Fender Bi-Flex Truss Rod Plug Repair
South Austin Guitar Repair
Every few months, another “Huh… haven’t seen this one before” projects makes its way onto my workbench. Herein lies the protruding Fender Bi-Flex truss rod plug.
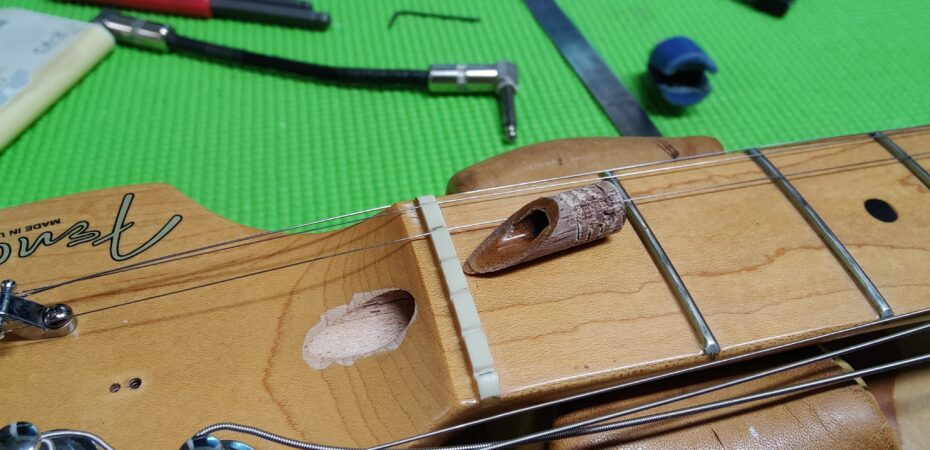
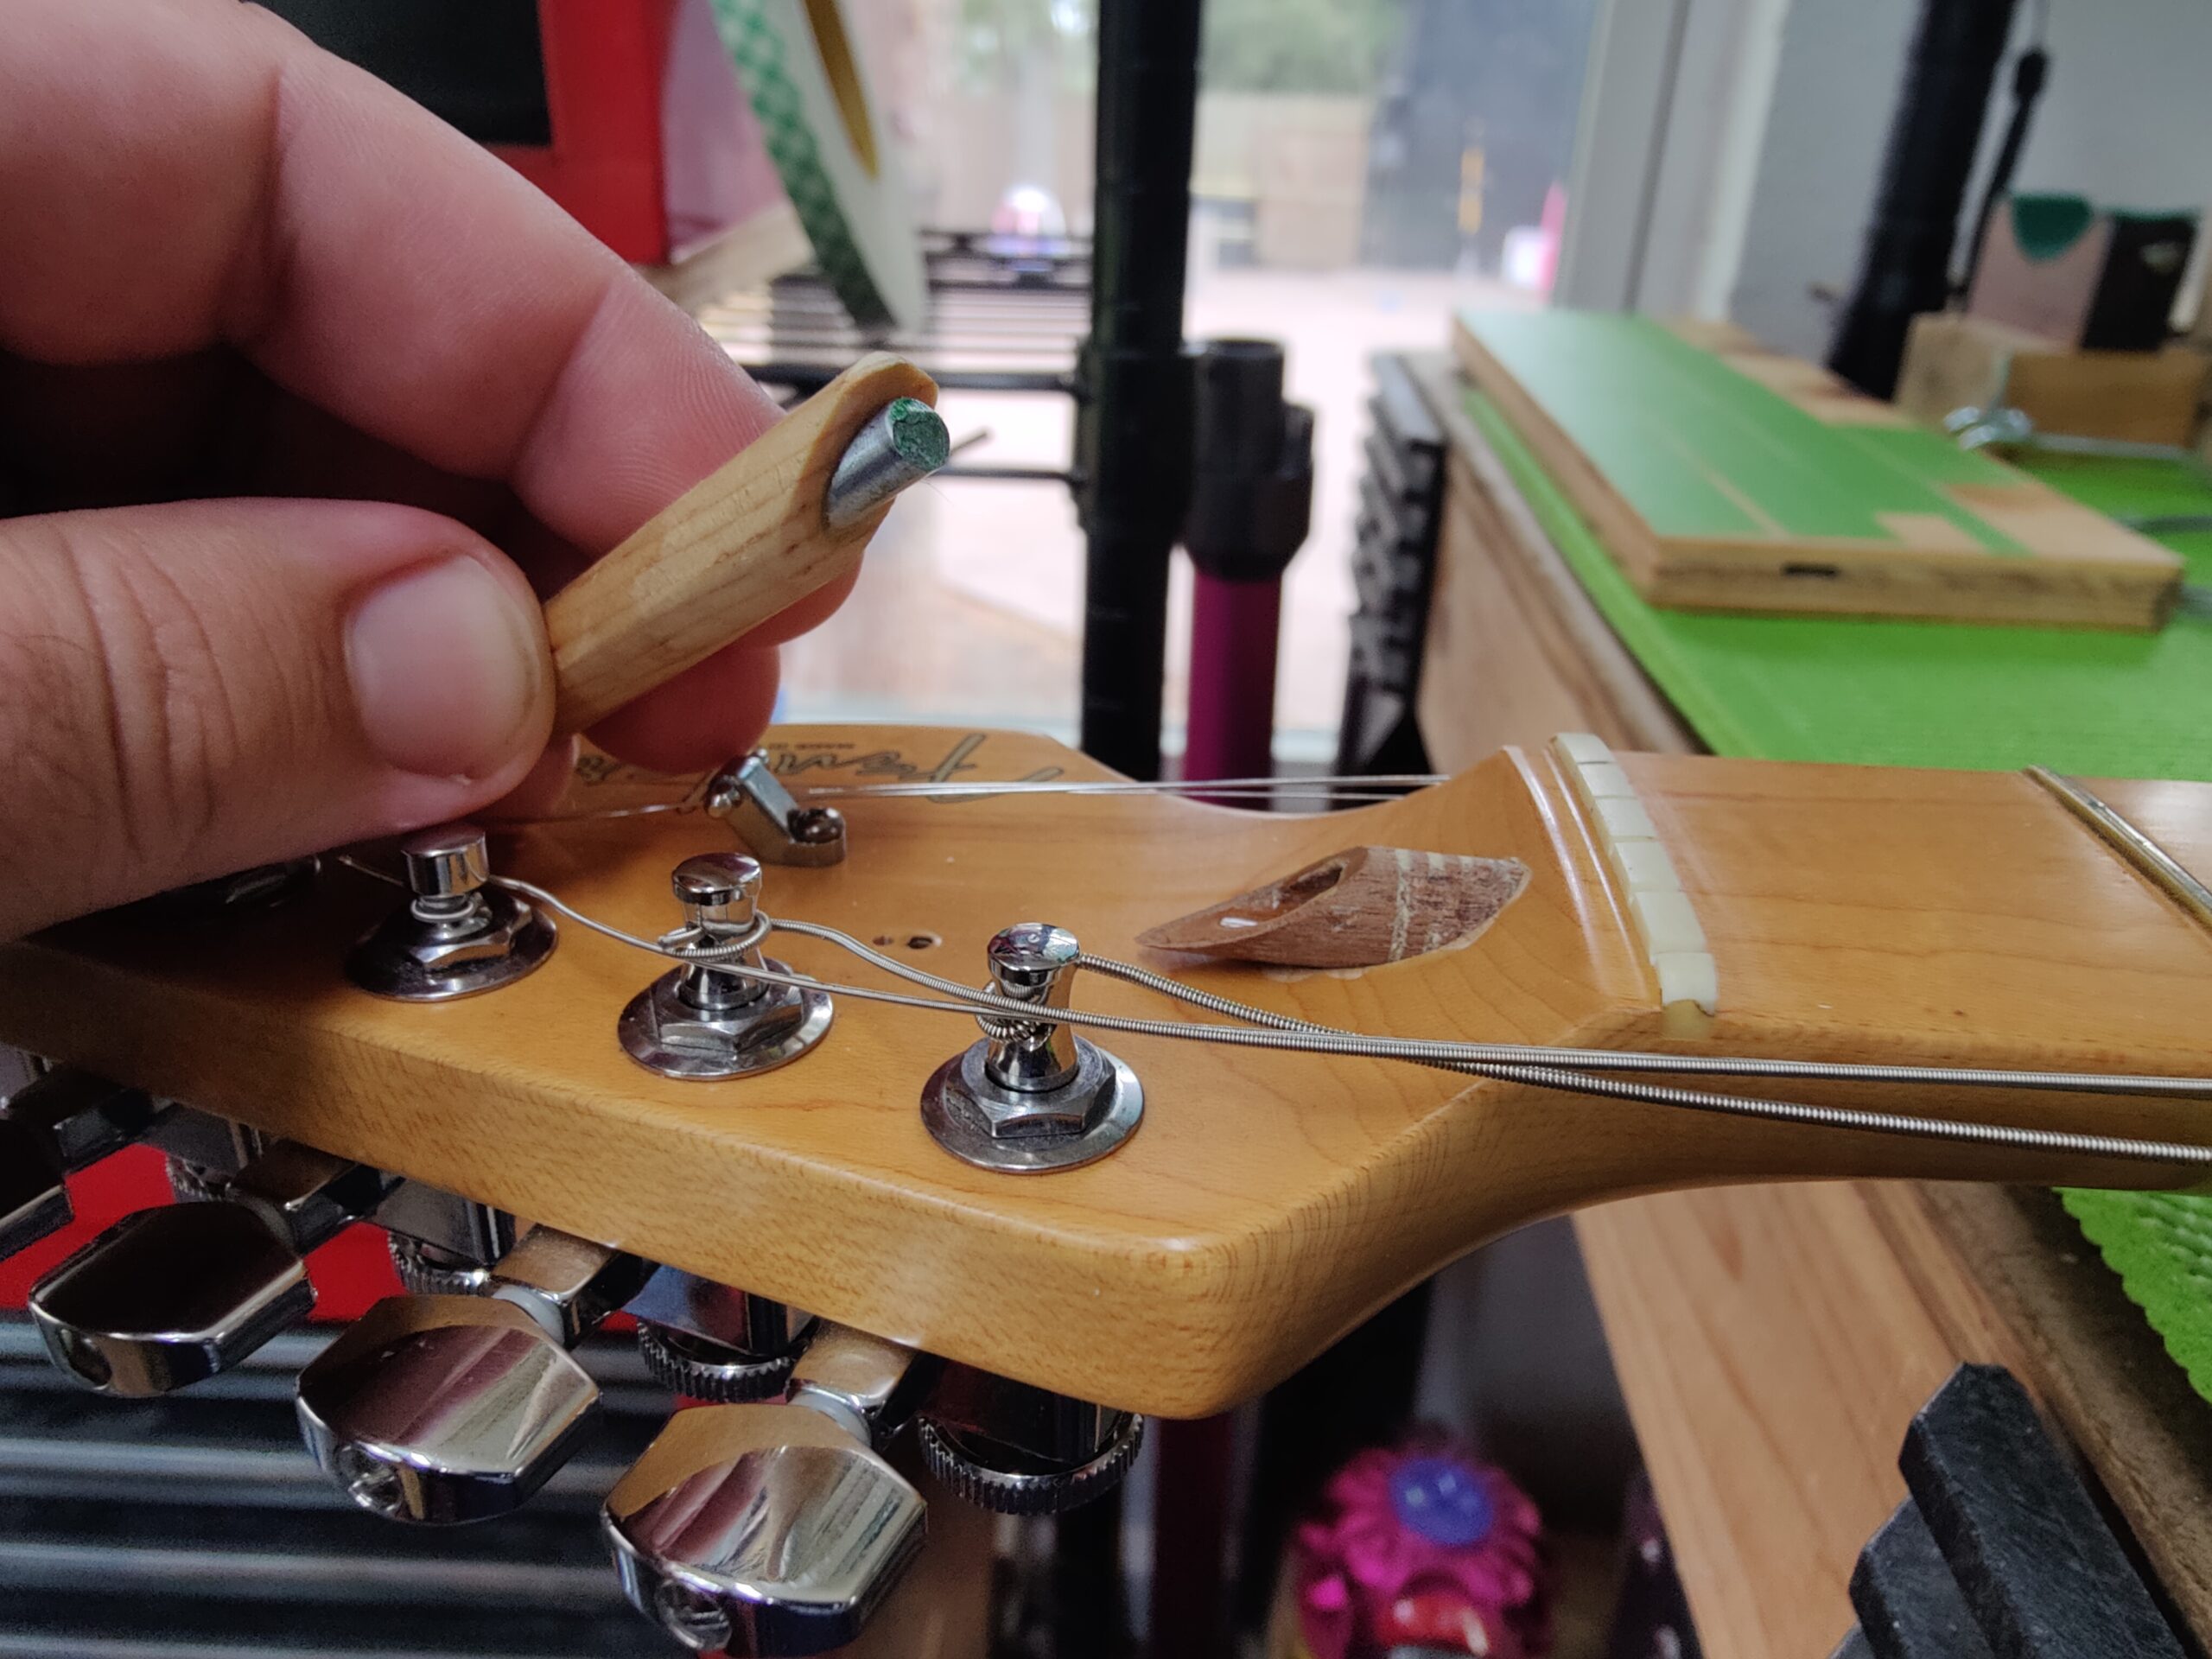
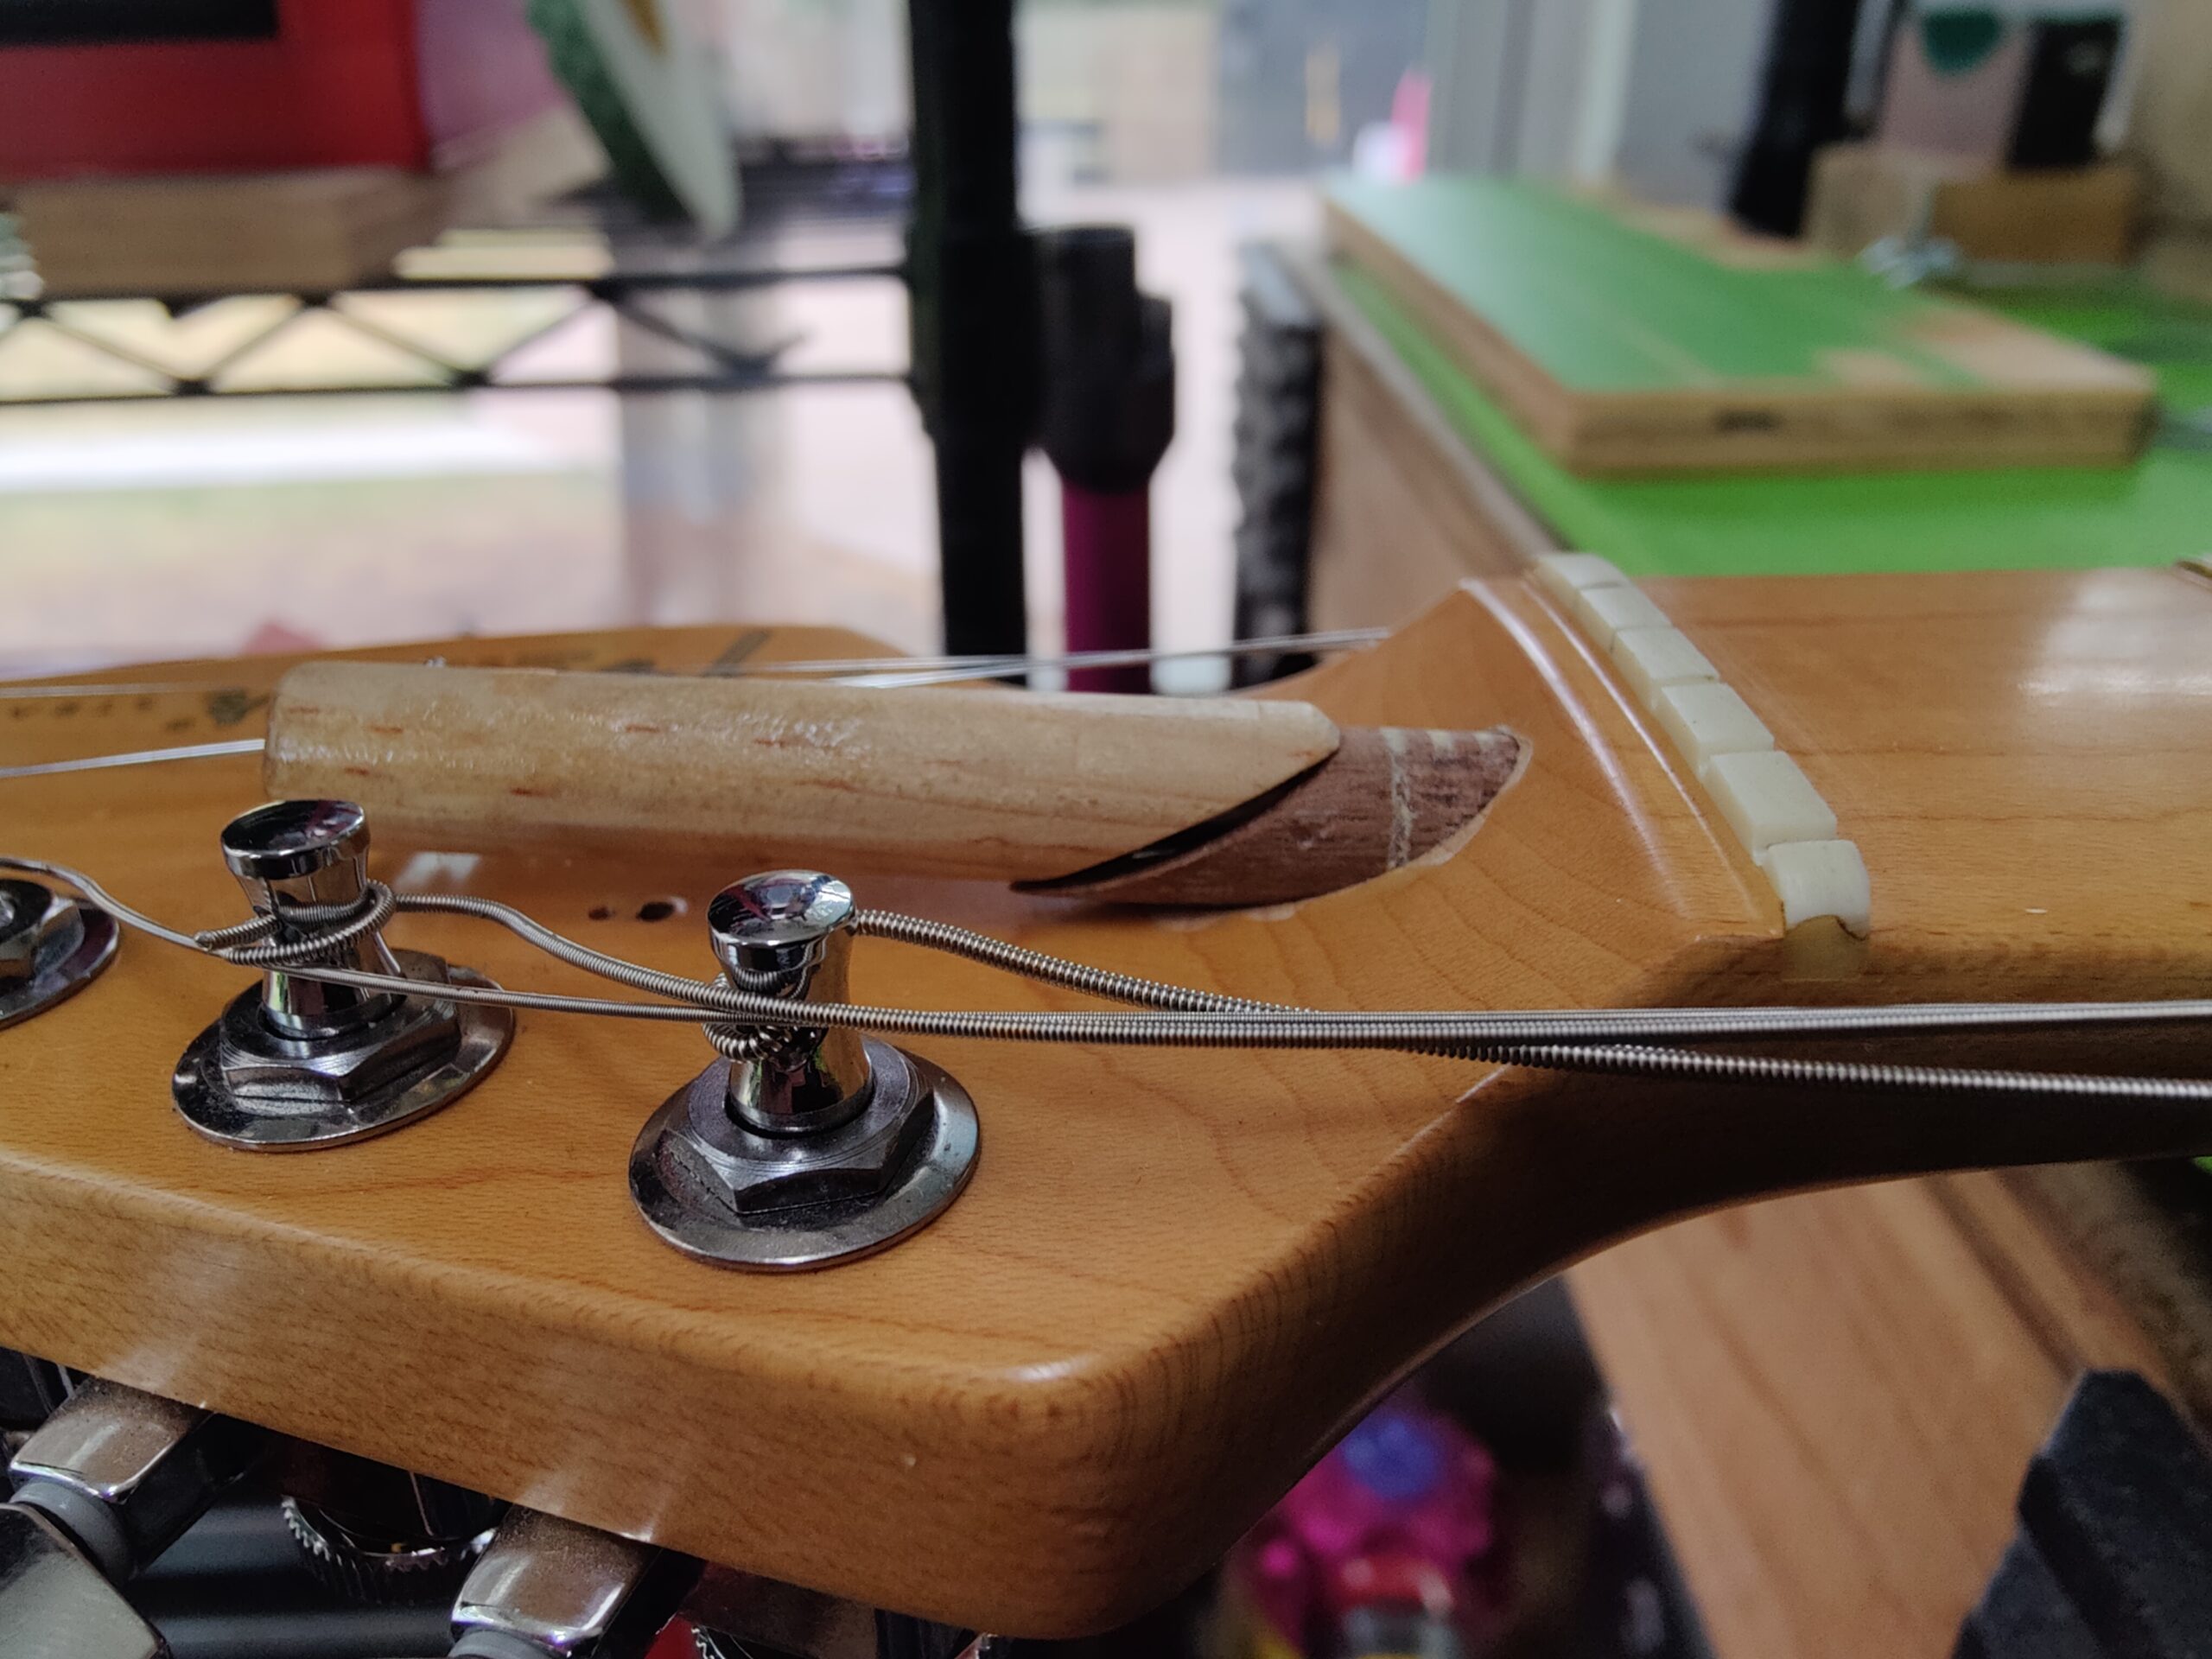
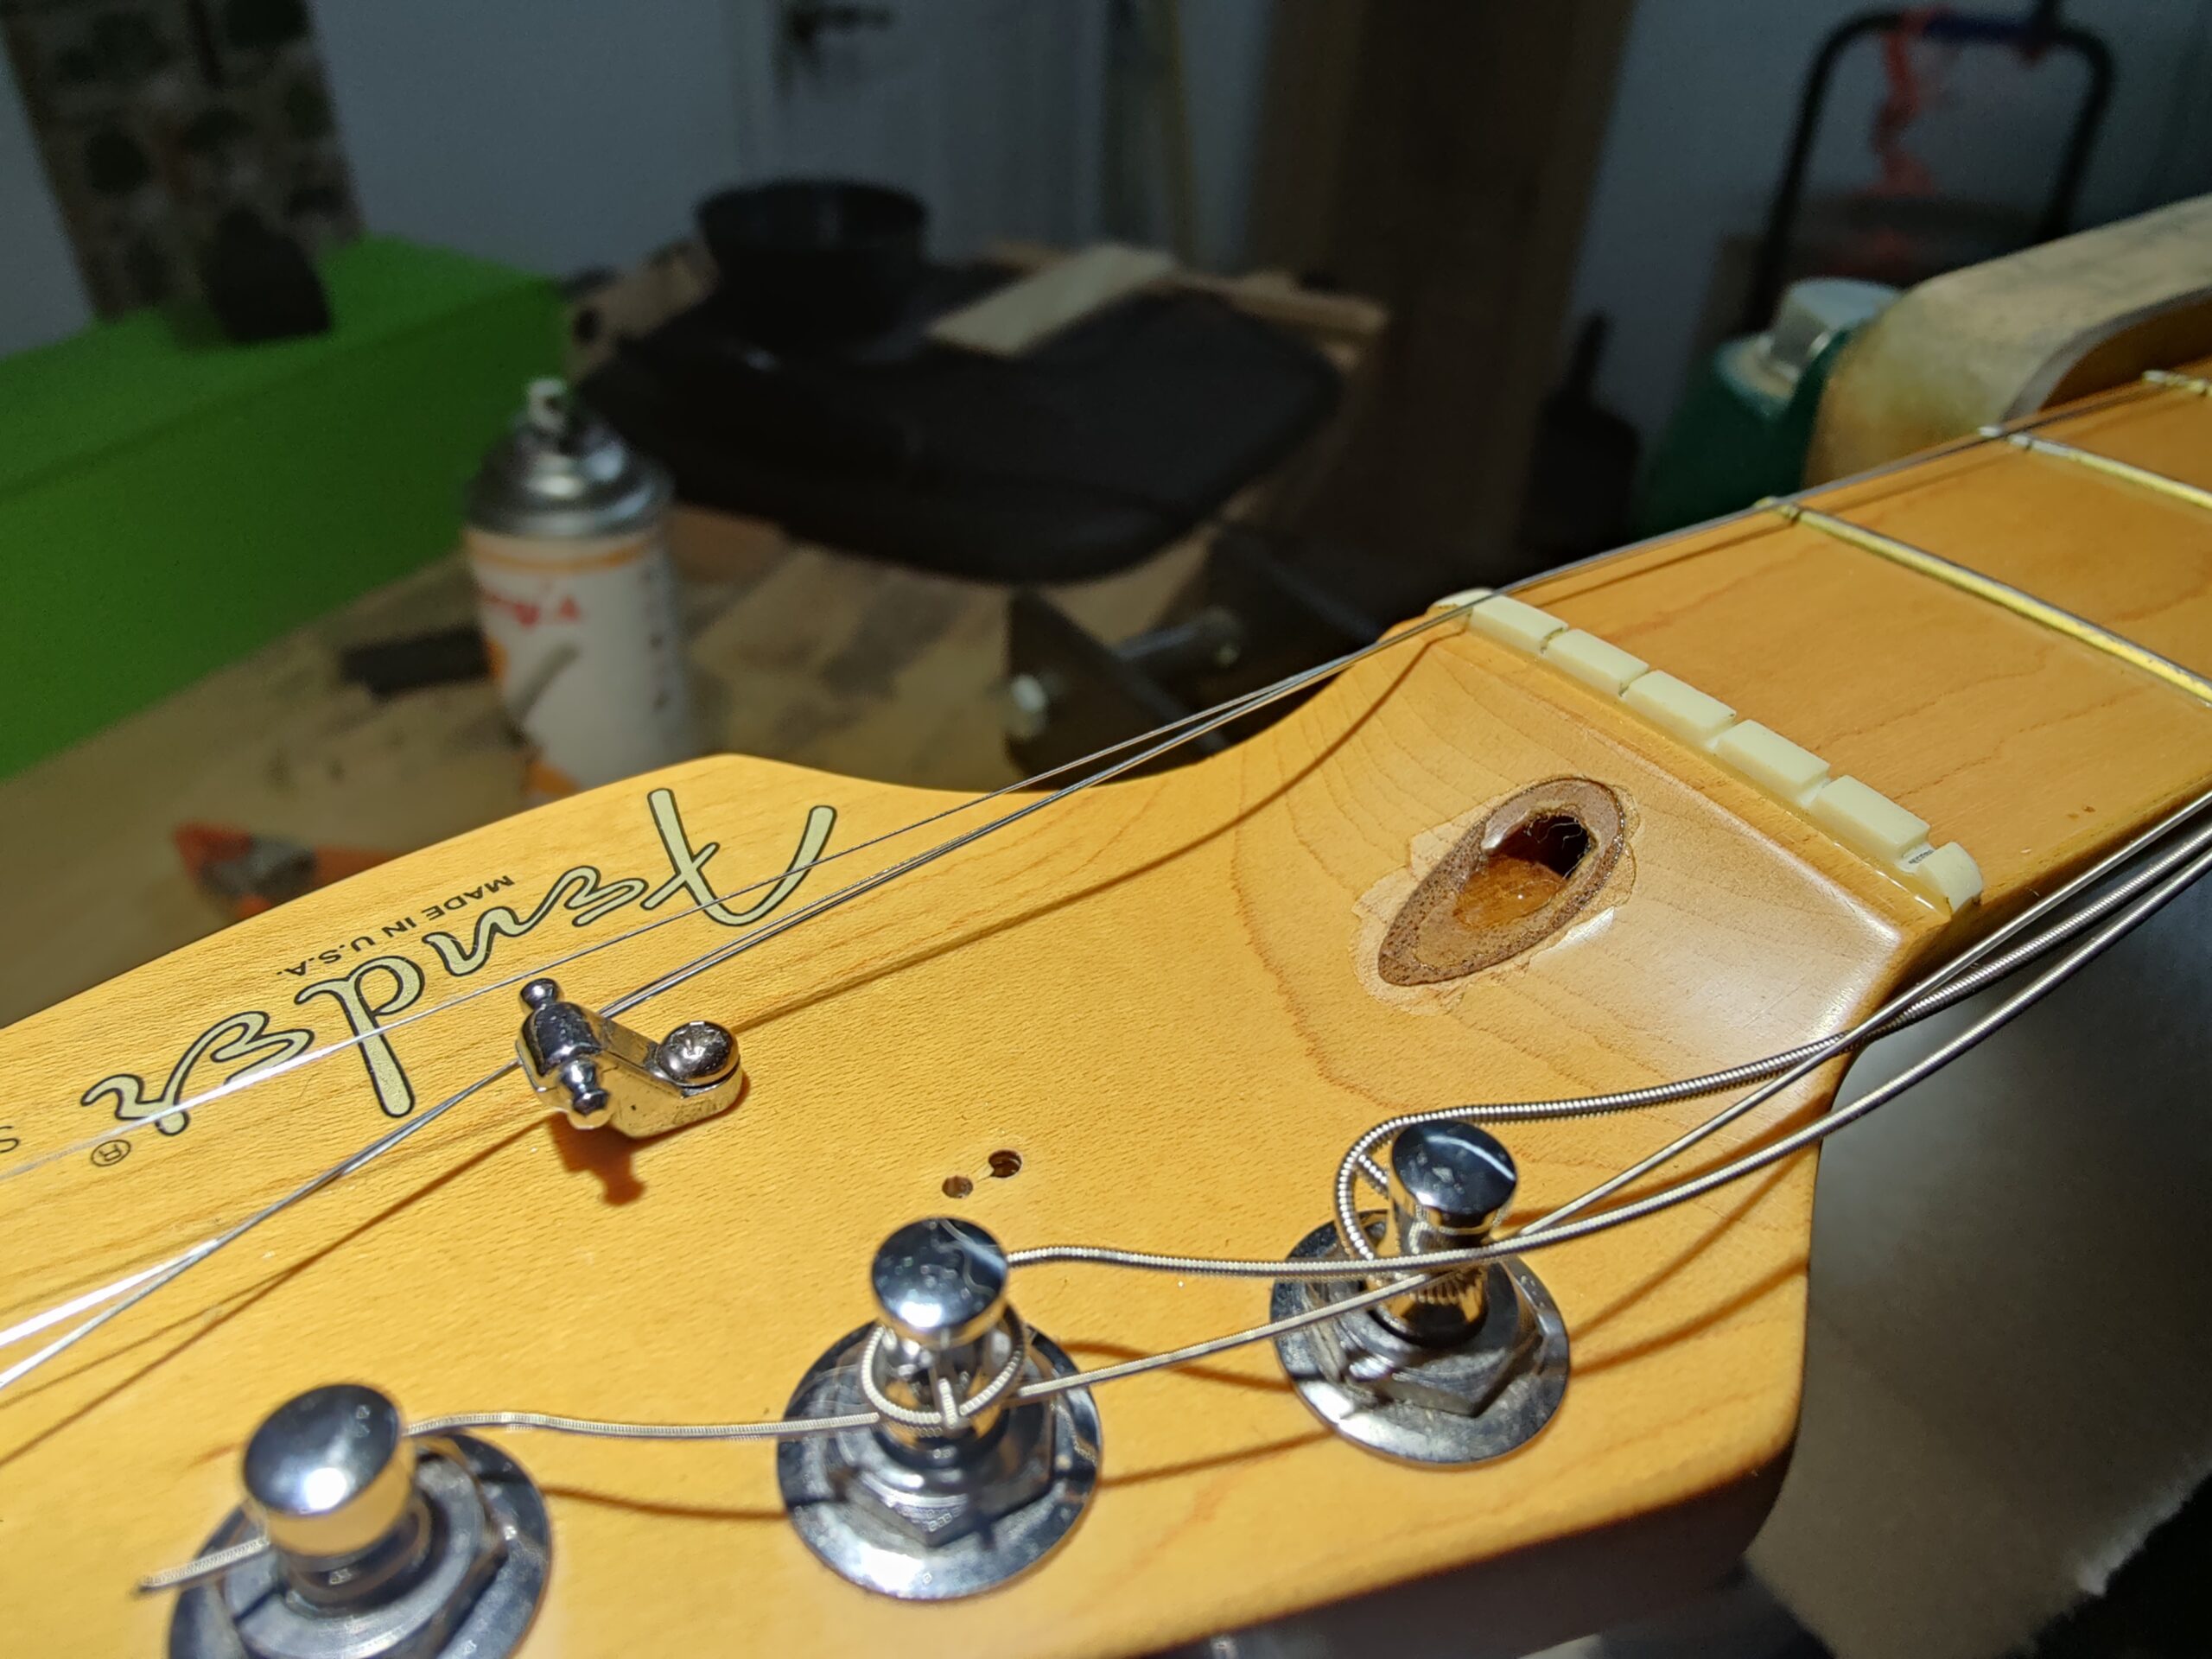
When this Stratocaster came across my bench, the plug was noticeably protruding from the channel. From the plug’s movement, it cracked the finish all around the perimeter.
Additionally, for this truss rod to work properly, this walnut plug needed to be glued back into place, as it acts as a stop point for the truss rod’s movement. Loosen it with a left turn of the truss rod, it pushes the rod against the plug. The truss rod relies on the plug’s inner wall to stop the movement of the nut so the rod itself will bend and counter the tension and add relief to the action. Vise versa, tightening the truss rod would change the nut’s direction to tighten, using wood stop further in the neck to act as a stopping point to counter the tension.
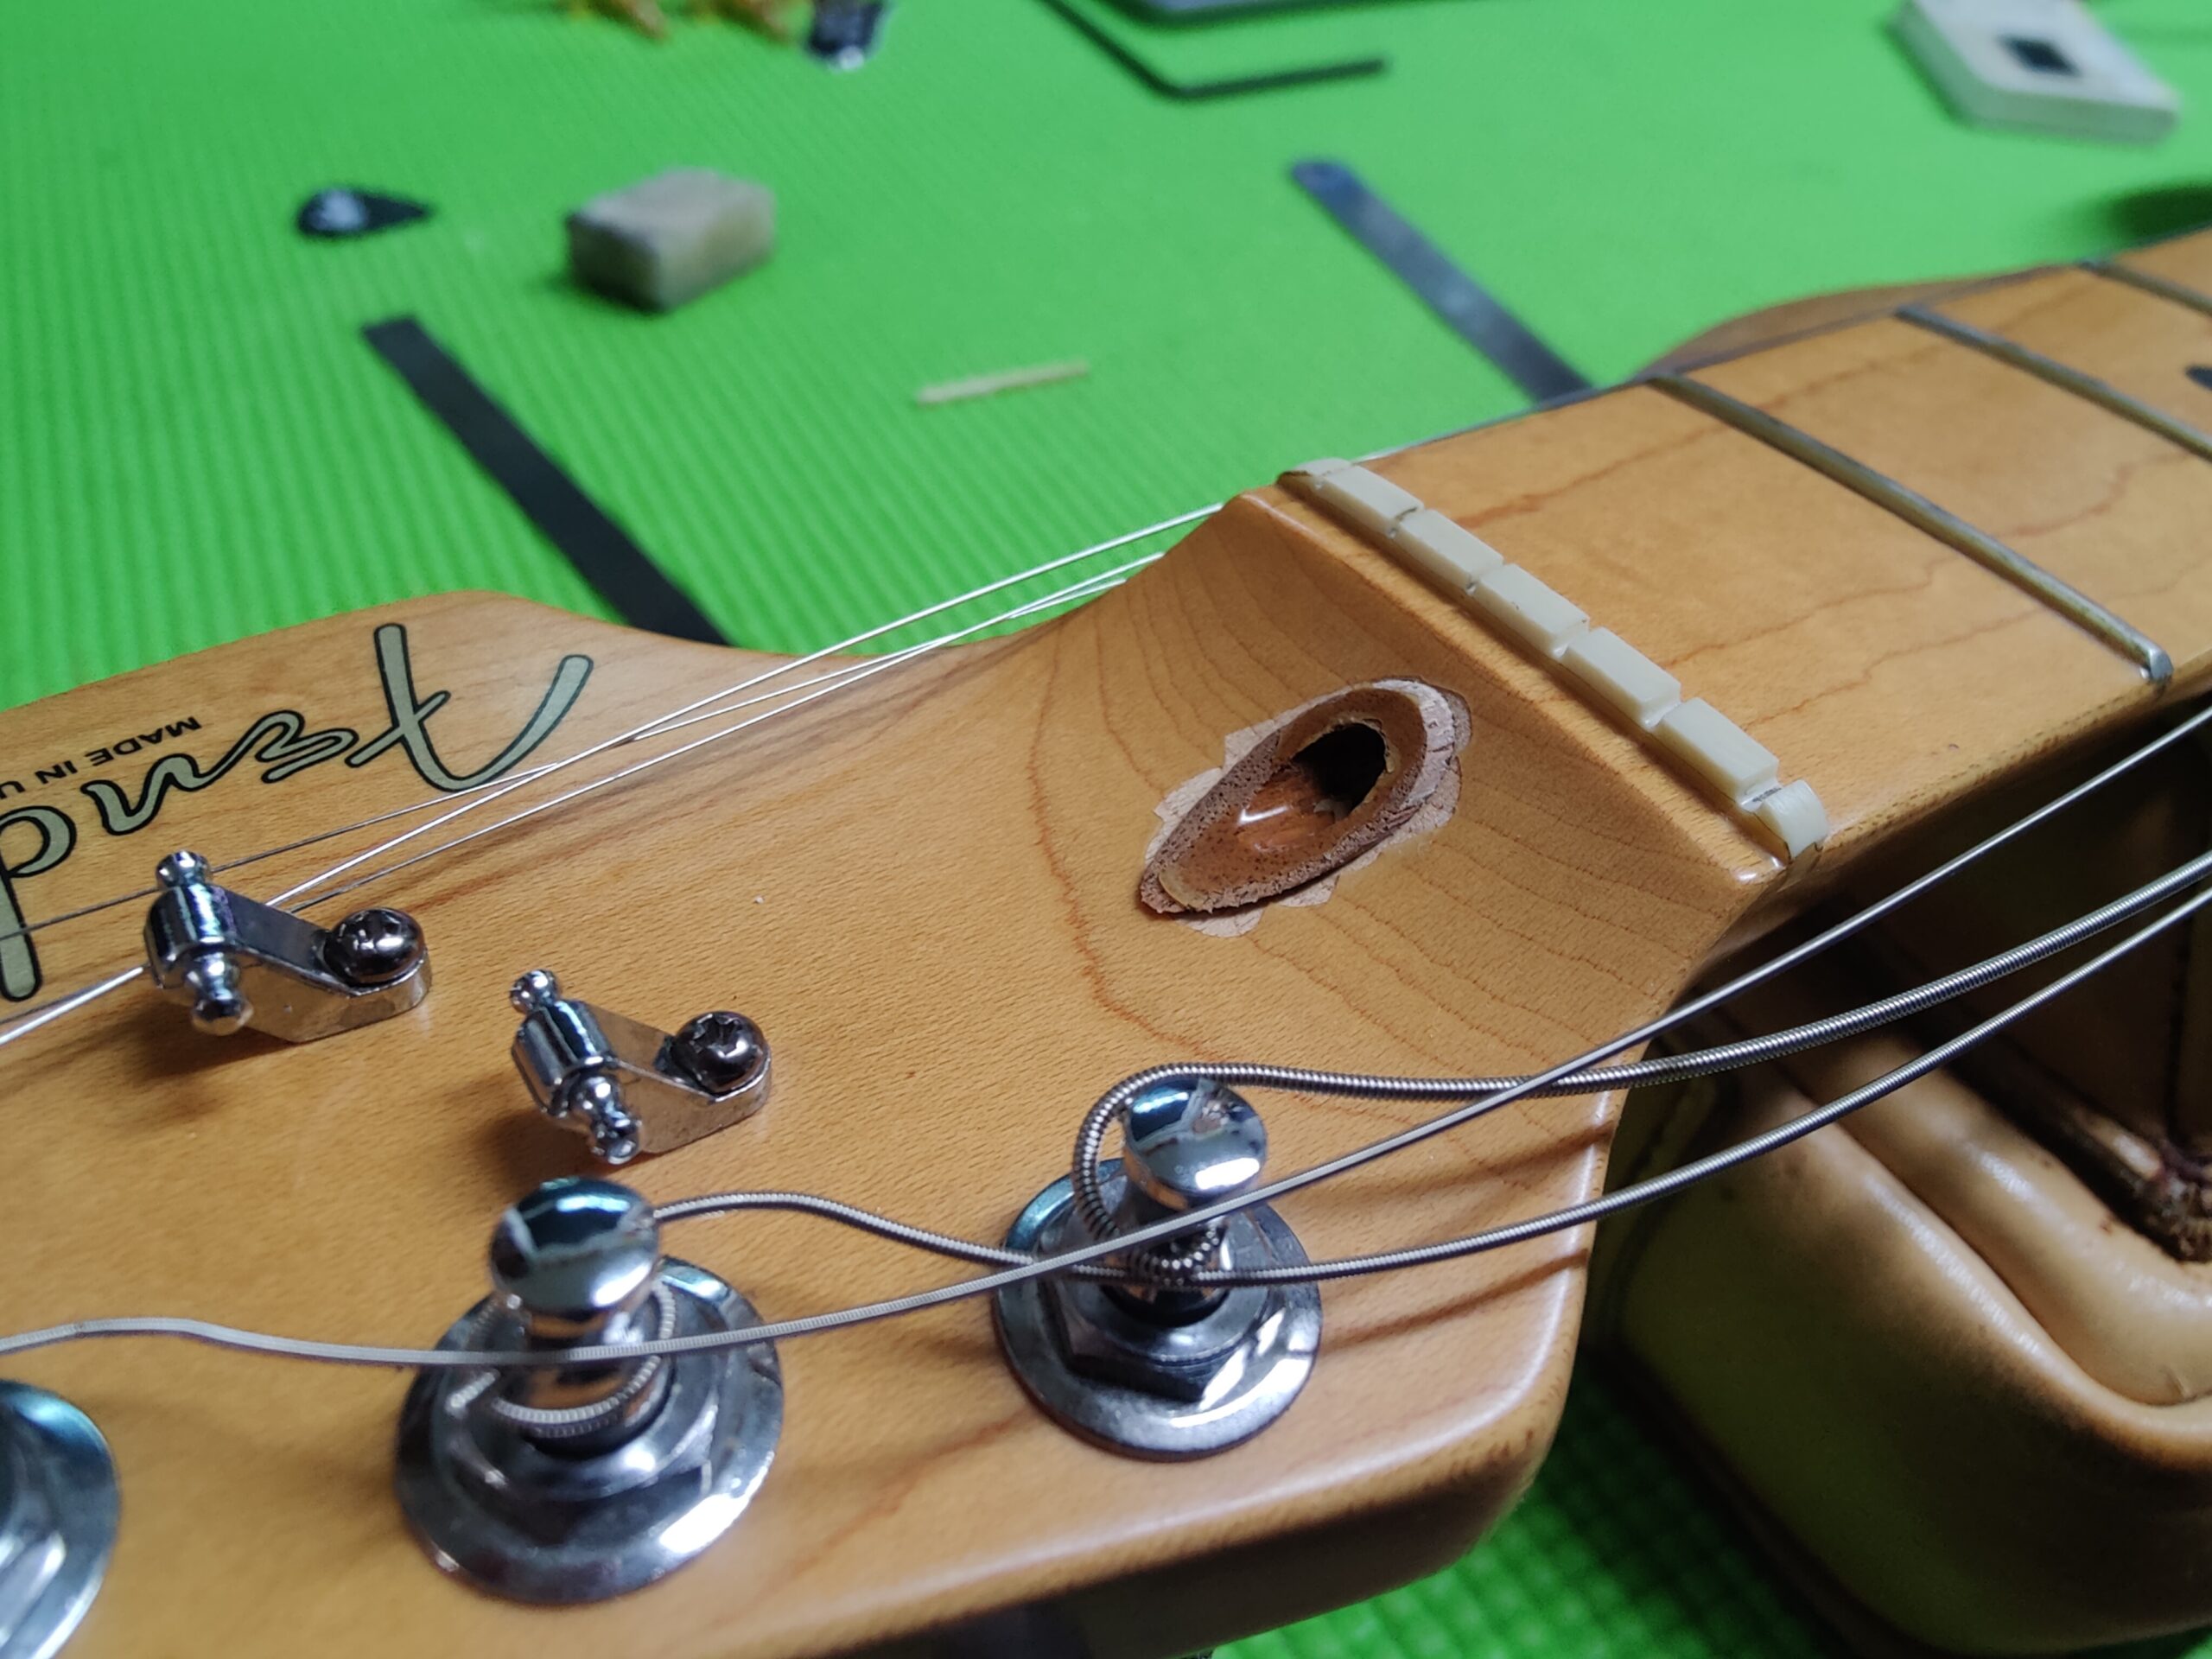
In this case, the glue holding the plug in place failed and the truss rod couldn’t loosen. A severe down-bow in the action caused the first few frets to fret out. The plug was in there quite snugly. To force it out, I cranked the truss rod lefty-loosey. Eventually, the plug was nearly out and I used a pair of soft jaw pliers to bring it across the threshold.
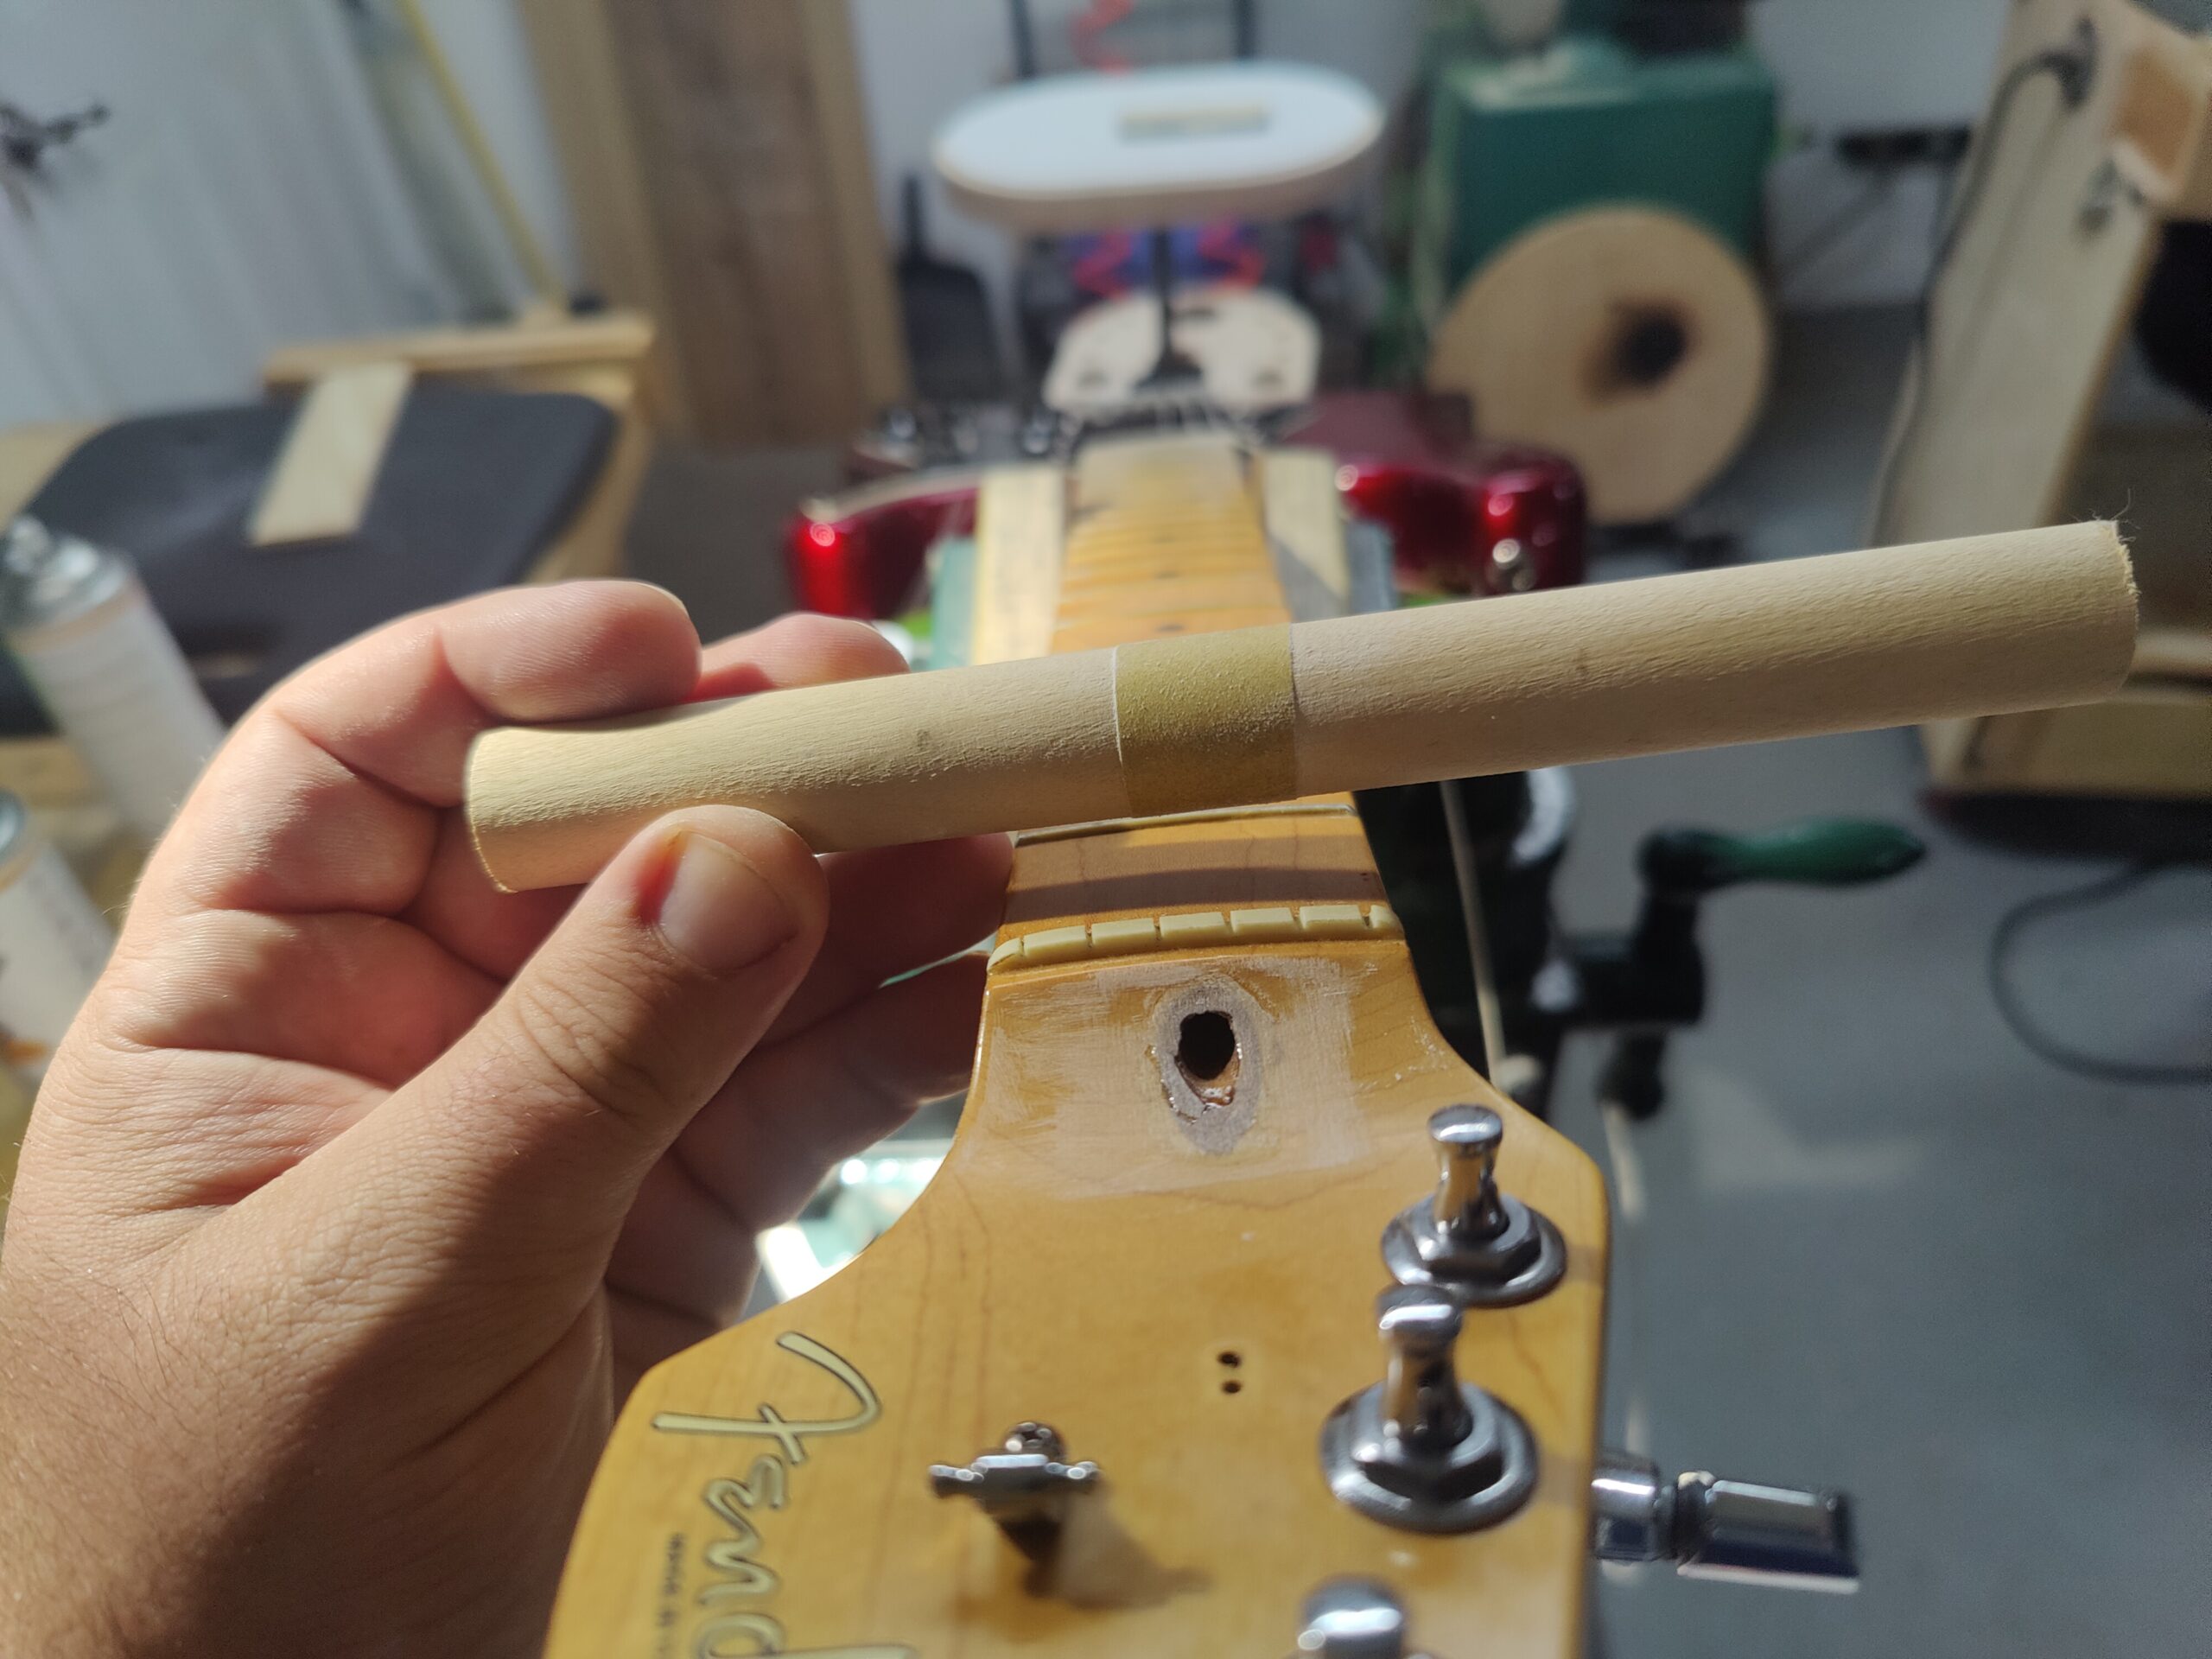
Once out, I decided to make a tapping/pushing tool to aid the plug back into the channel. I didn’t have any means of pushing the plug back into place other than my fingers and elbow grease, and as I mentioned, the fit was tight and the surface which is was going into, was curved; I couldn’t use any old clamp to get it back in place, and ensure the contours aligned once pushed in.
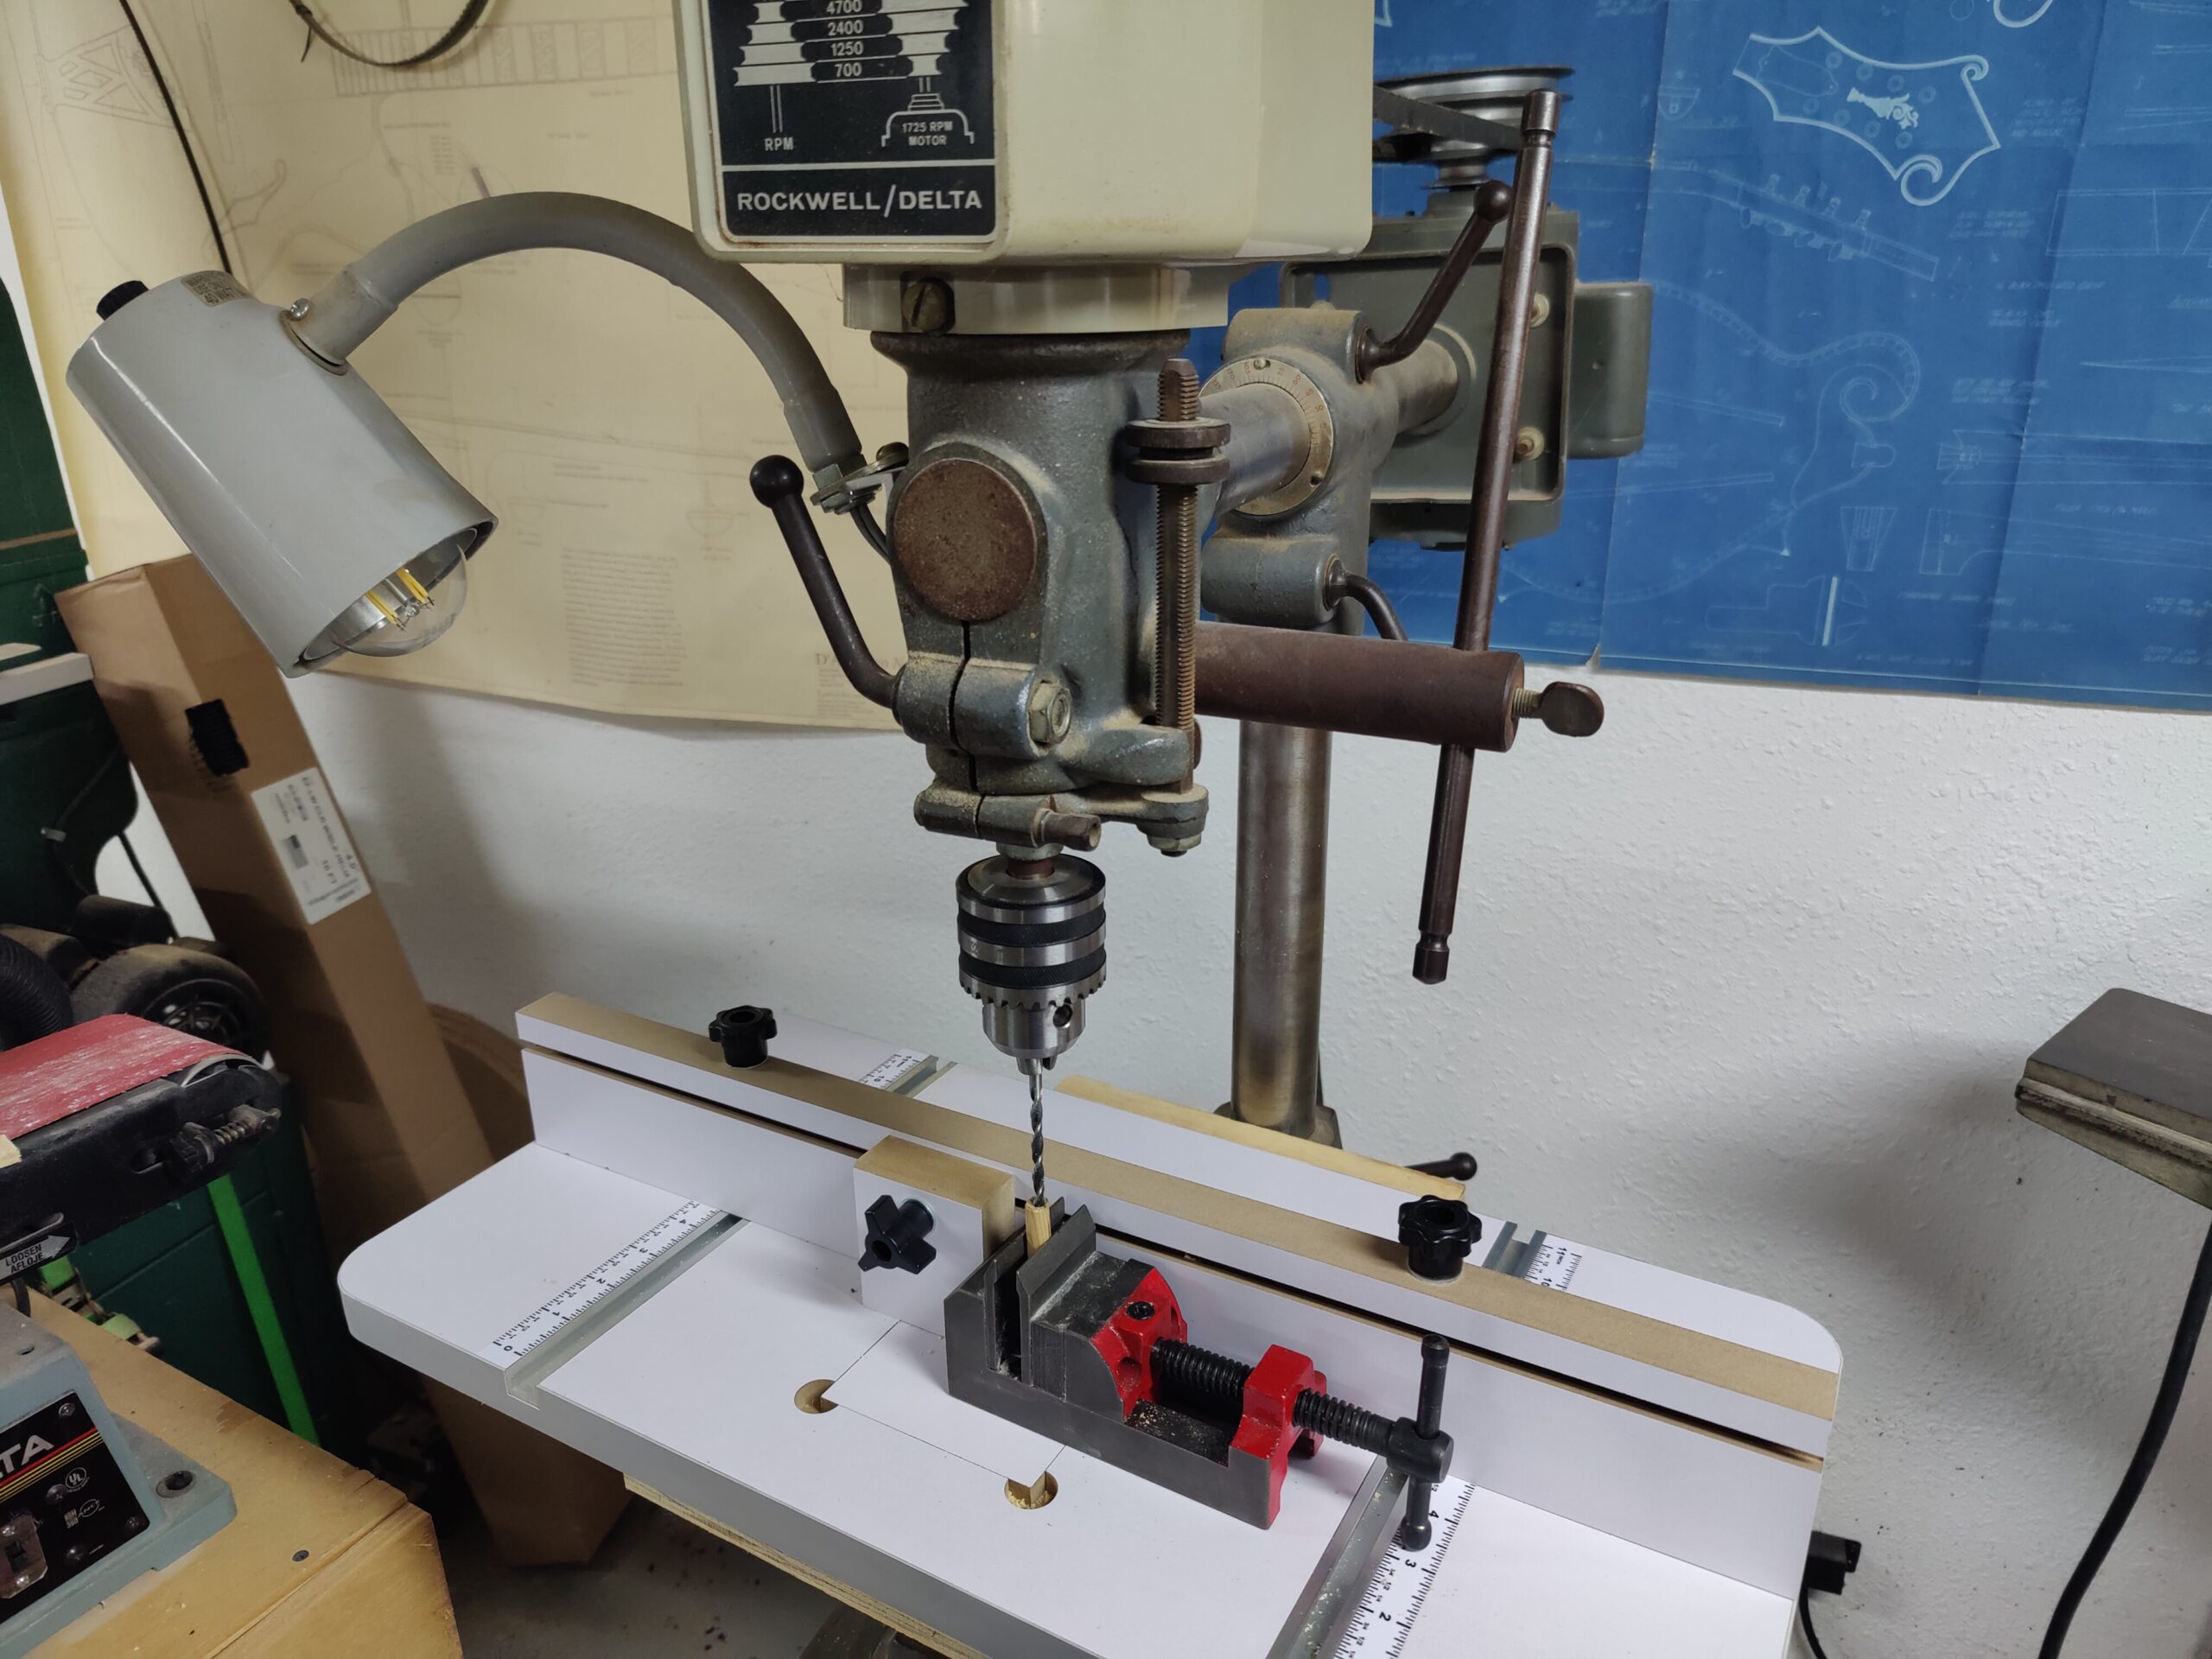
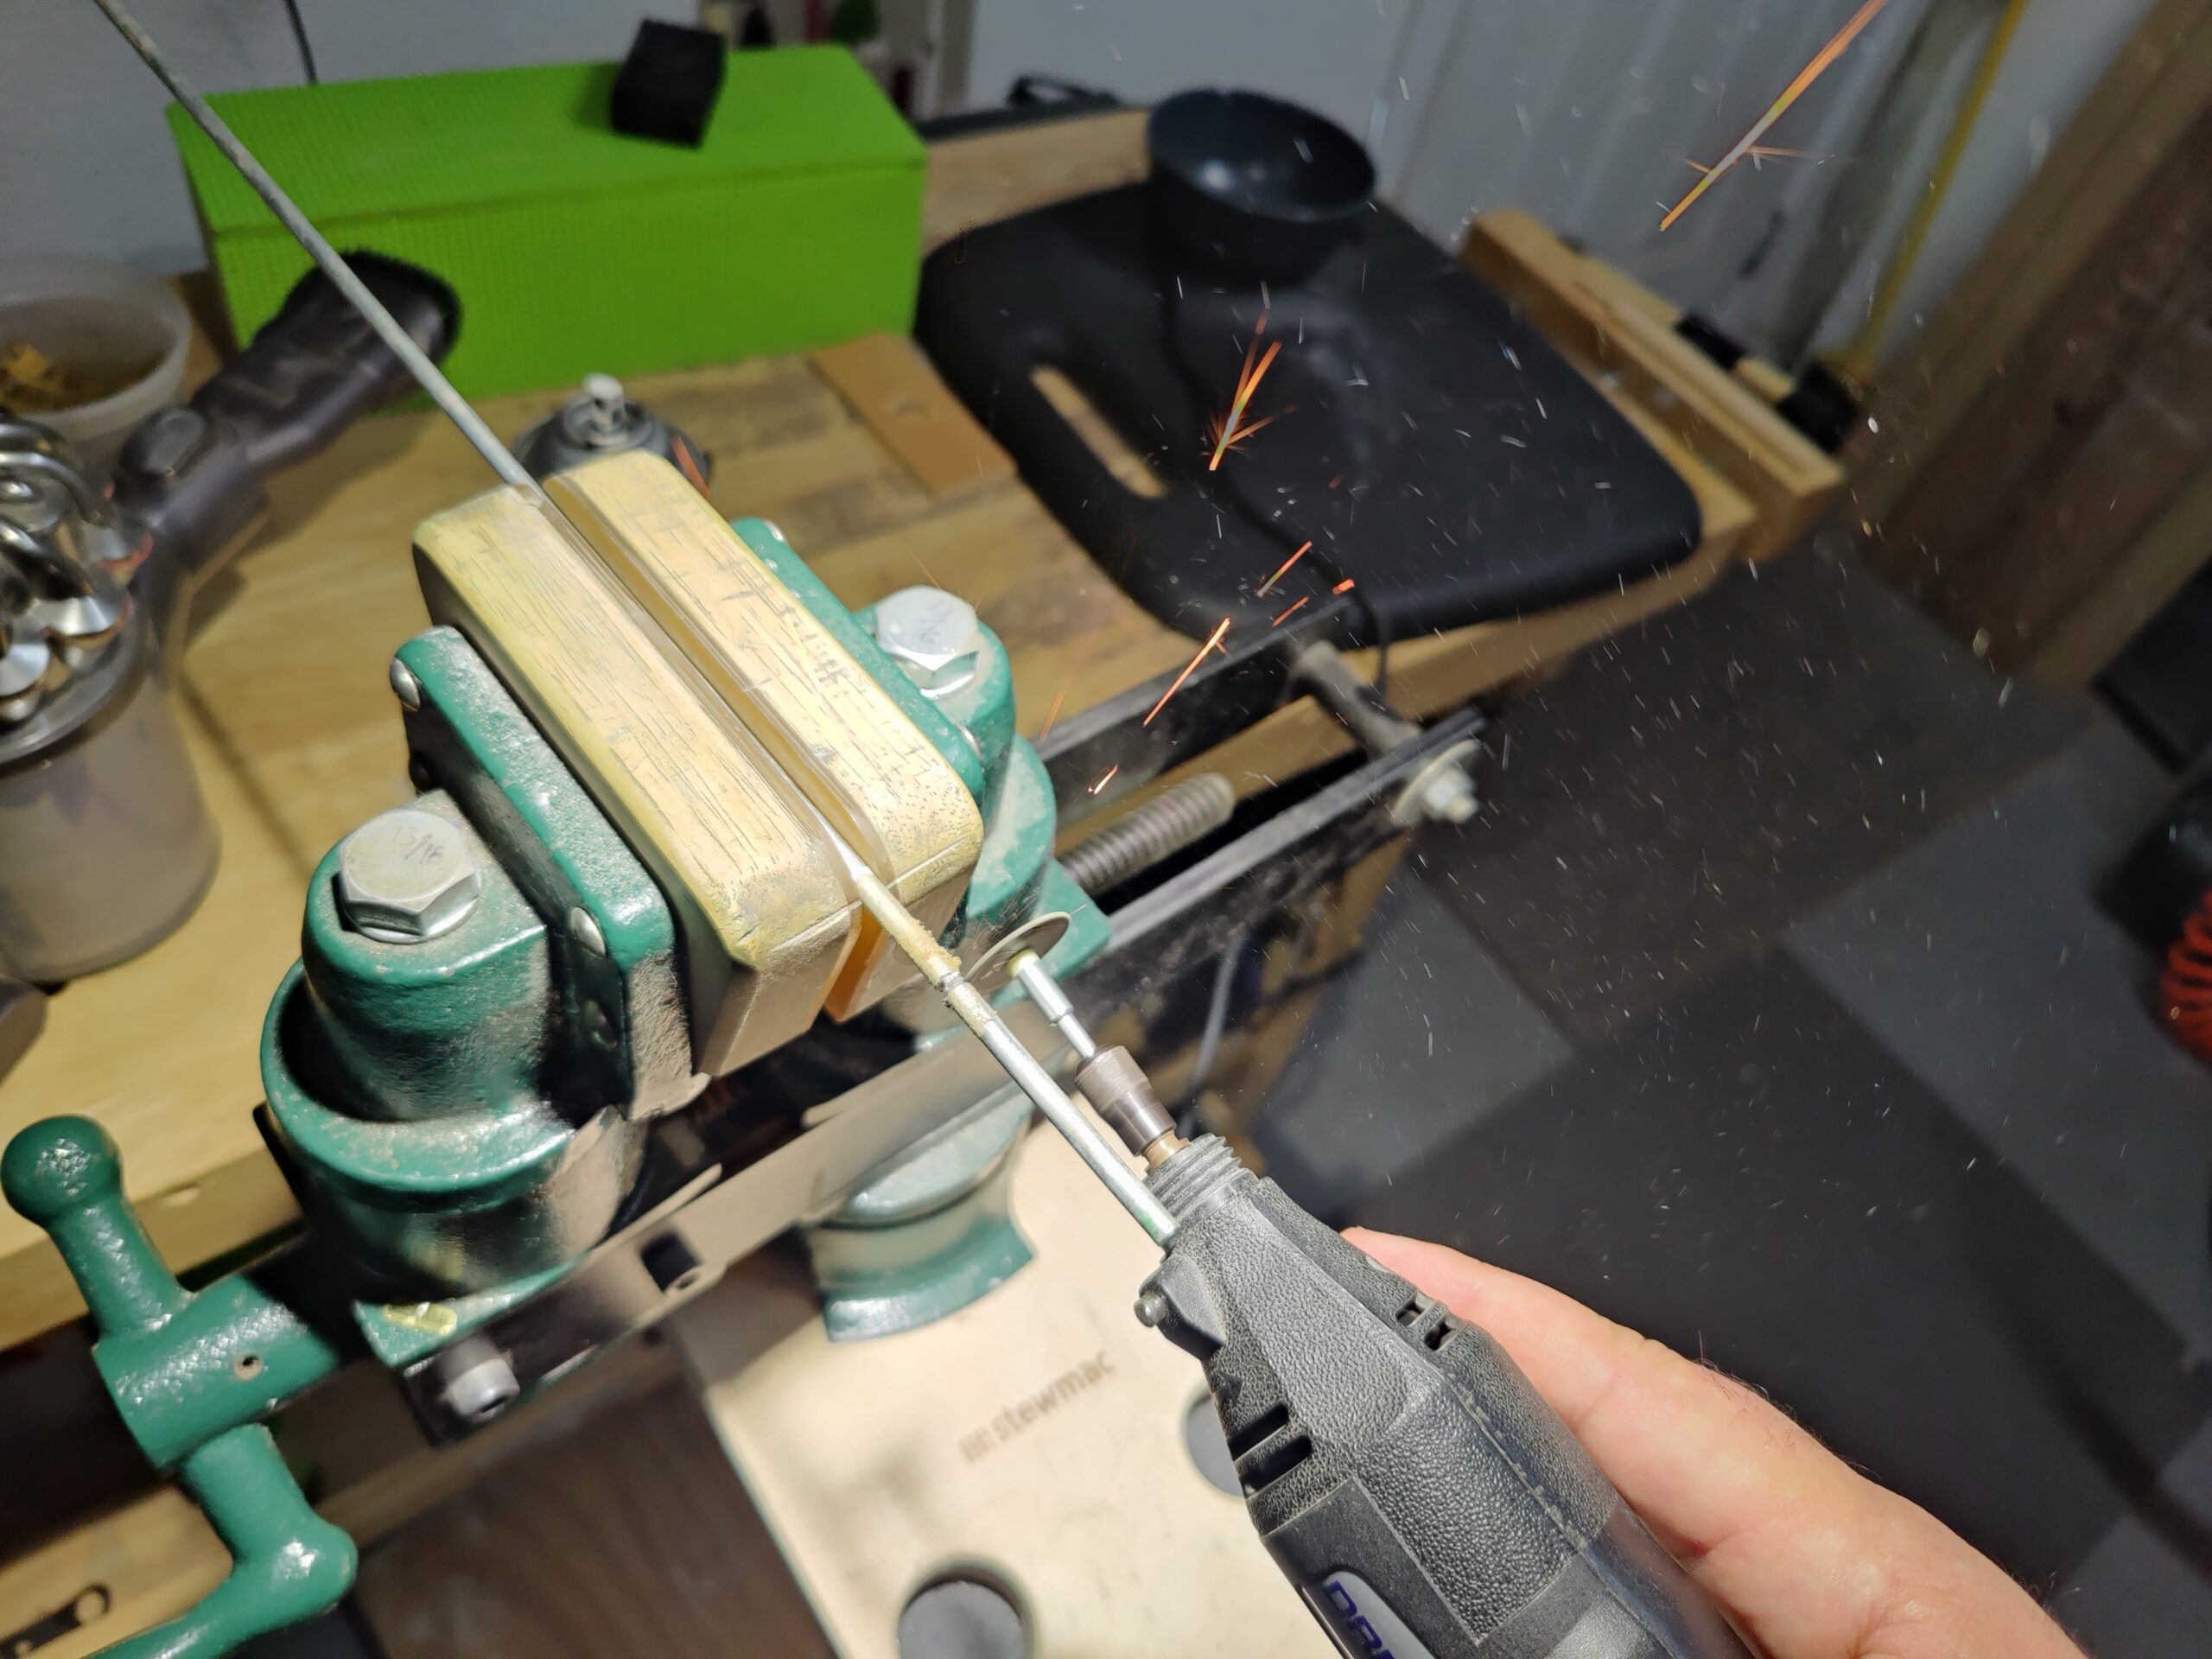
I had an idea of a simple tool that would do the trick in my head and ran with it. I drilled out the center of a dowel about the size of the plug with a 1/4″ bit. The combination of my StewMac nut vise and Wen drill press table with walls and guides helped me align the cuts.
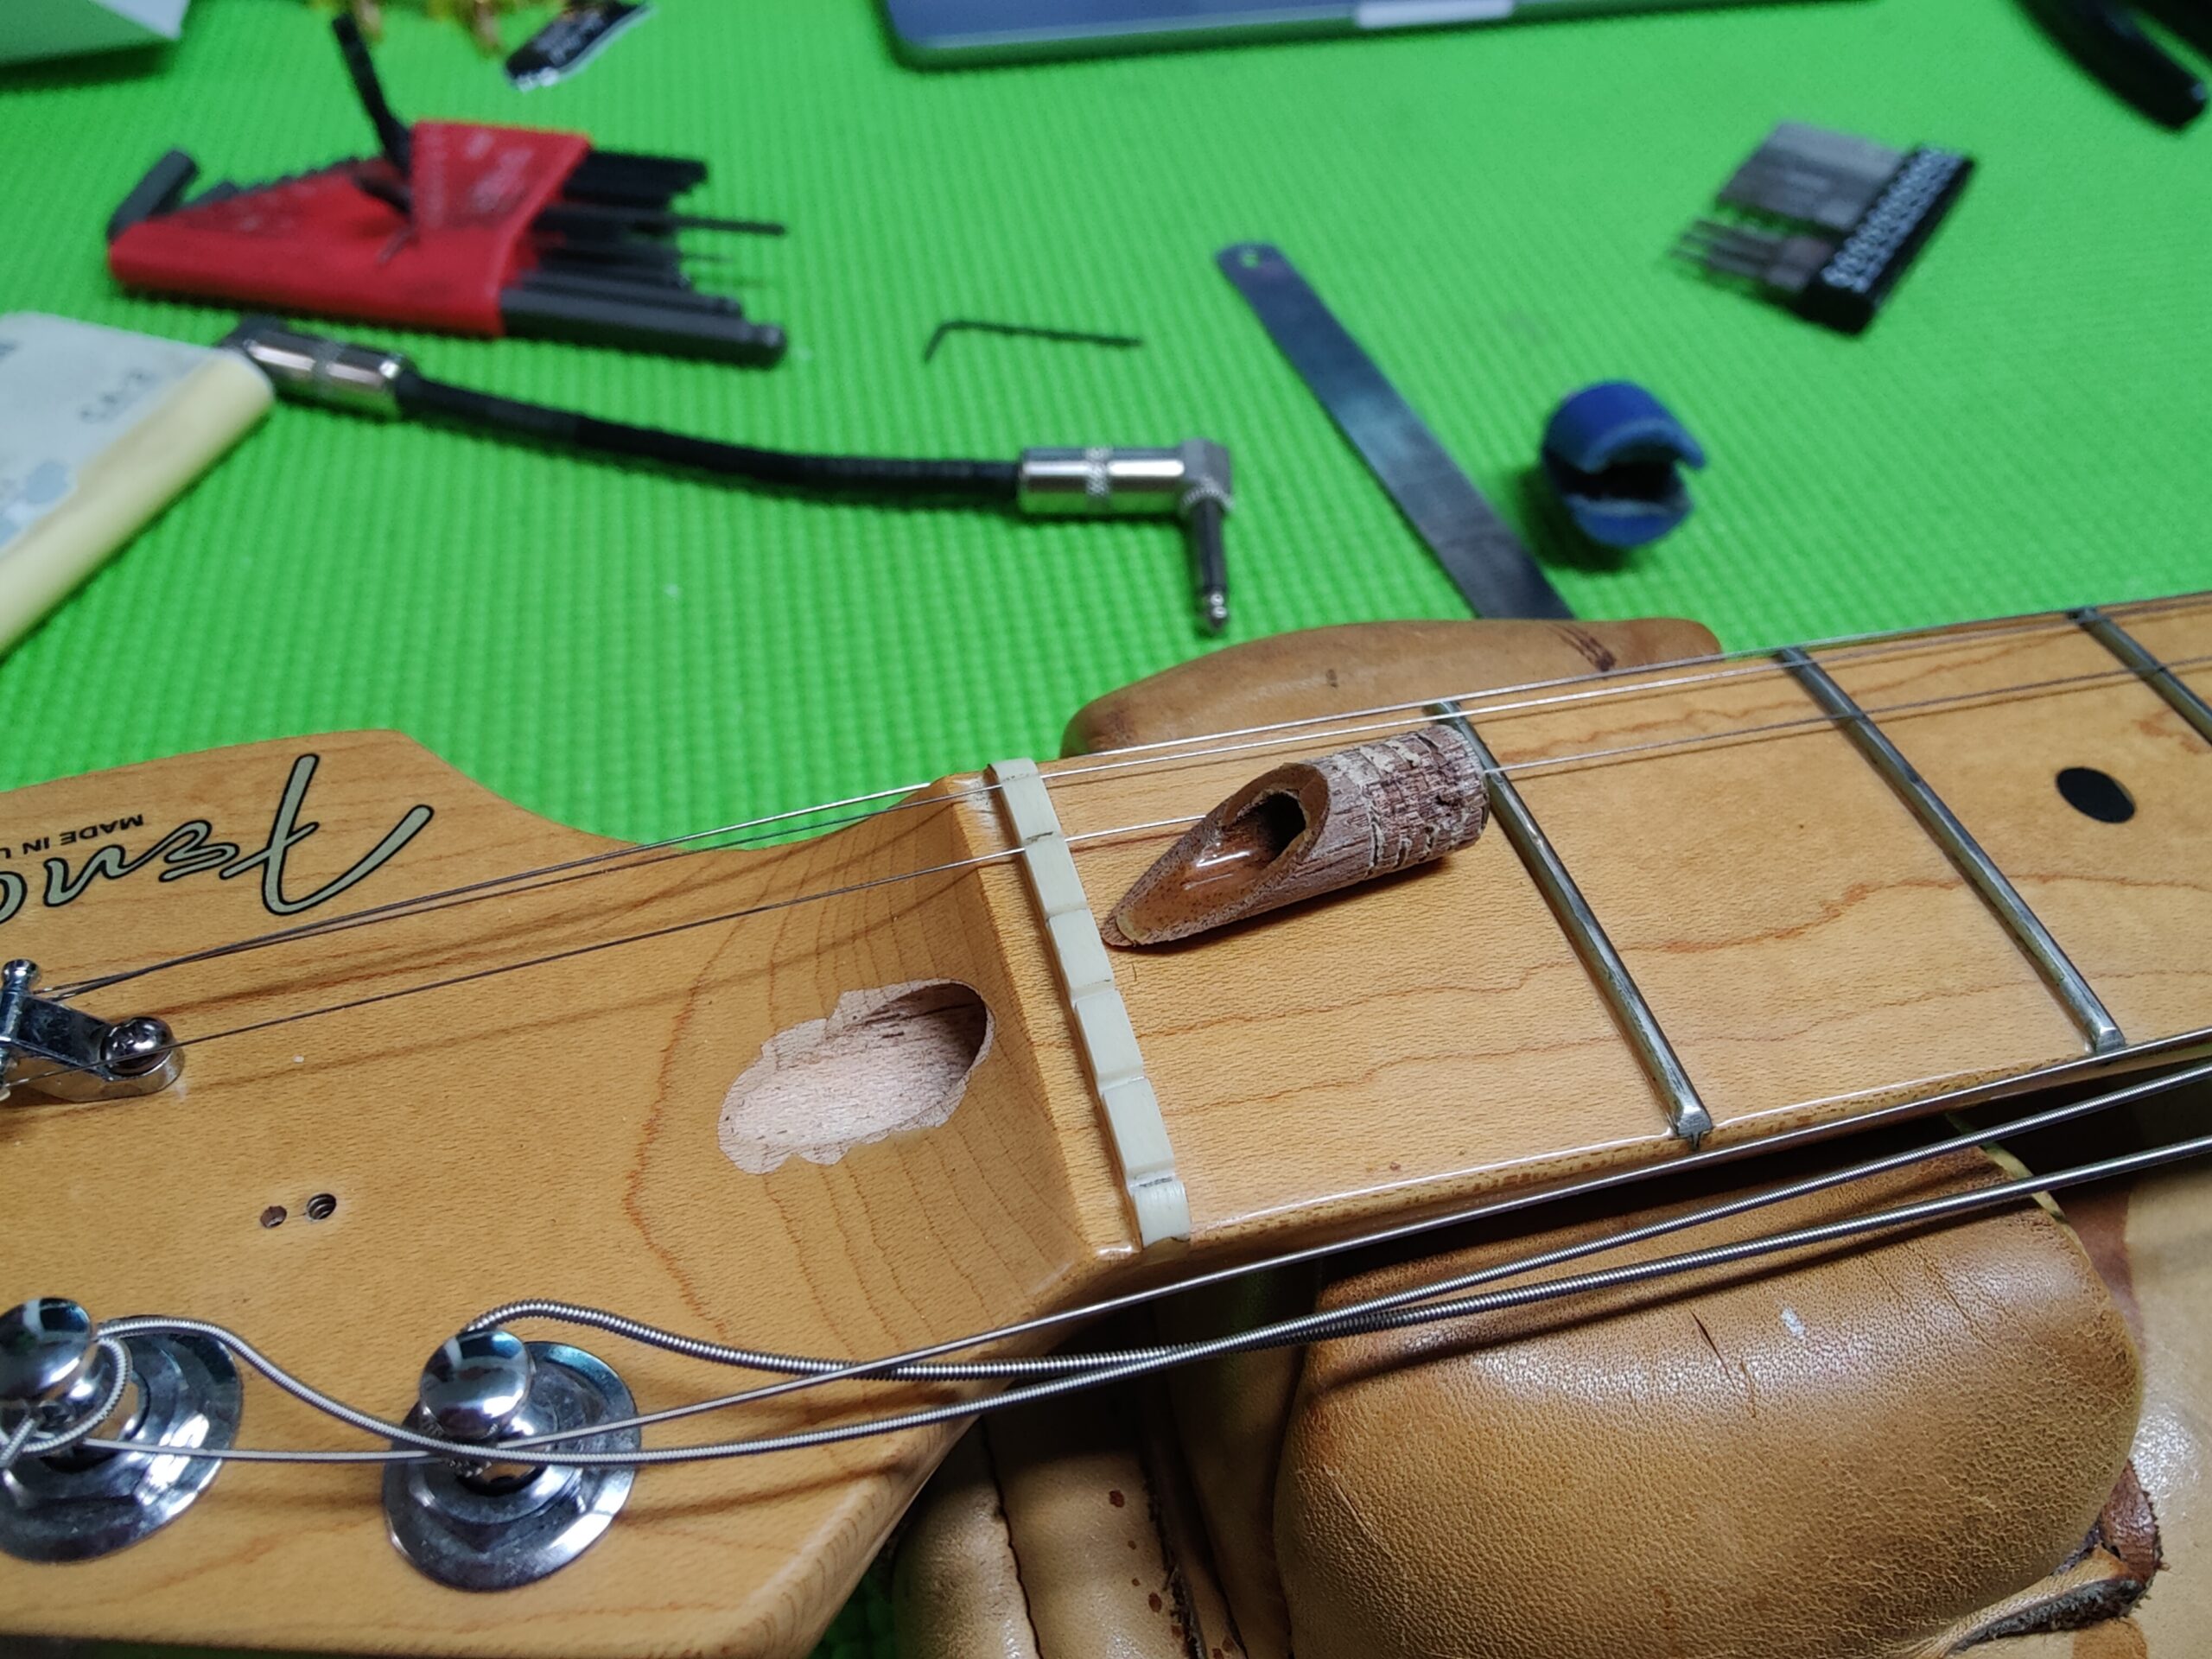
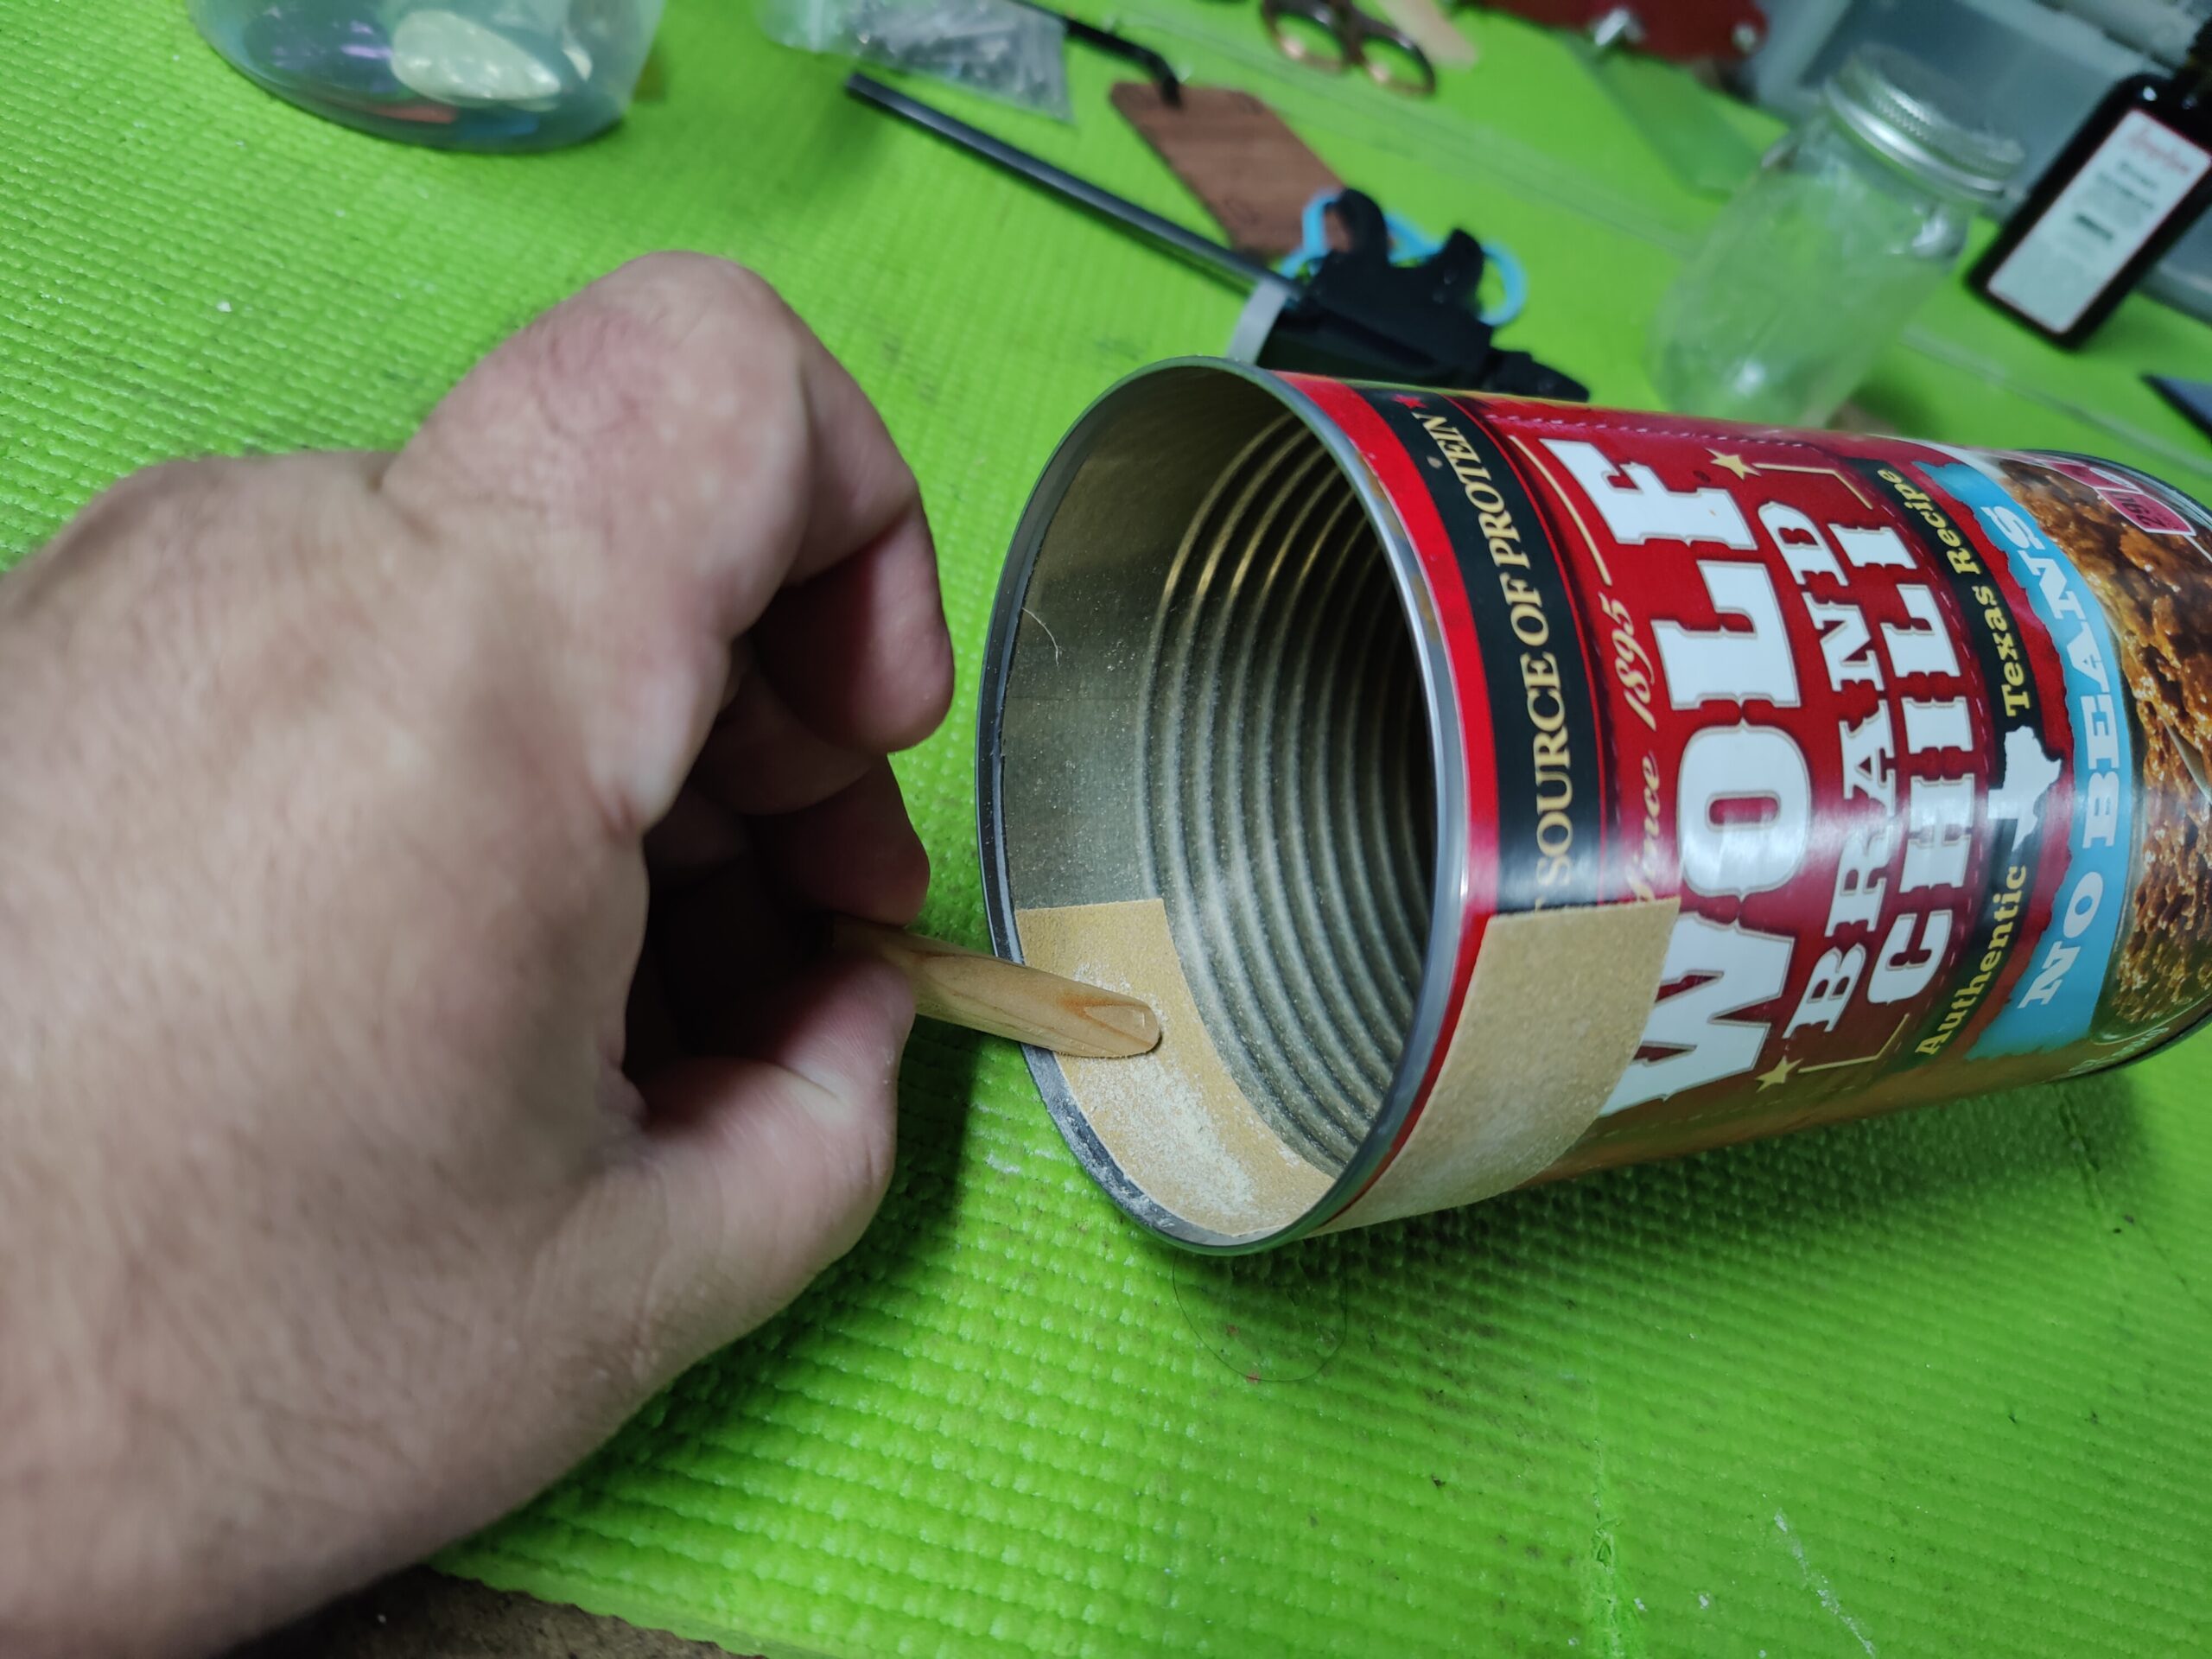
I cut the dowel at a similar angle as the headstock face with a manual miter saw and added contours to the end with some adhesive backed sandpaper to a large chili can, with a similar radius to the headstock’s contour.
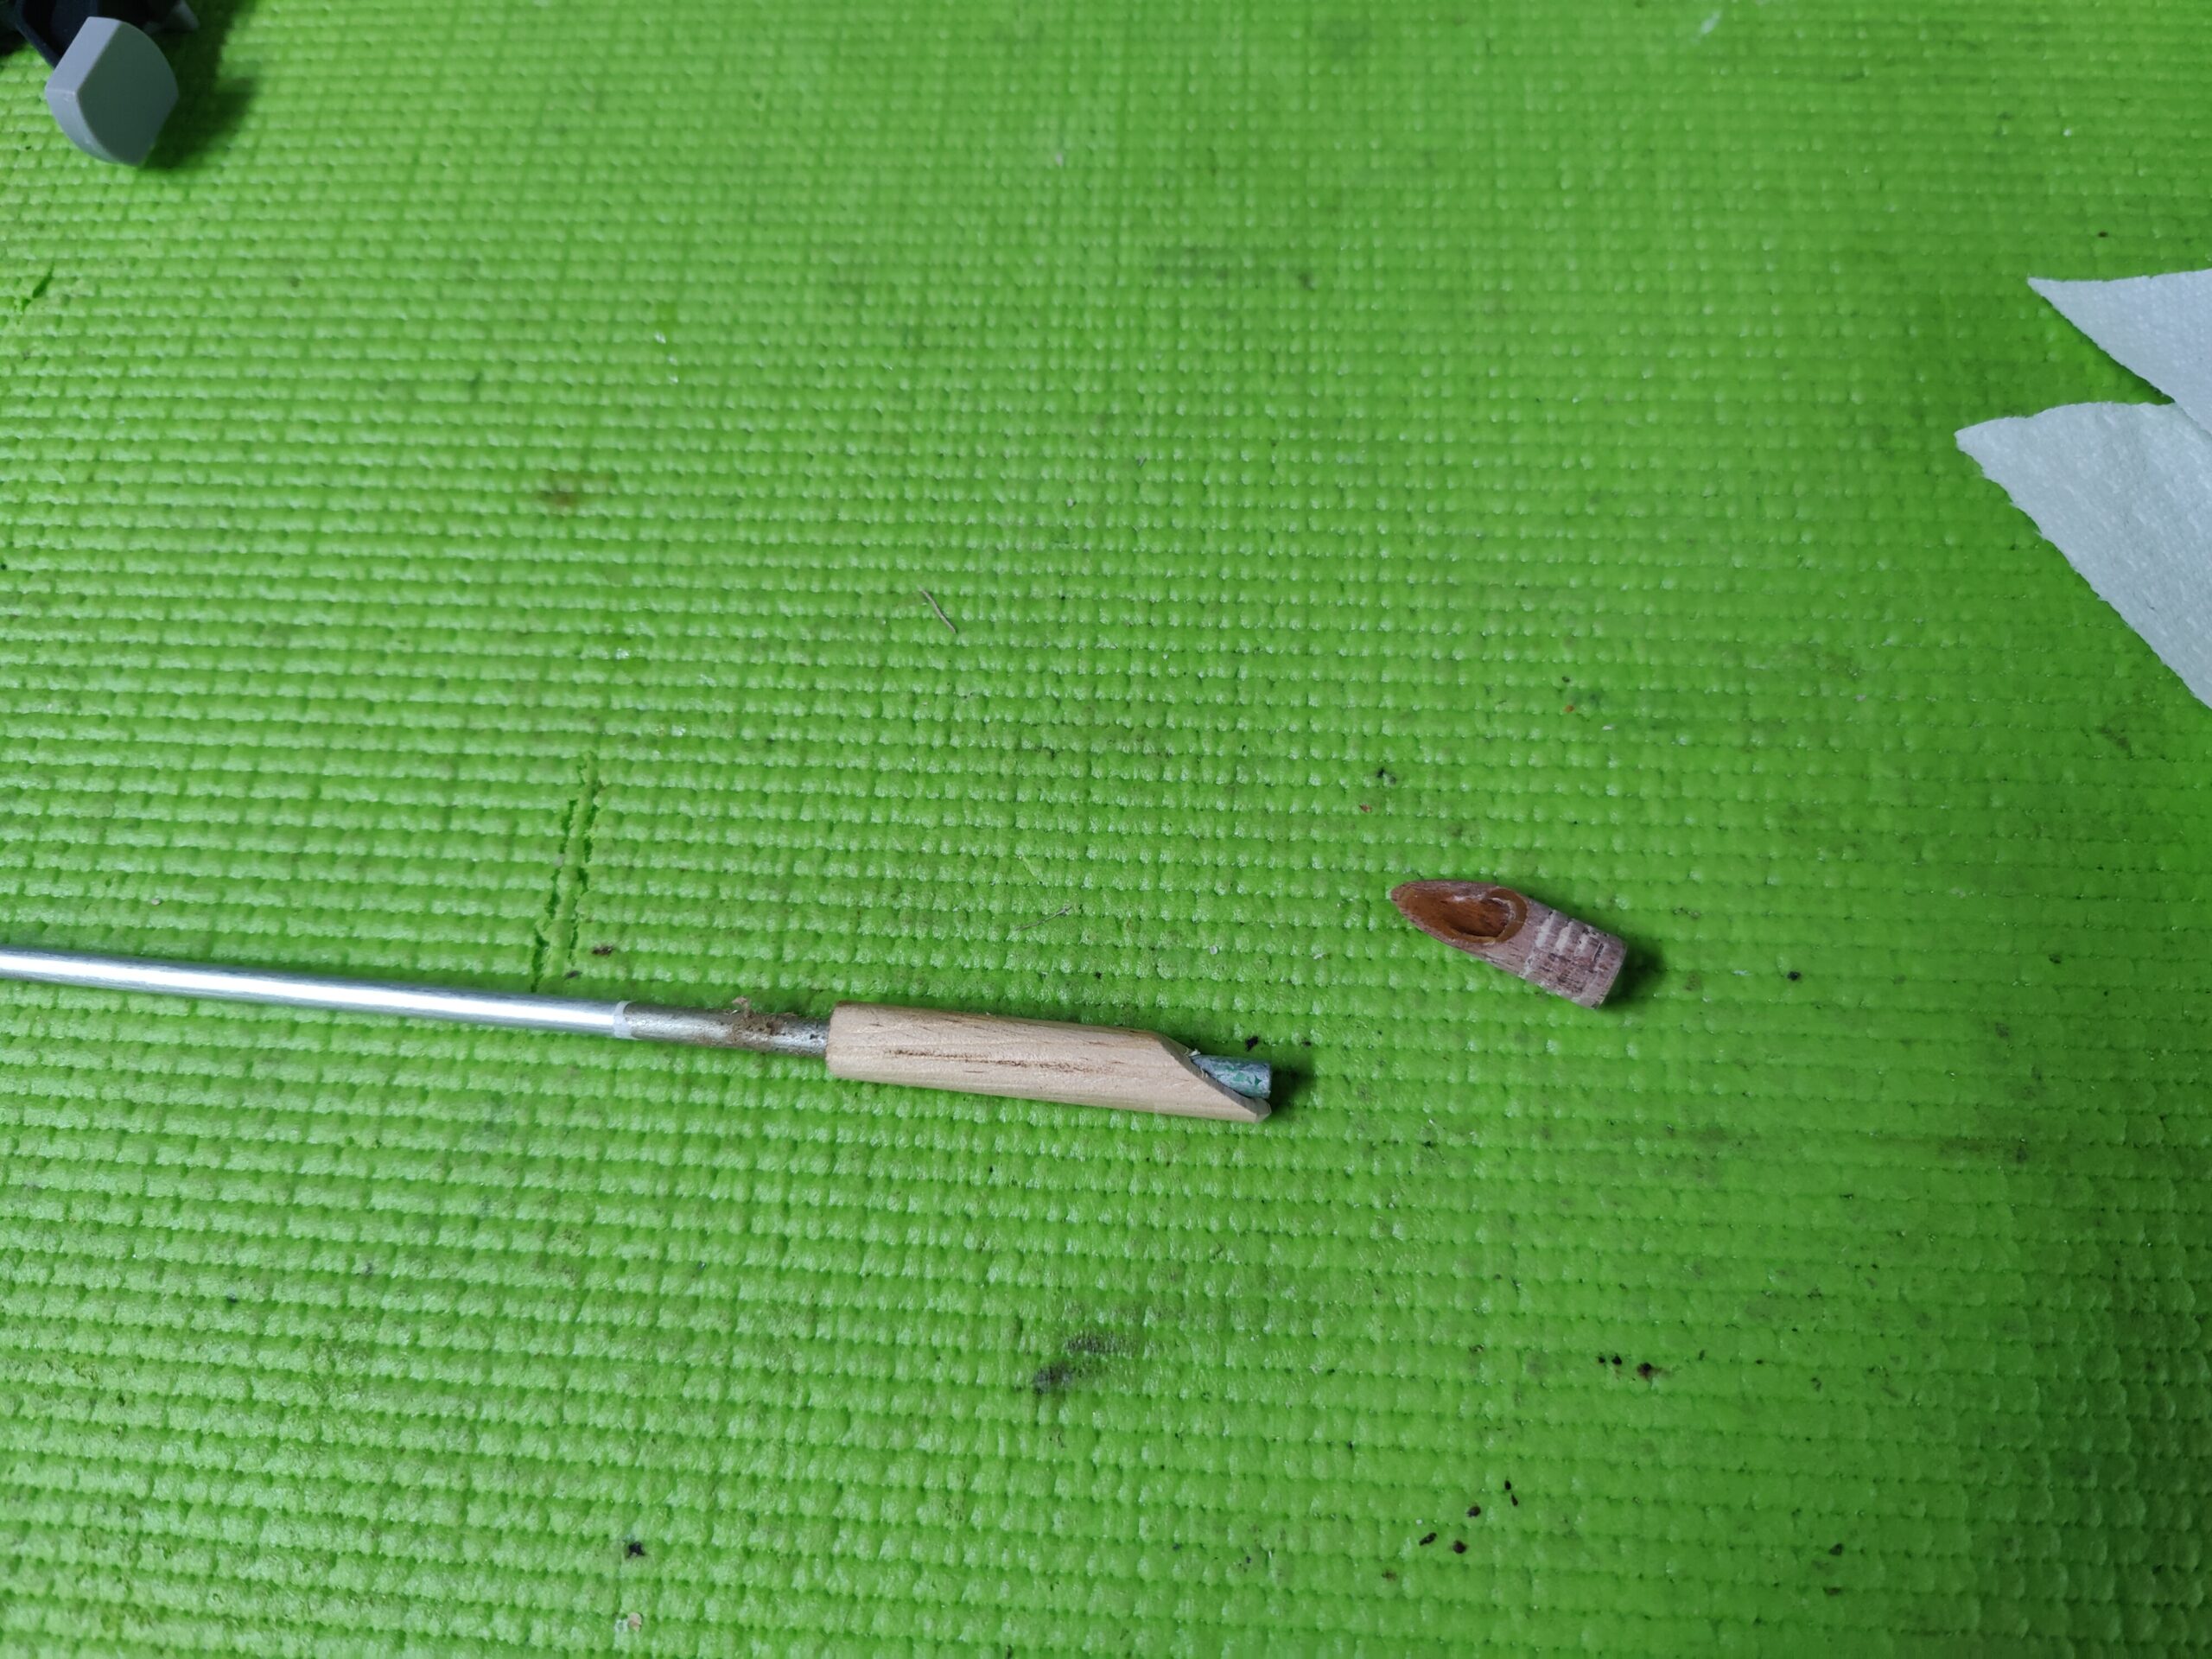
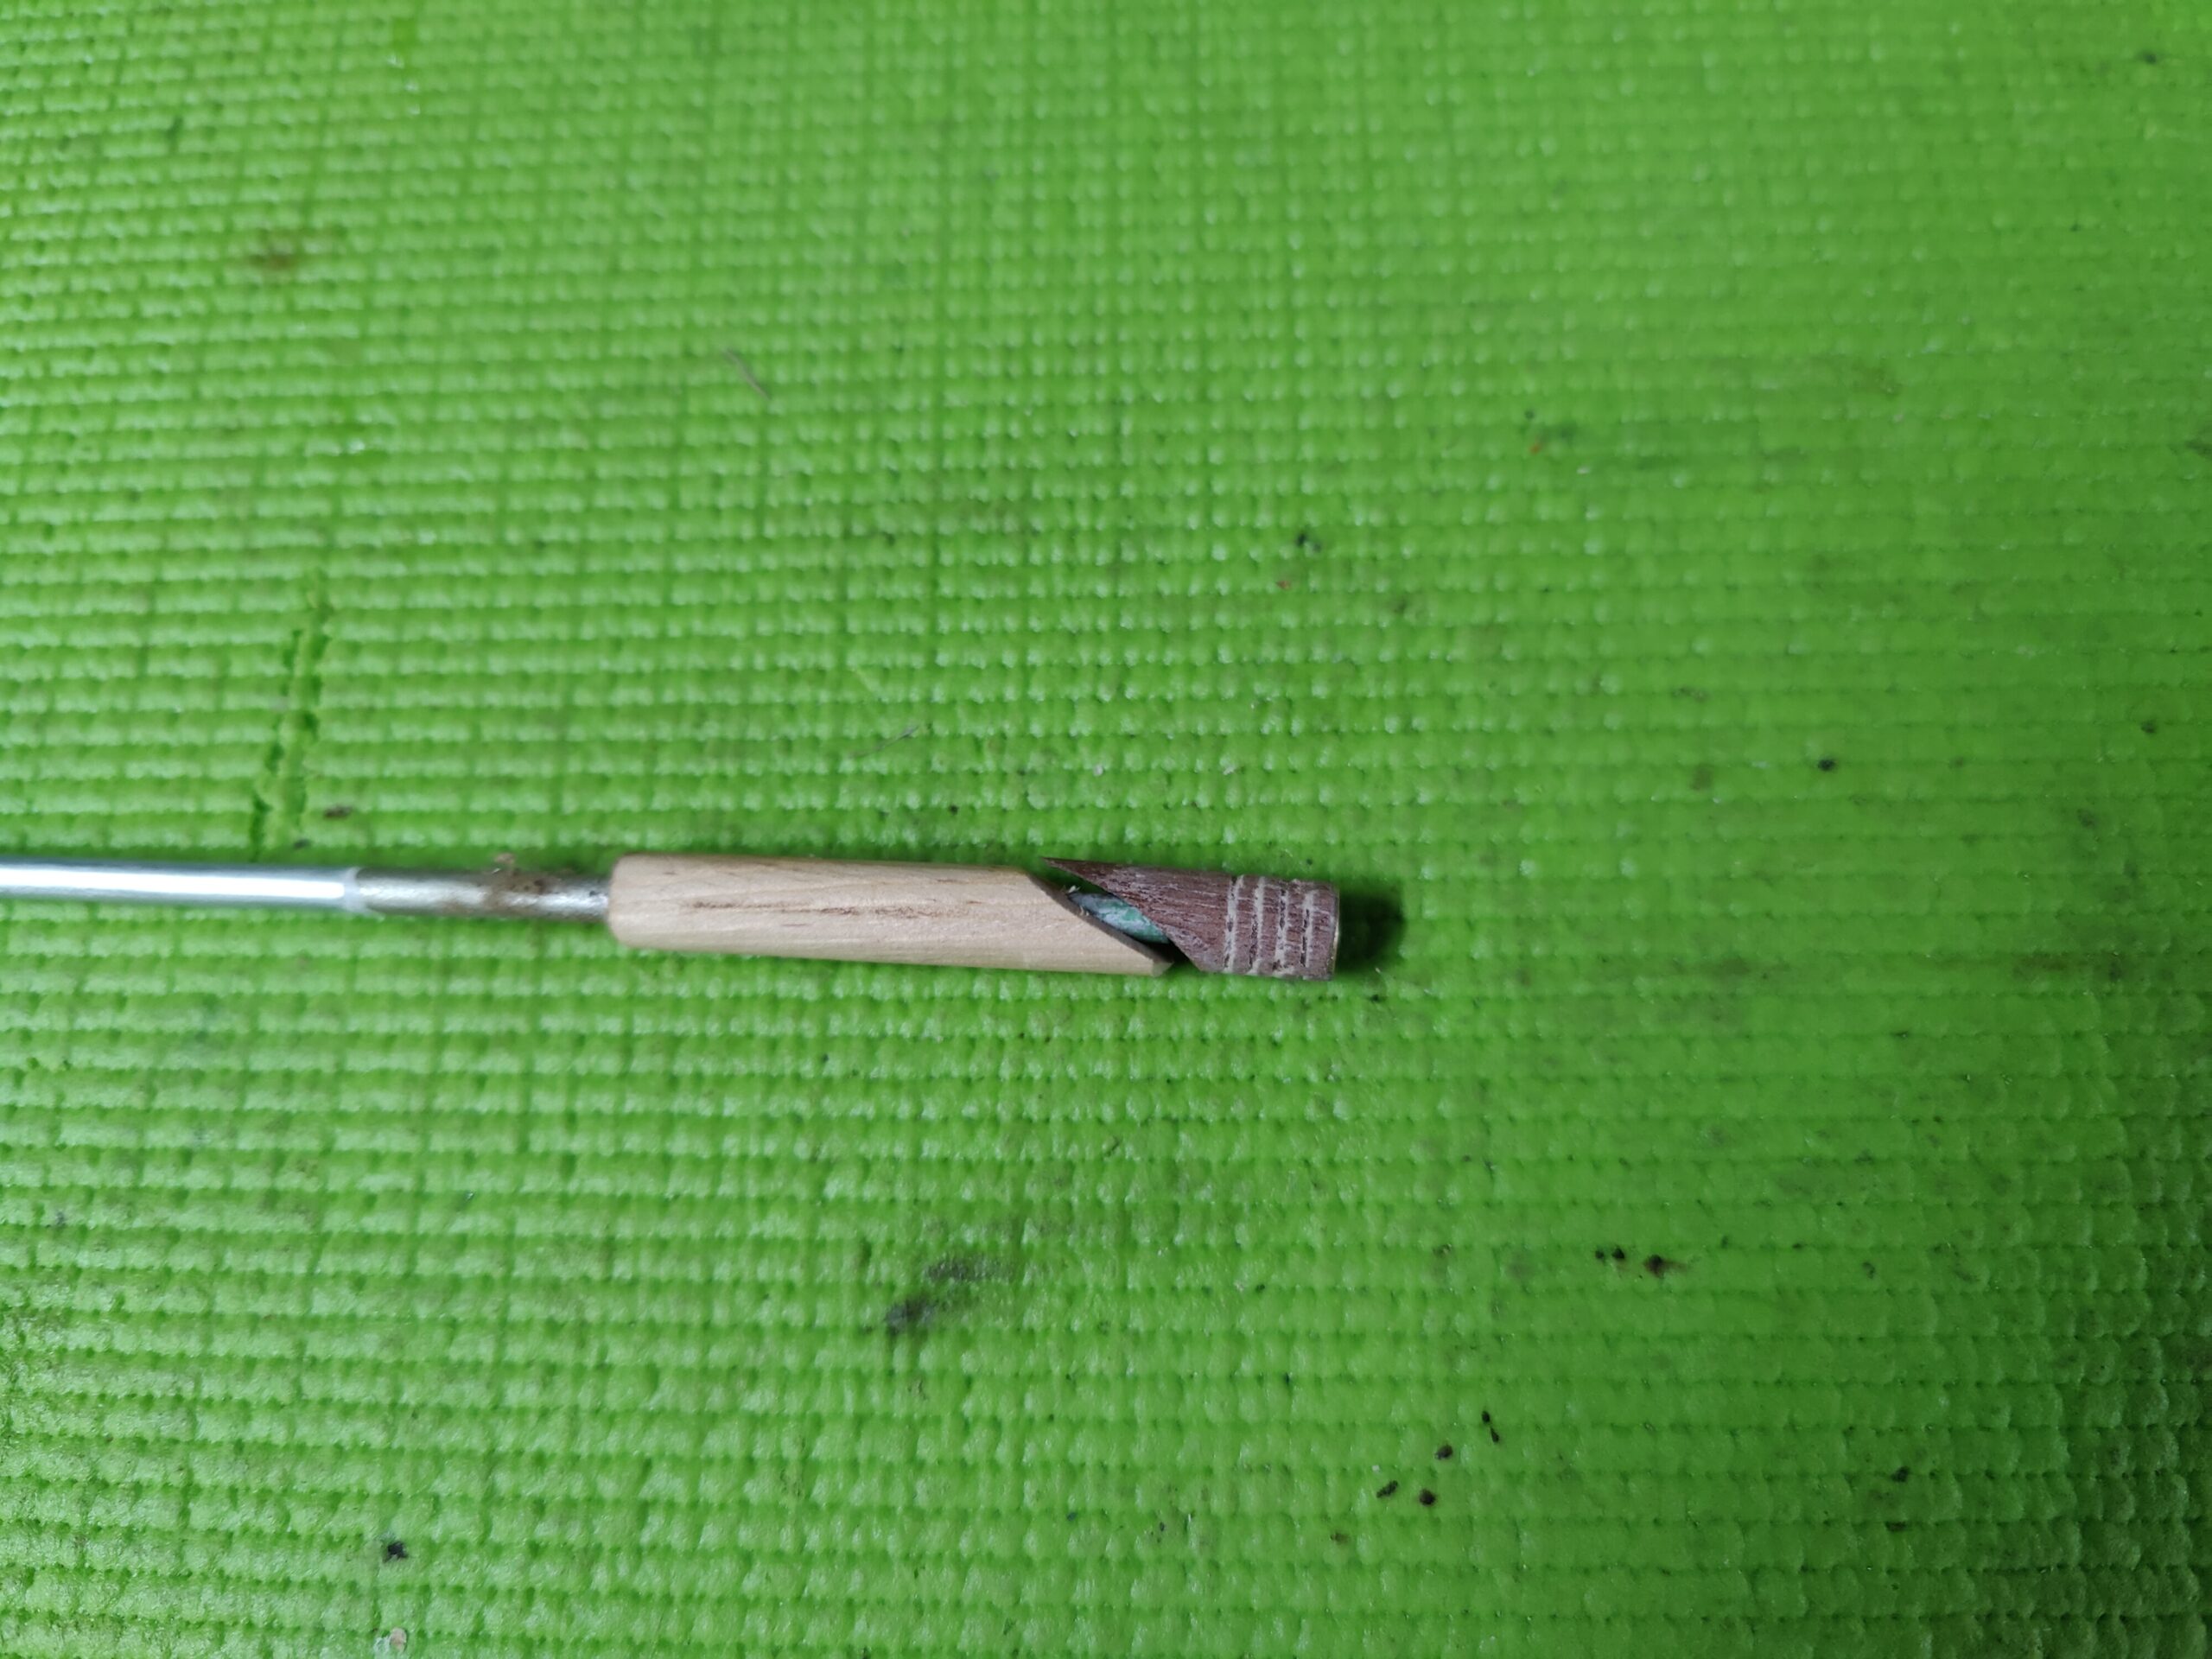
Through the 1/4″ hole in the dowel, I inserted and epoxied in a 1/4″ aluminum dowel. As you can see, the opening in the walnut plug and the metal dowel fit together well in the event I need to use a hammer to tap it back into the channel. I cut off the excess of the wooden dowel and sand the edge smooth.
 |
 |
 |
 |
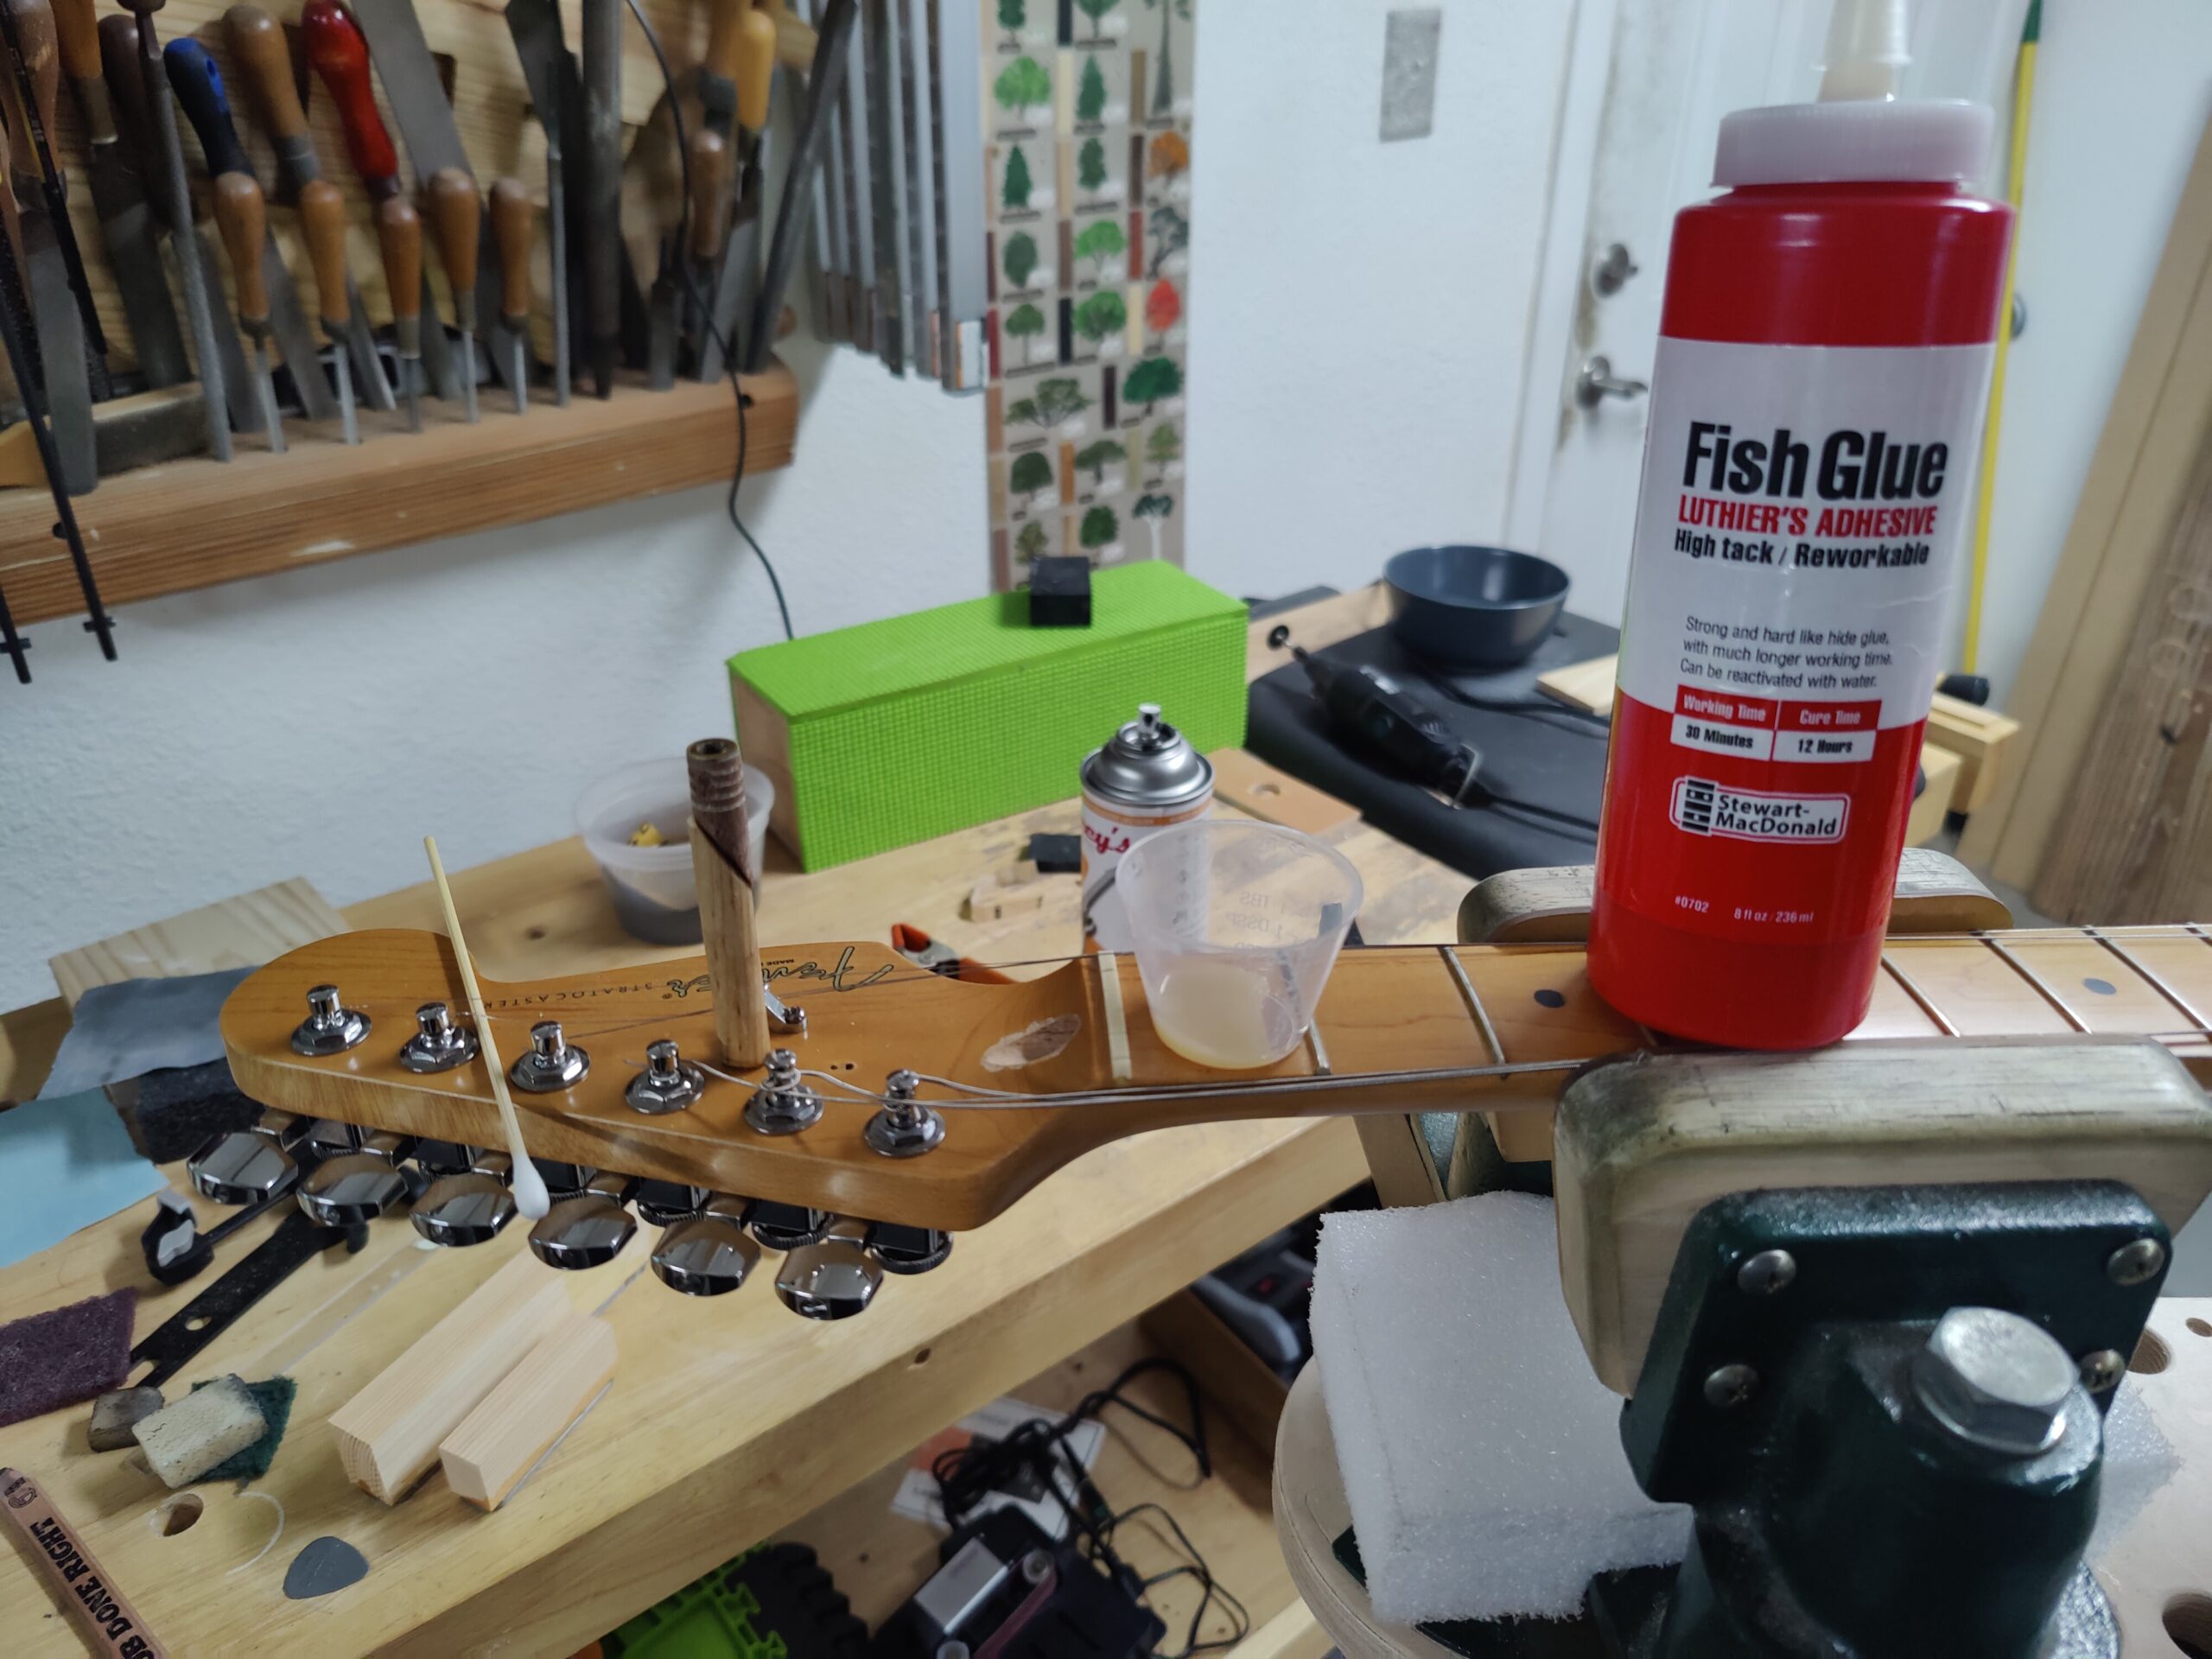
I prep the walnut plug sanding it briefly with 220 grit and do the same on the inside of the plug’s channel so to remove any old glue residue. Next, I use a Q-tip and apply some carnauba wax onto the threads of the truss rod nut and allen wrench adjustment end of the nut so no glue can harden there rendering the truss rod useless.
 |
 |
 |
 |
I apply a coating of fish glue into the walls of the channel before inserting the plug. I chose fish glue because of it’s high strength of tack once cured, it’s minimal spread out once the plug is inserted and it’s easy water clean up during the curing process. It’s a magical adhesive for a guitar repairman like me.
 |
 |
 |
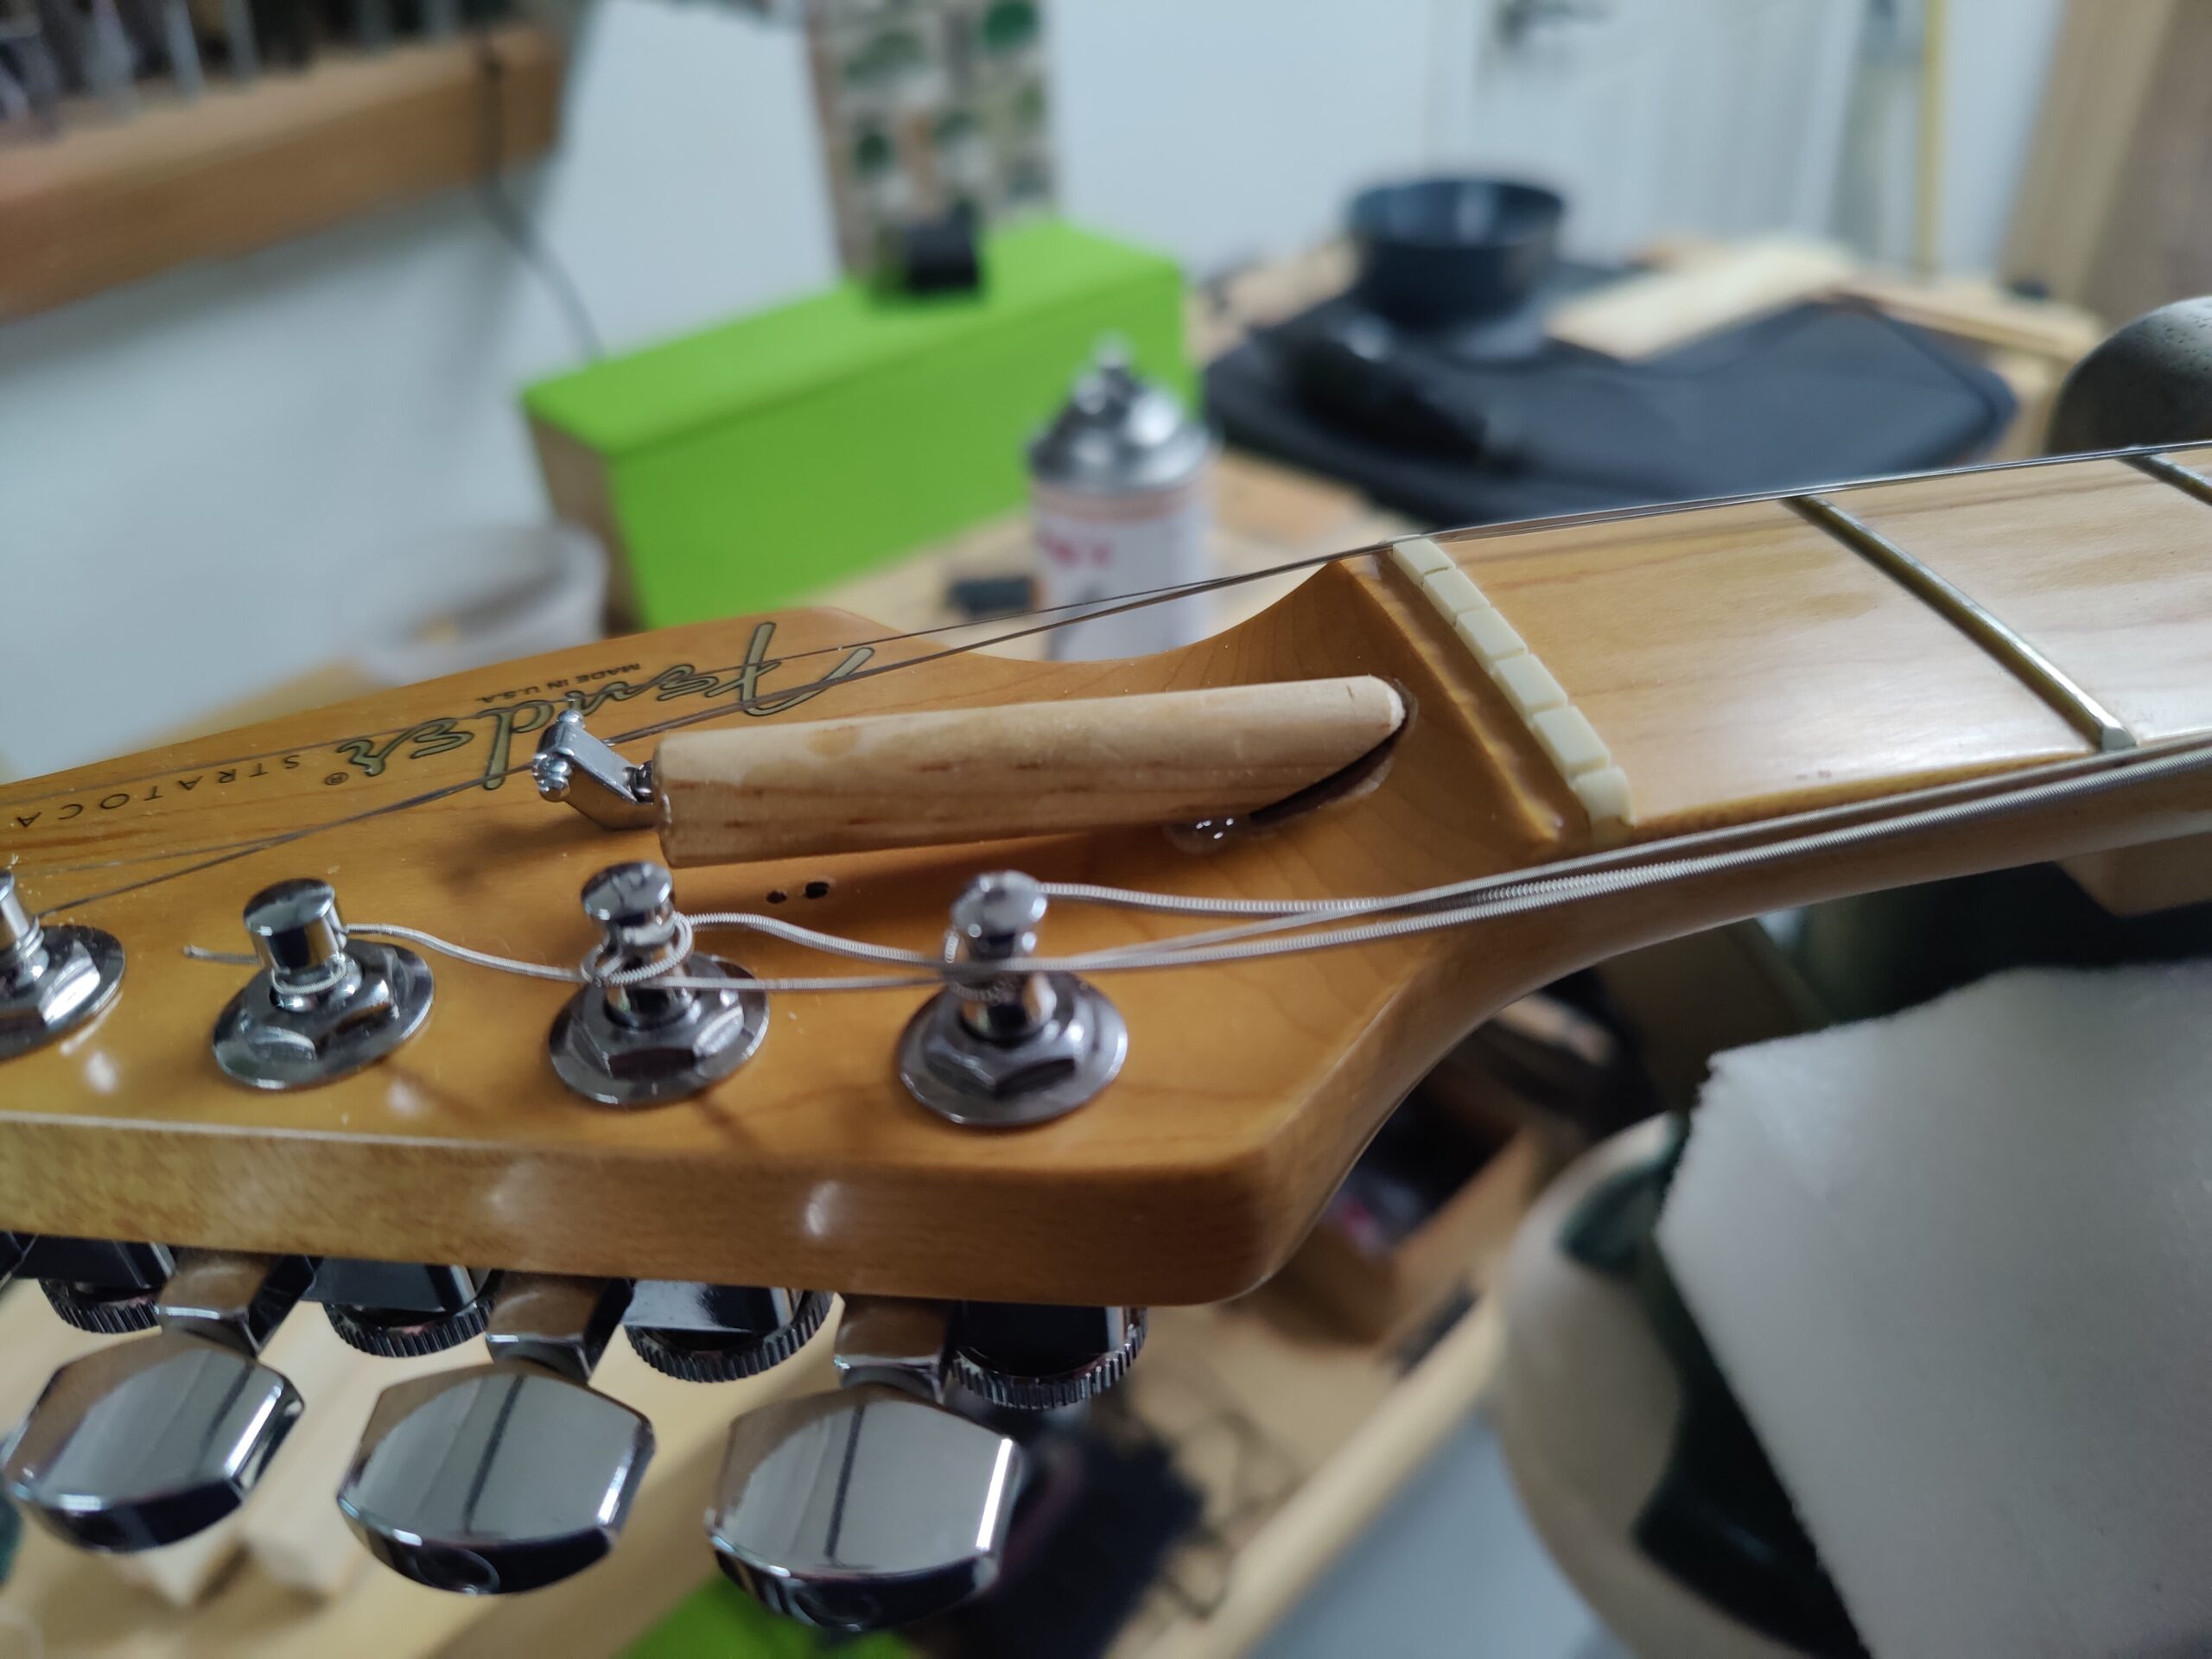 |
After tapping in the plug with a tiny hammer, I wipe off any excess of glue squeeze out on the outside of the joint. I clean the inside of the channel again with a Q-tip doused in water several times to remove any additional glue. About 5 minutes into the gluing process, I crank the truss rod in both directions to ensure no glue is settling in the threads. I crank it again after 10 minutes, 20 minutes, 30 minutes, and every 10 minutes I was in my workshop for the rest of the evening. You can’t be too careful with this process. Fast forward to the next morning, I come back to the guitar to give it another few cranks in either direction and yee-haw, it was moving flawlessly.
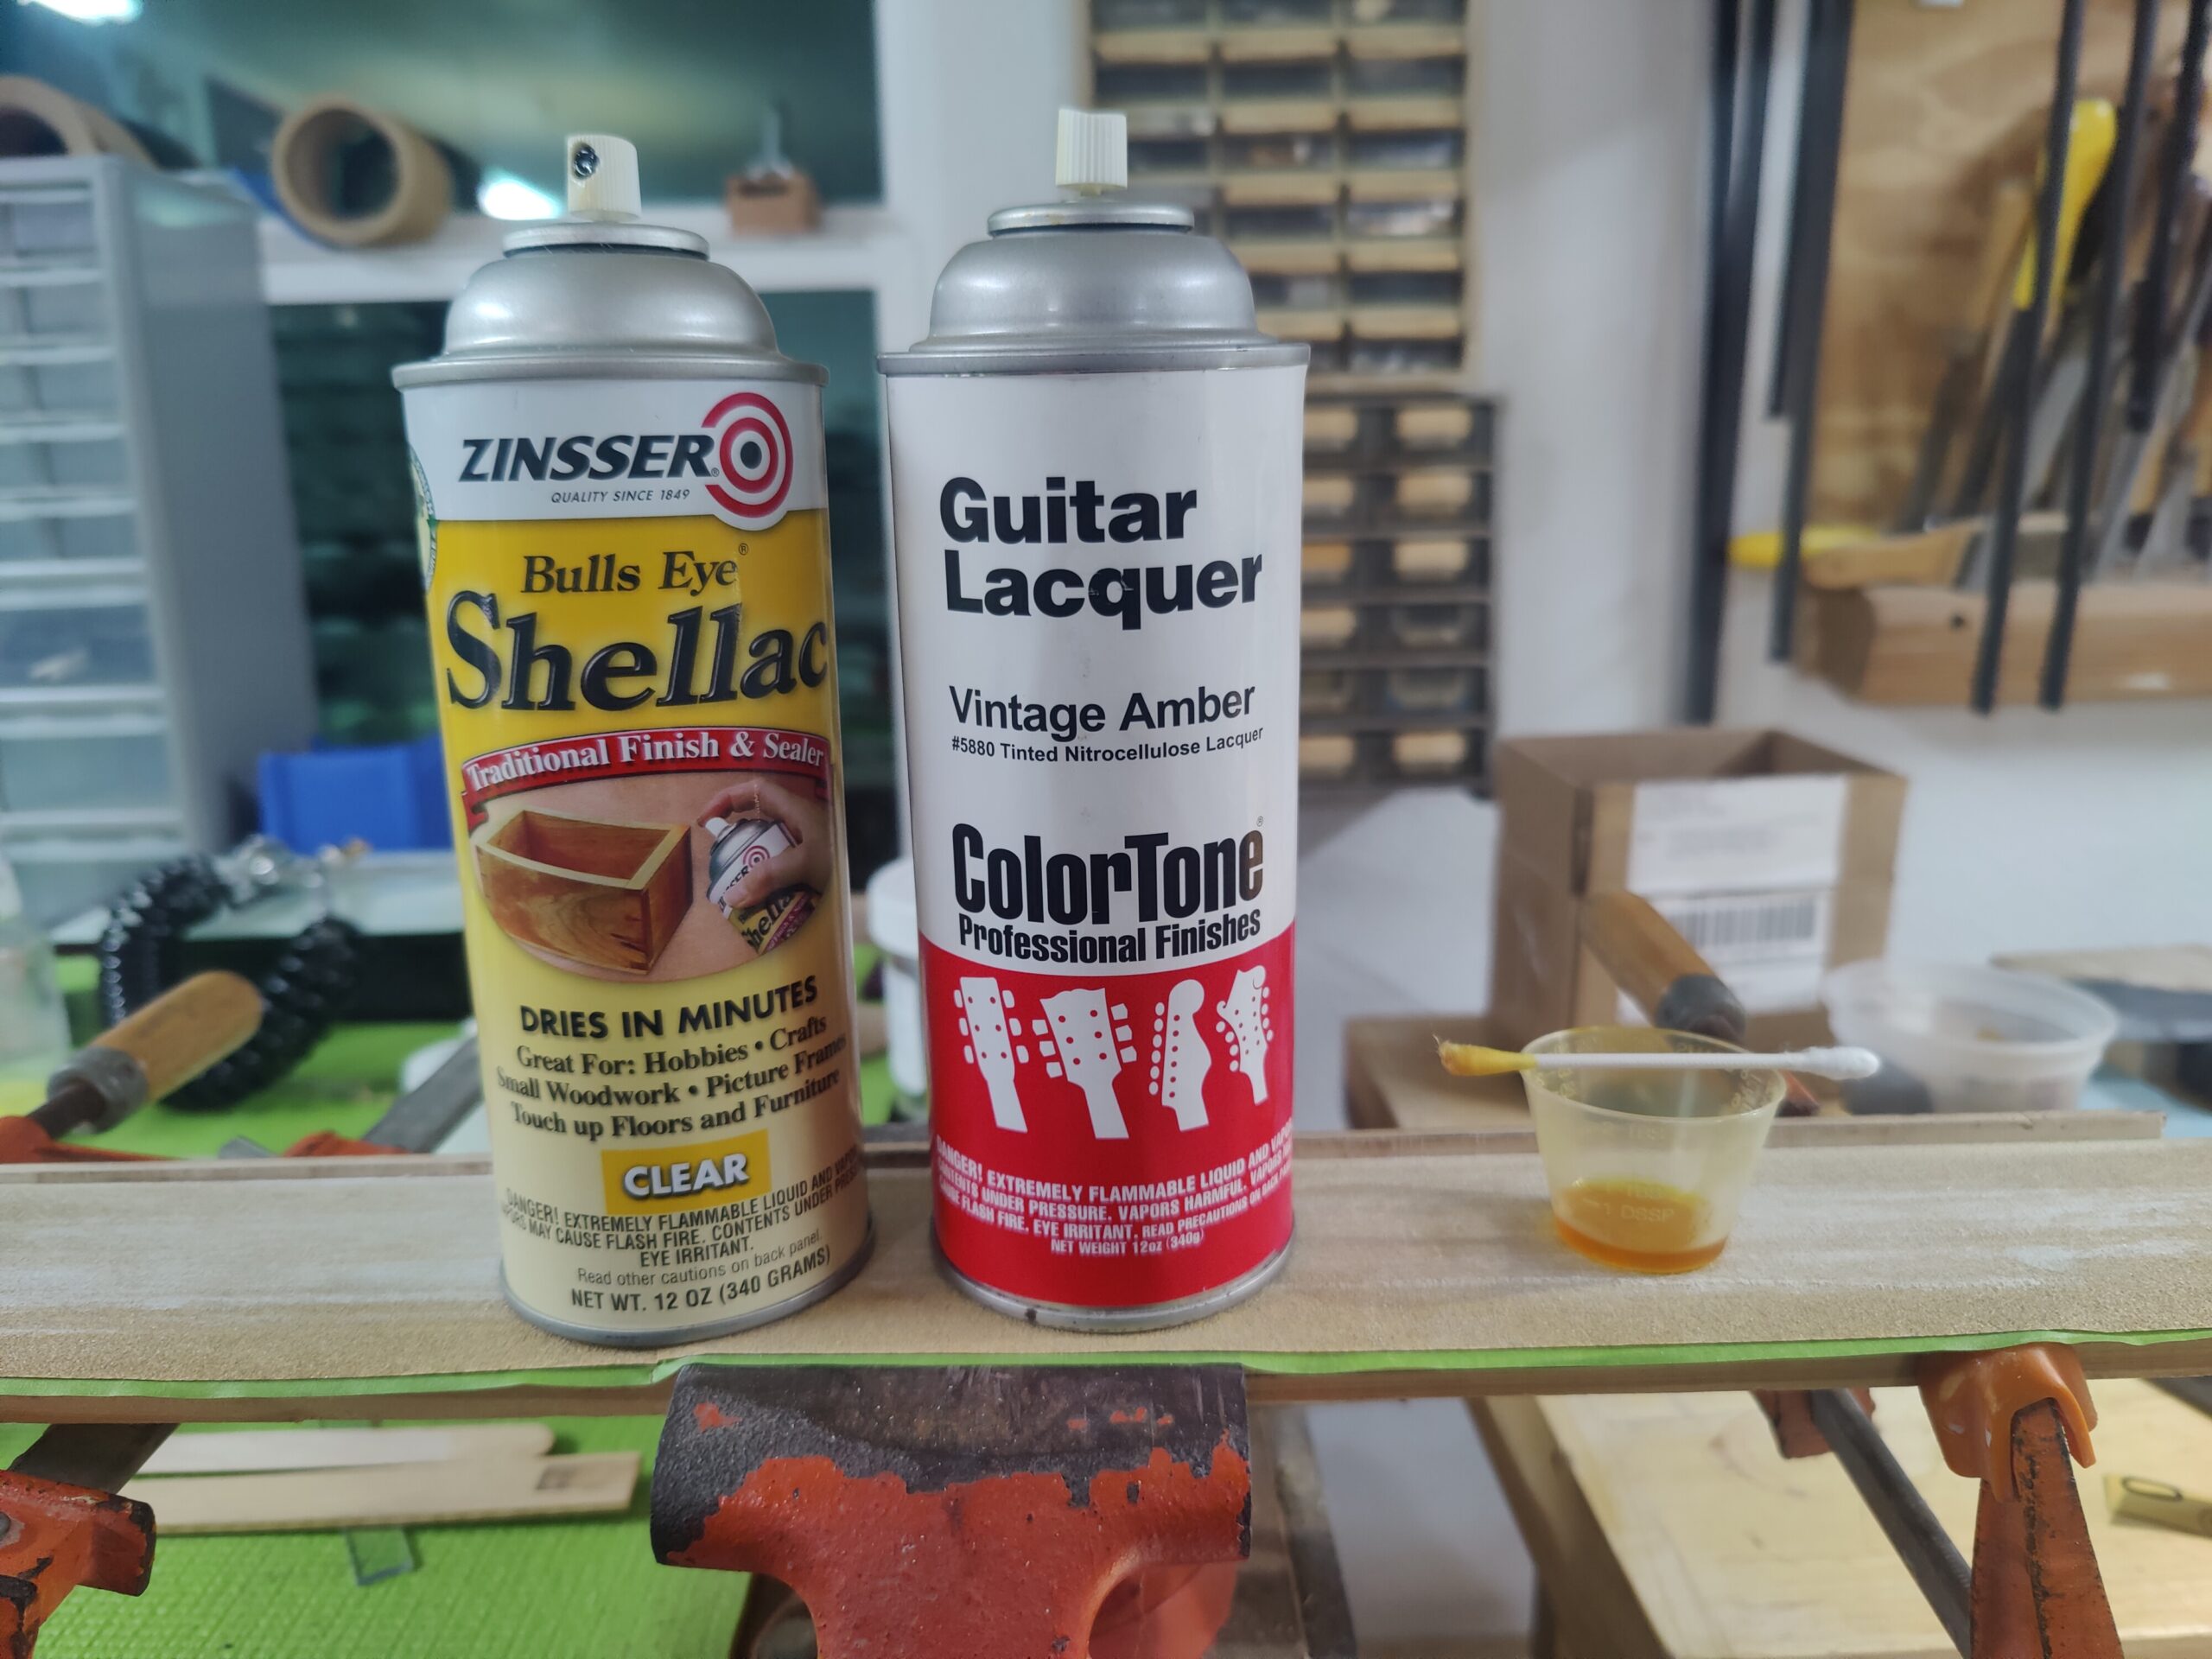
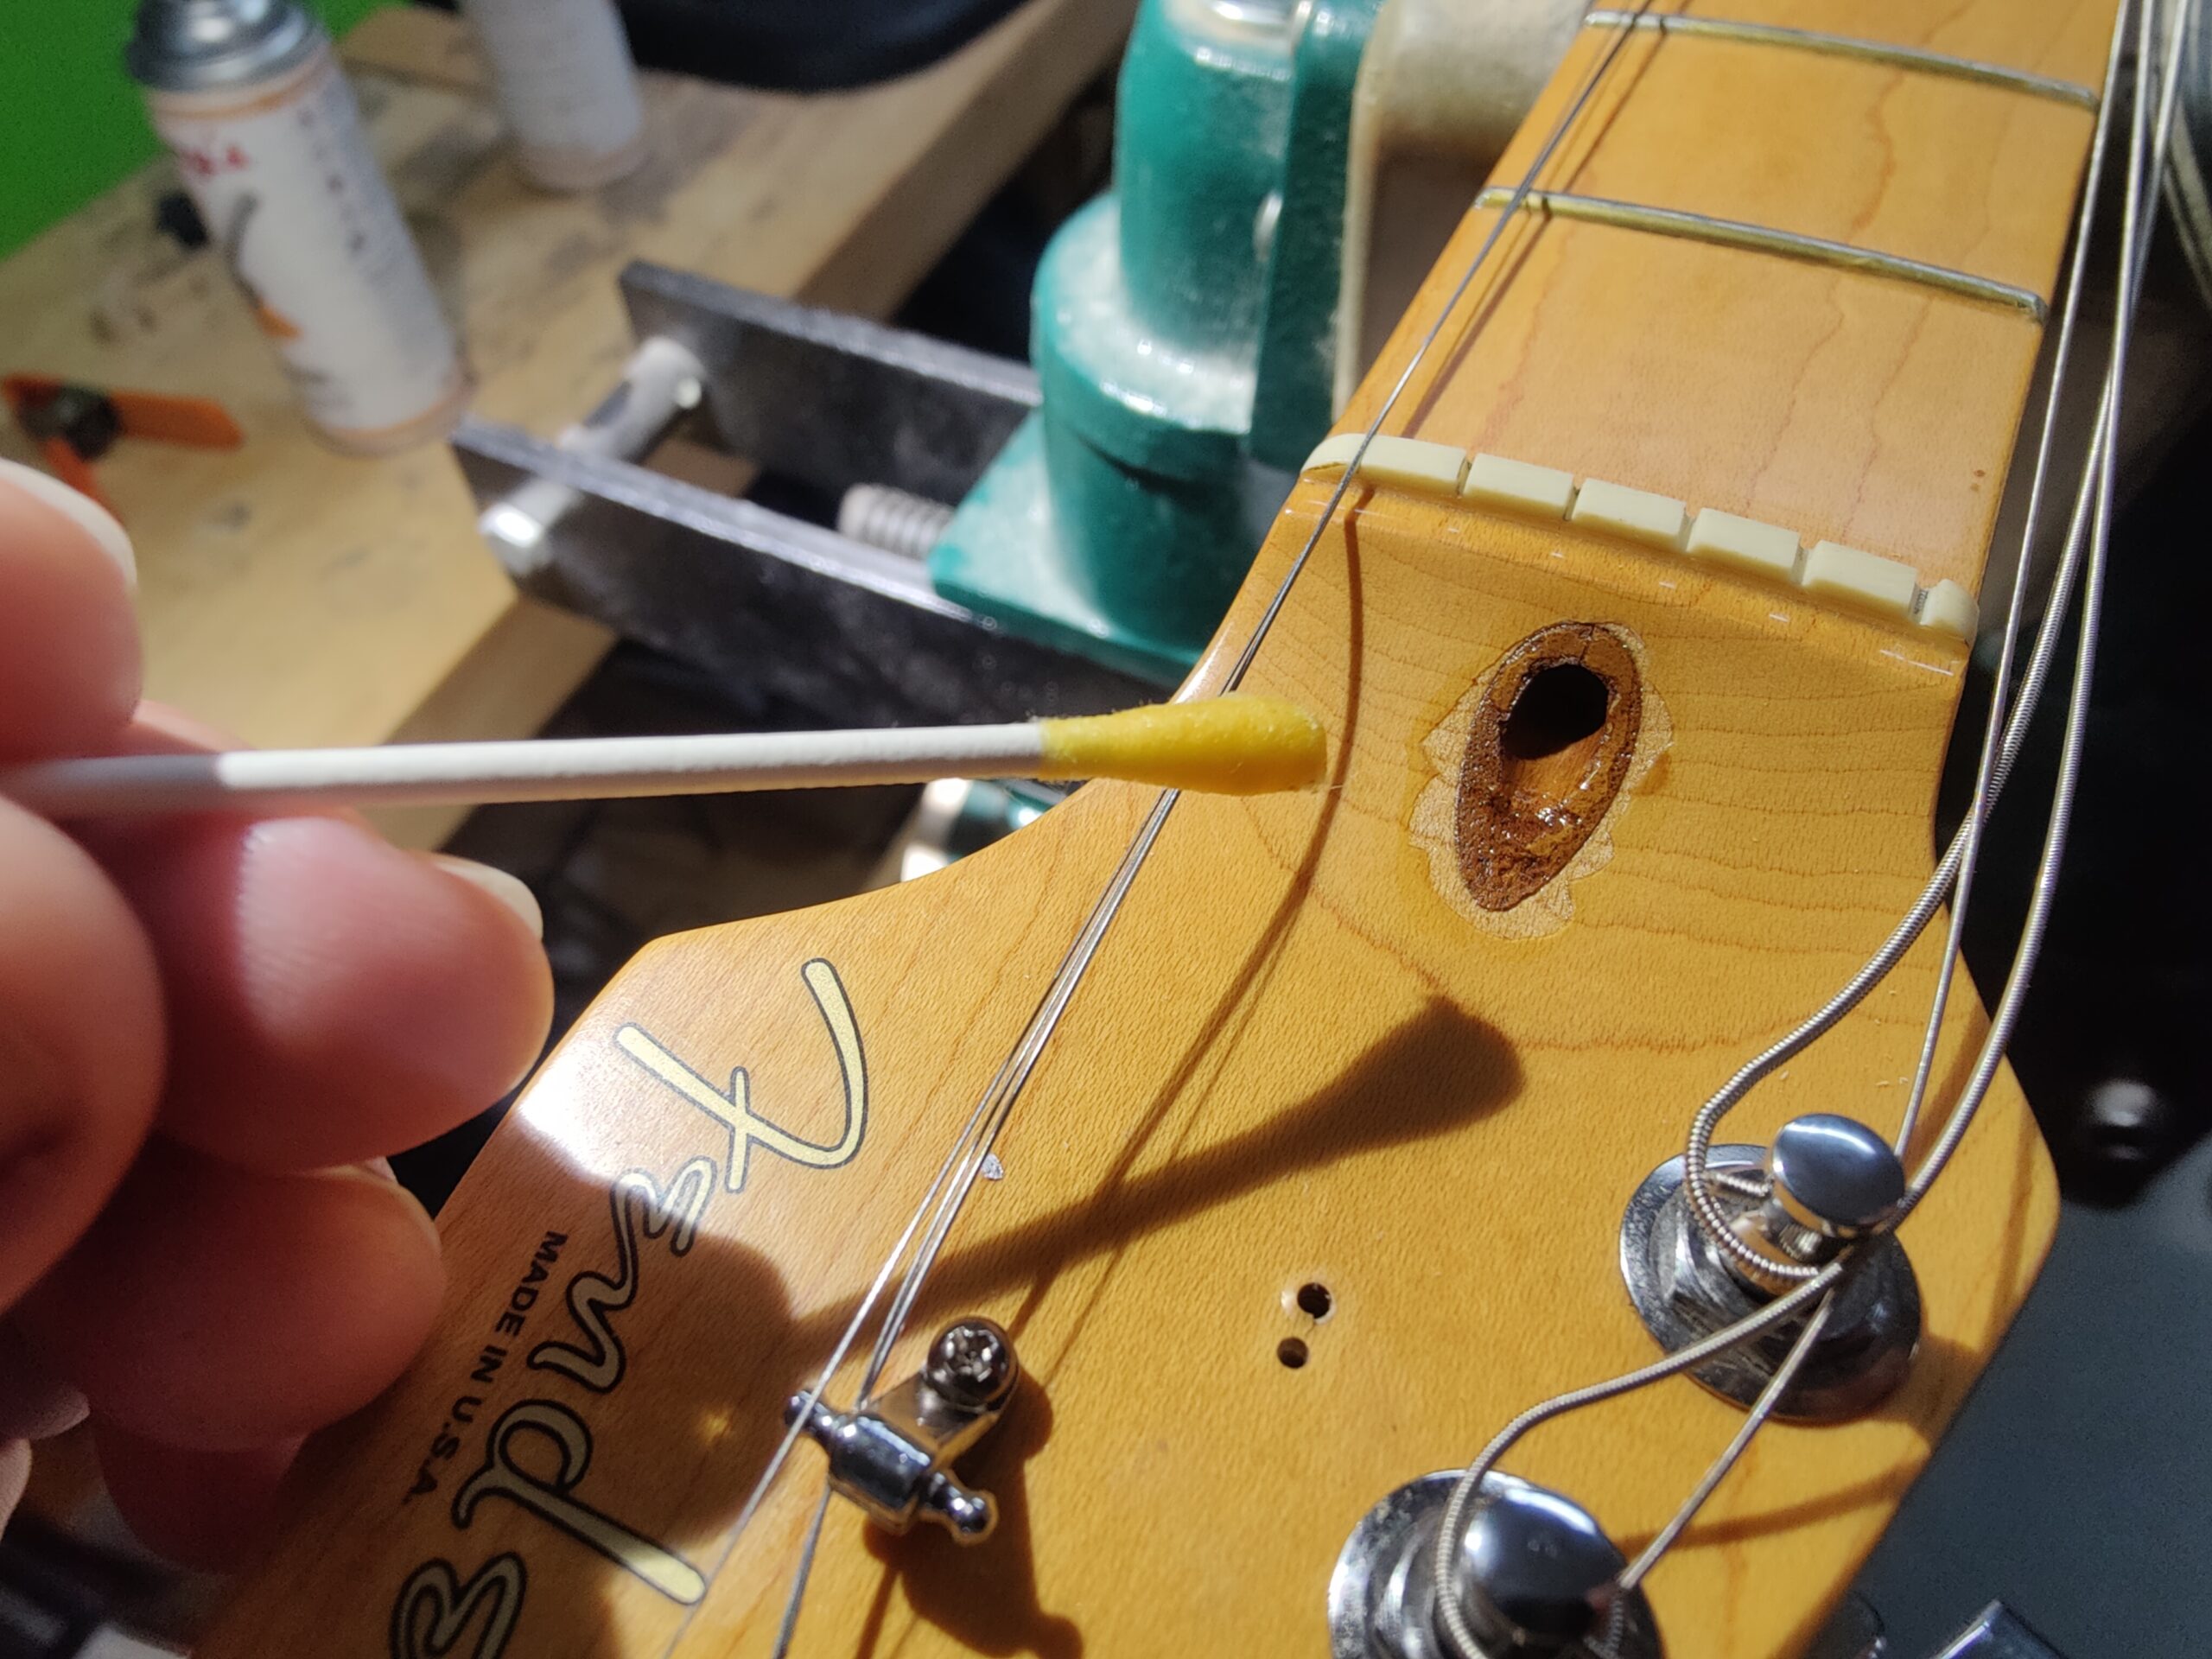
To finish off the project, I wasn’t asked to do this, but the break in the finish around the walnut plug was staring me back in the face every time I checked my repair. I needed to do something about it. I mixed up a bit of aerosol shellac and vintage amber. I applied the concoction with a Q-tip onto the exposed wood. Waited a few minutes and reapplied the mix to match the color of the Fender finish.
 |
 |
 |
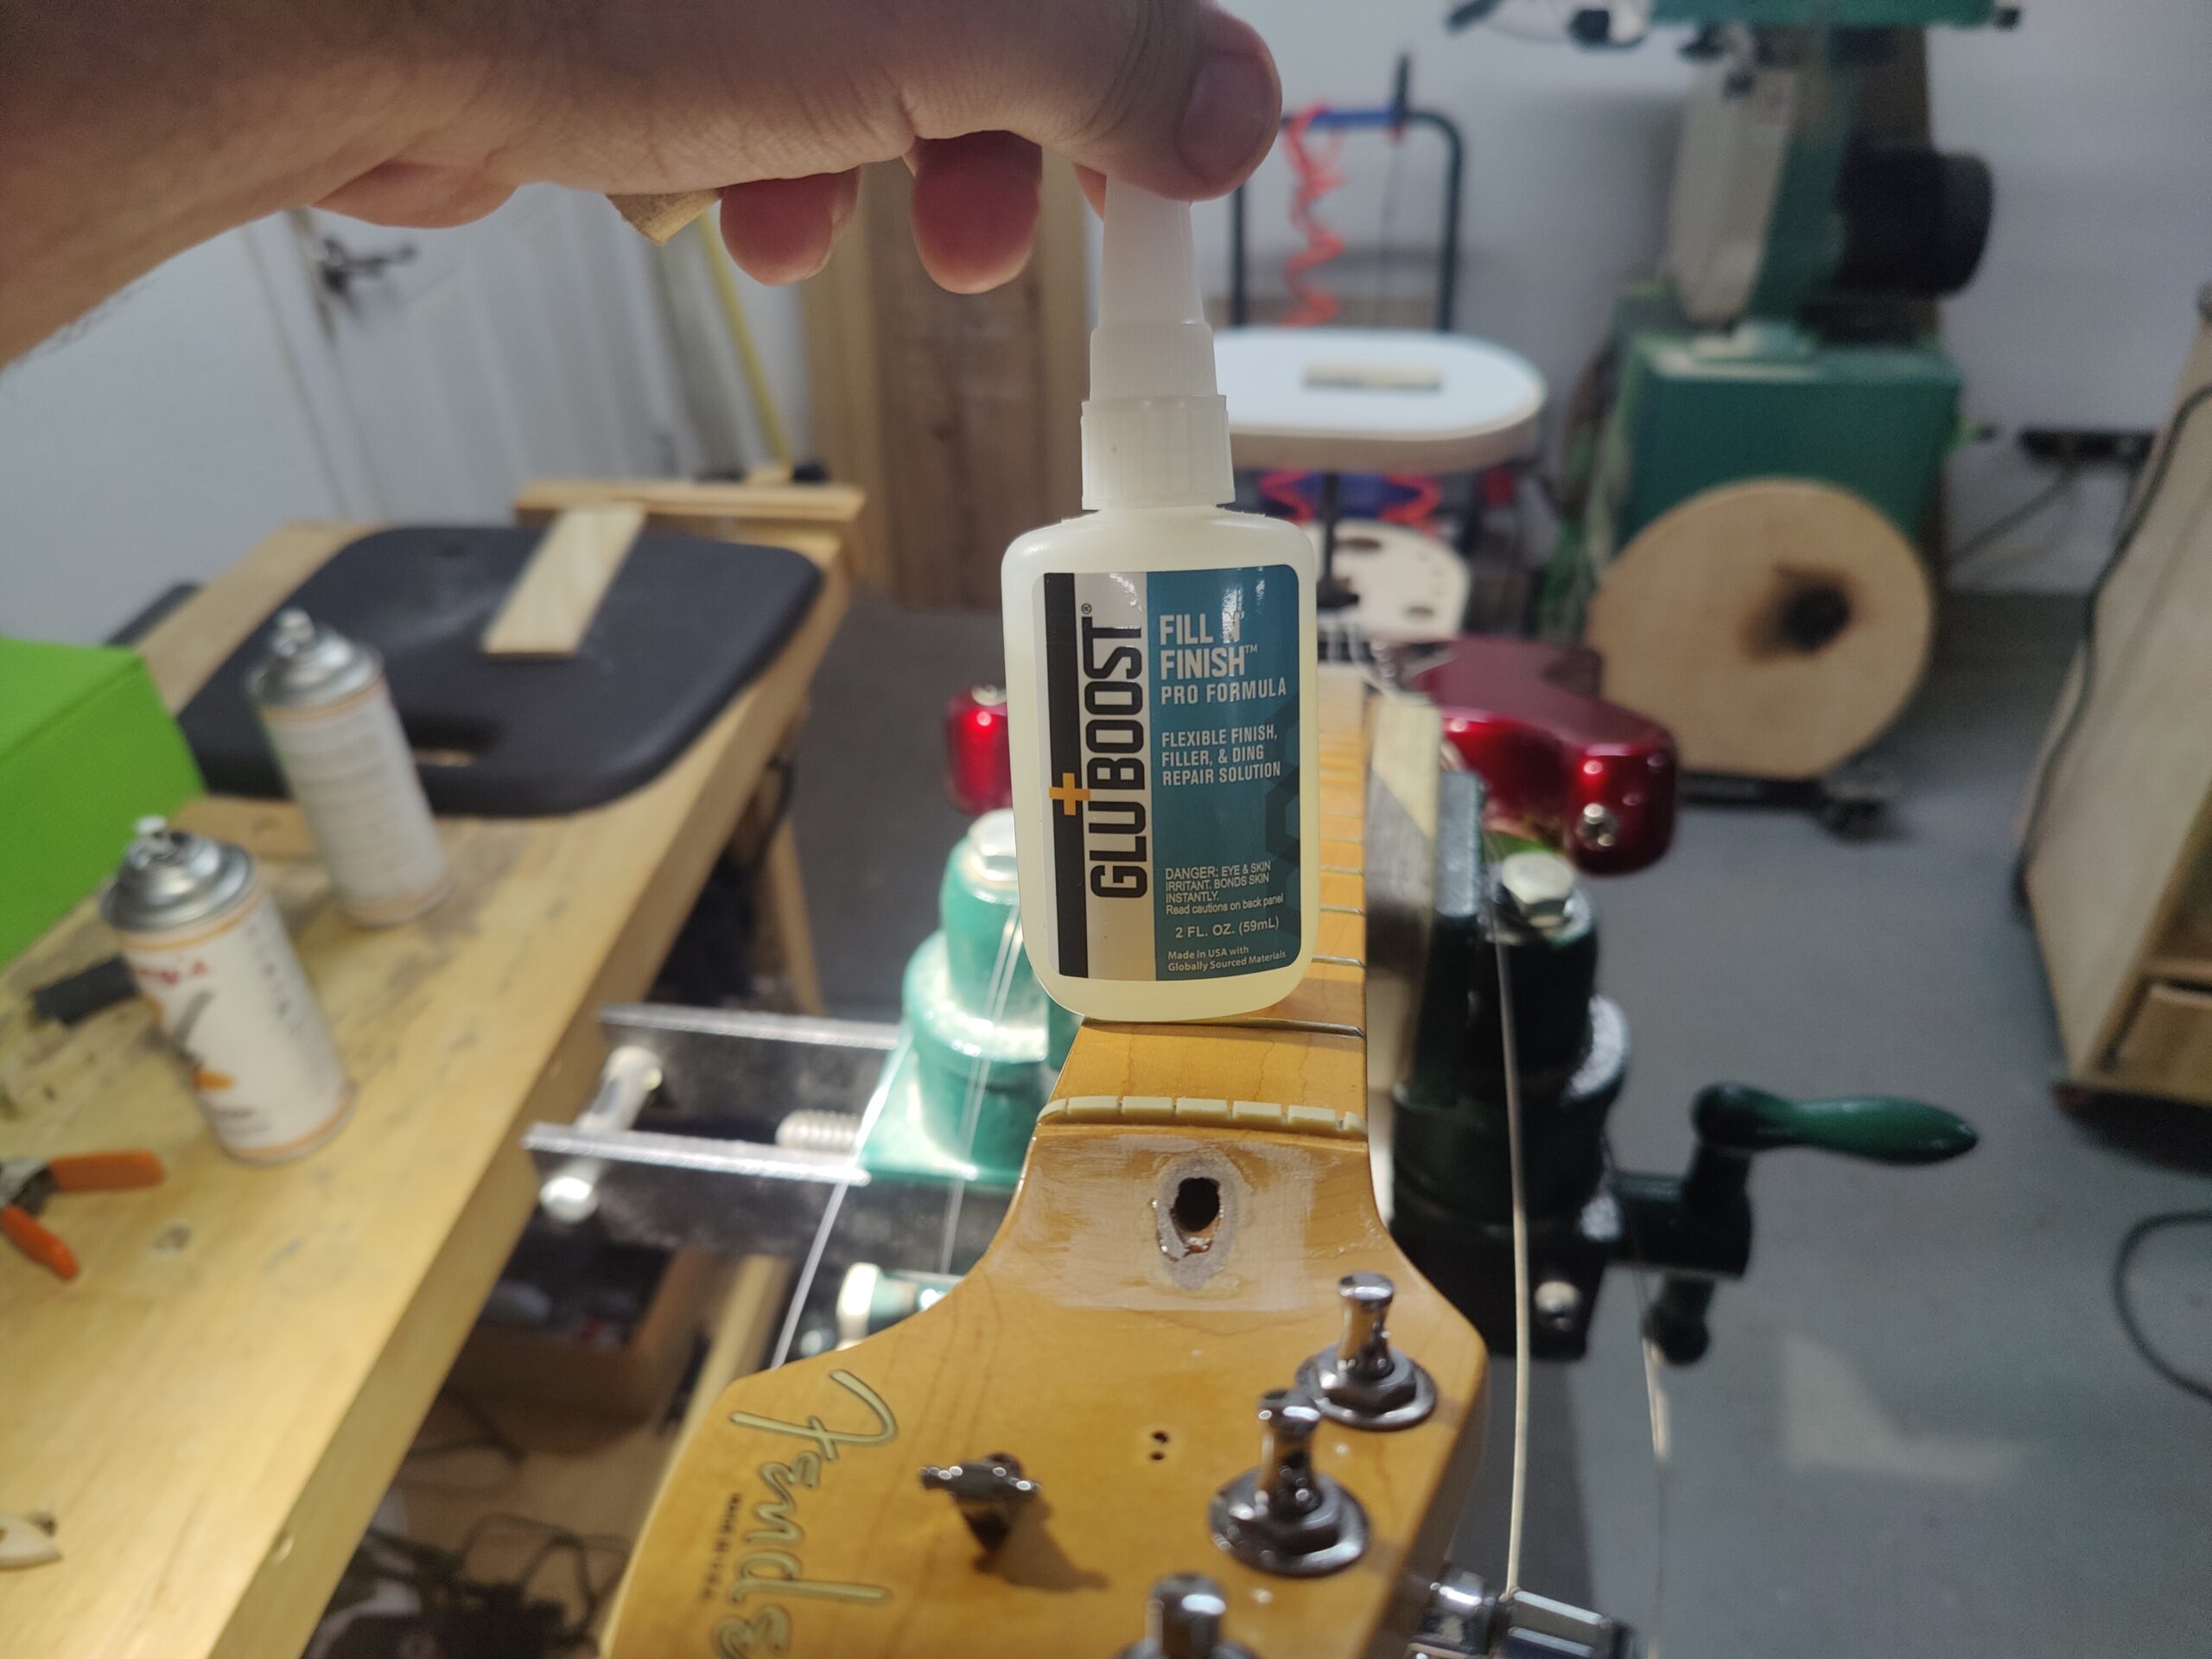 |
To seal off the broken finish, and bring the clear coat up to the level of the rest of the finish, I apply coats of GluBoost Fill N’ Finish. This stuff is amazing. Easy to work with. Self levels in the drying process. Most importantly, doesn’t dry in the bottle between uses like every other friggin super glue I tried before it.
I lightly sand the area where GluBoost was applied, re-apply a bit more to fill in voids, sand again. Sand with increasingly higher grits until the scratches disappear and buff the area with a few compounds. The end result looks great. At a glance, you wouldn’t know anything happened.
 |
 |
 |
The walnut plug is sitting securely once again and this Strat is set up, playing its best.
For all your truss rod repairs, call Andrew with South Austin Guitar Repair (512) 590-1225.