Epiphone Zero Fret Swap – Pickguard Re-glue – Headstock Veneer Finish Repair
South Austin Guitar Repair
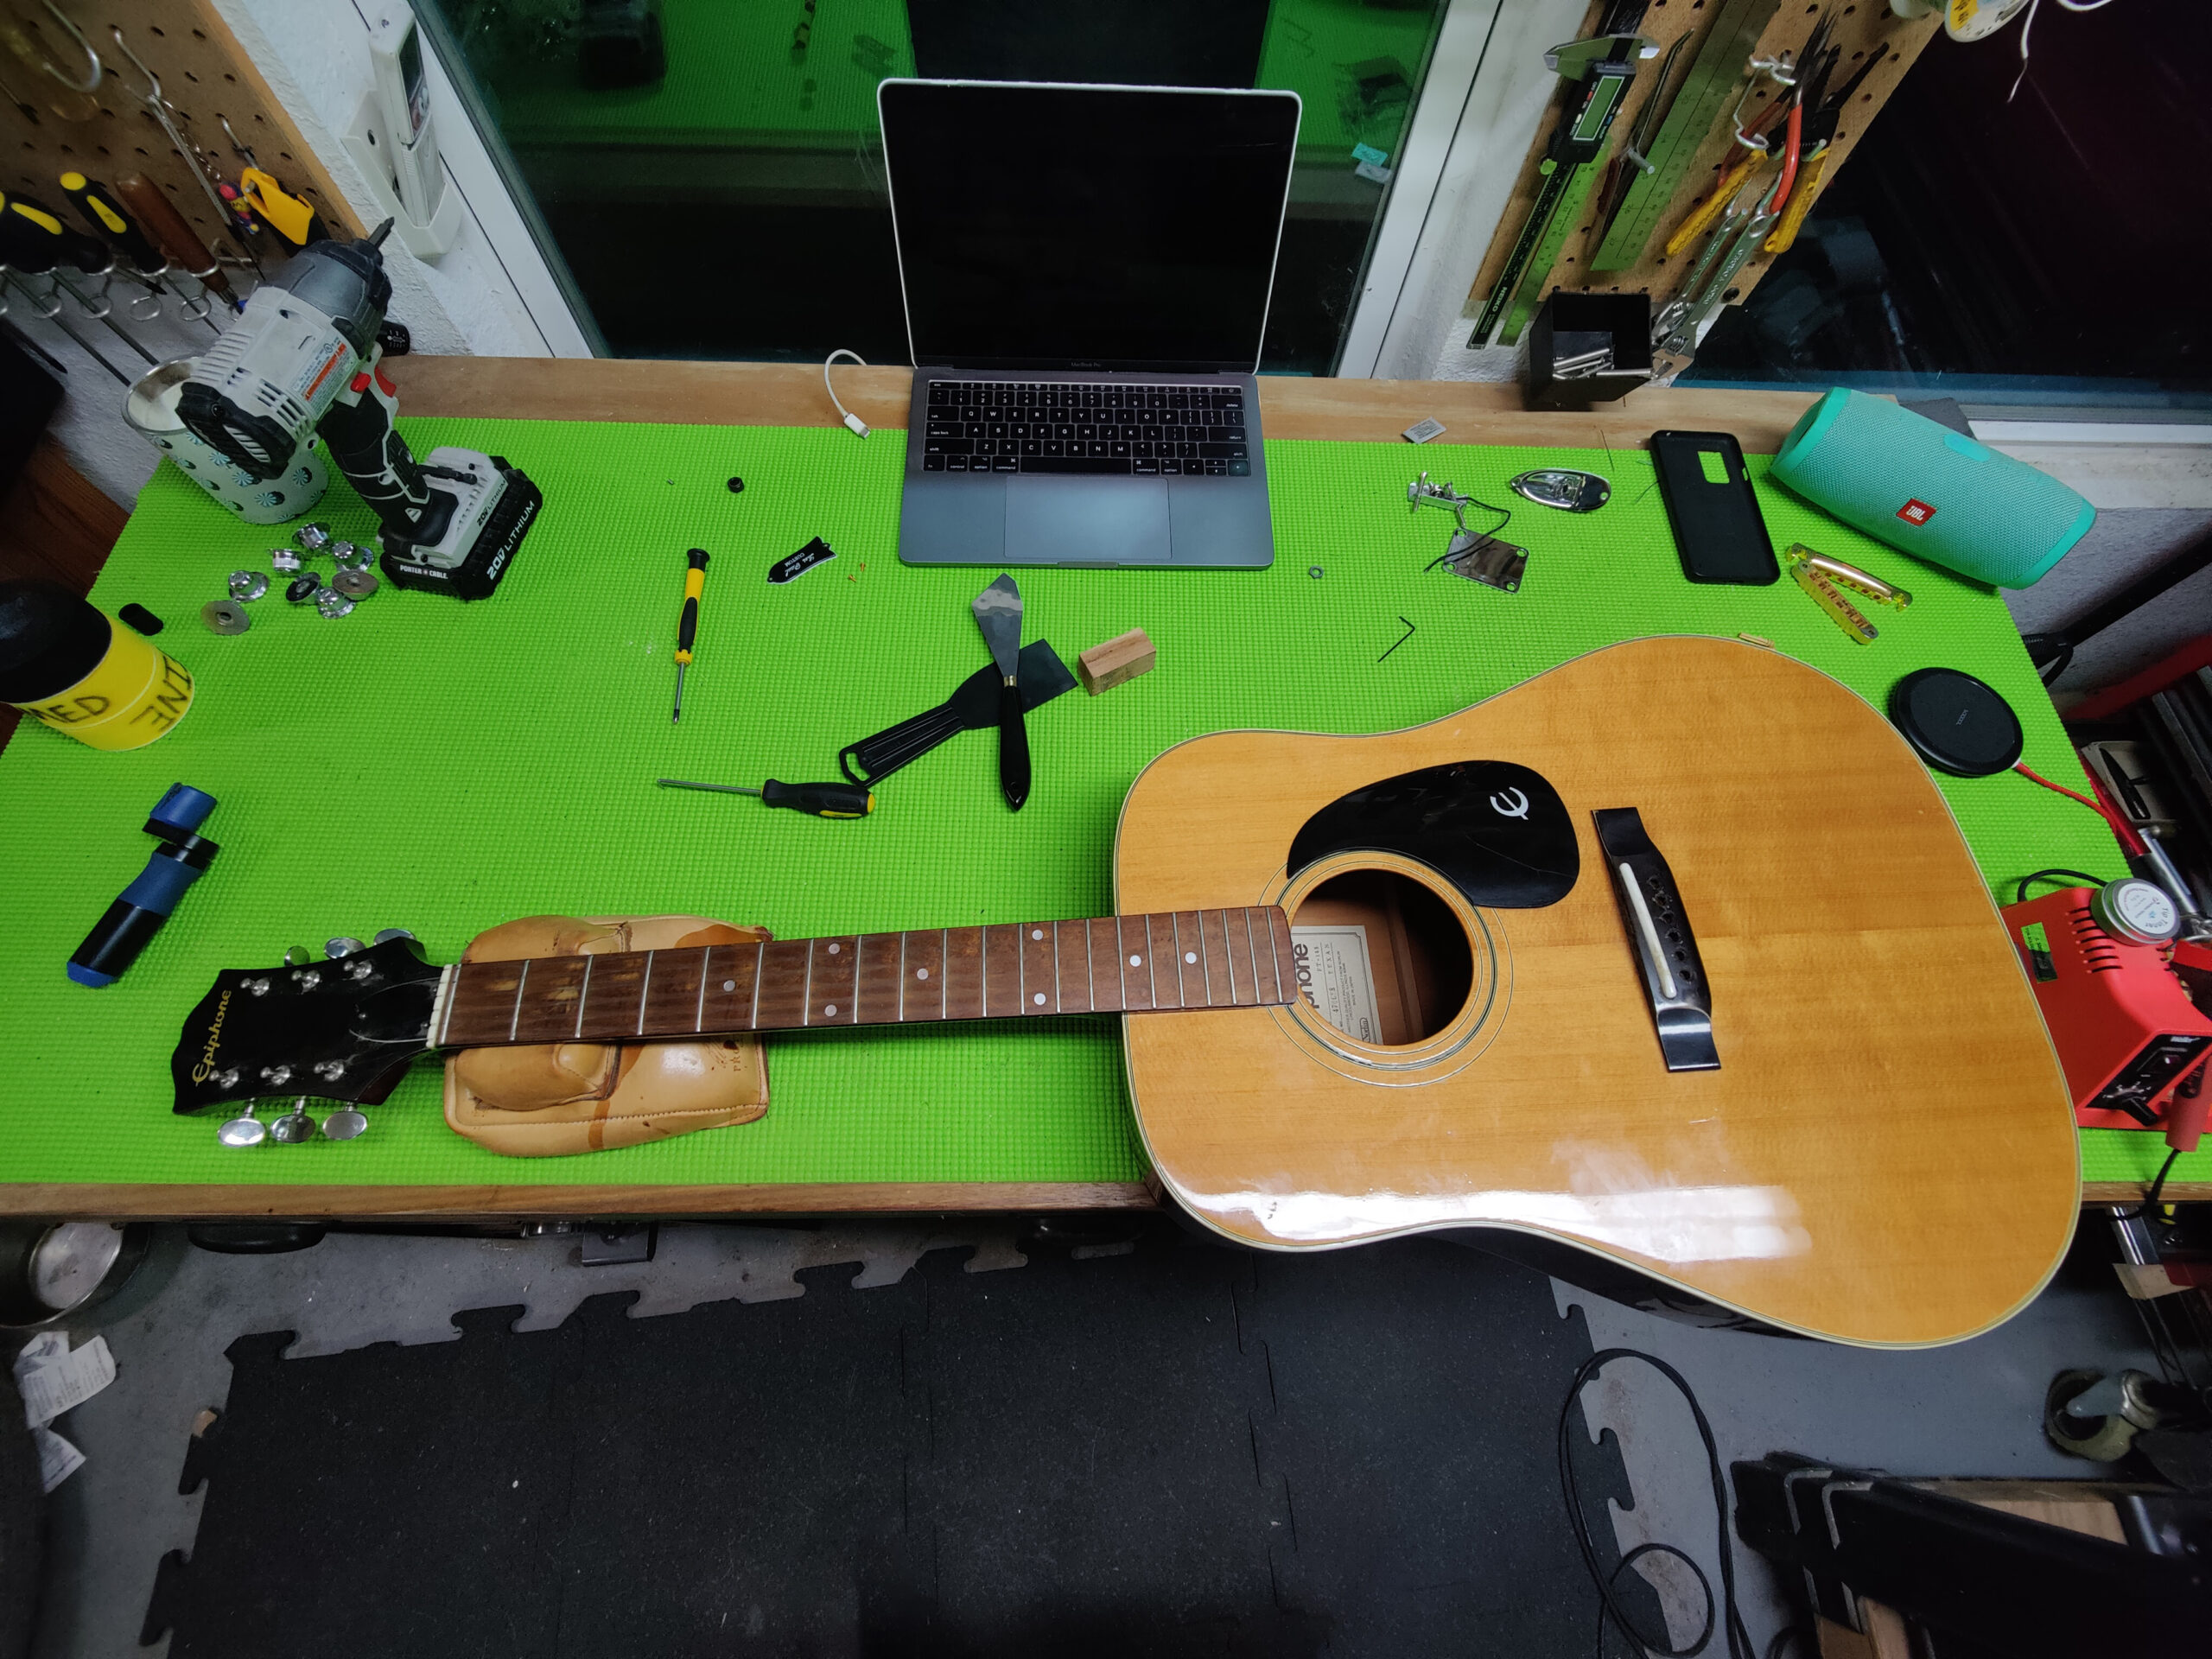
Here’s an example of a few different skillsets coming together to finish a project. All of them result from the core tenant of guitar repair: problem solving. How do you get to the desired end result with the knowledge you possess?
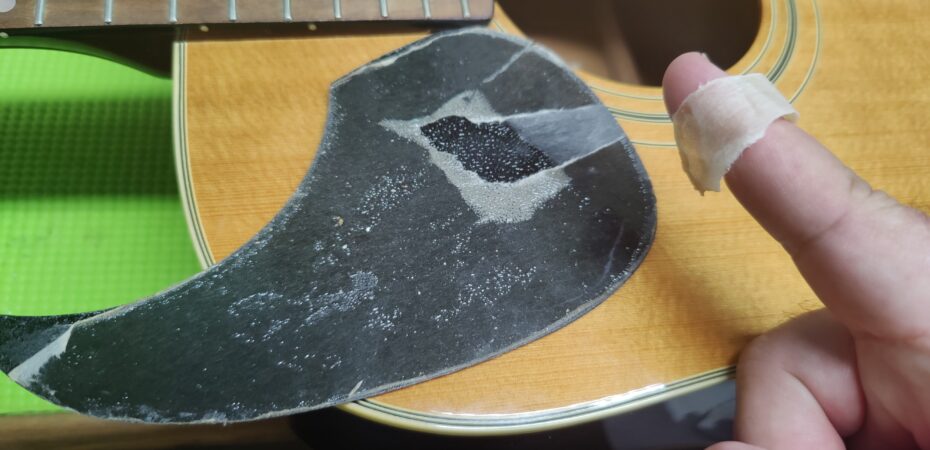
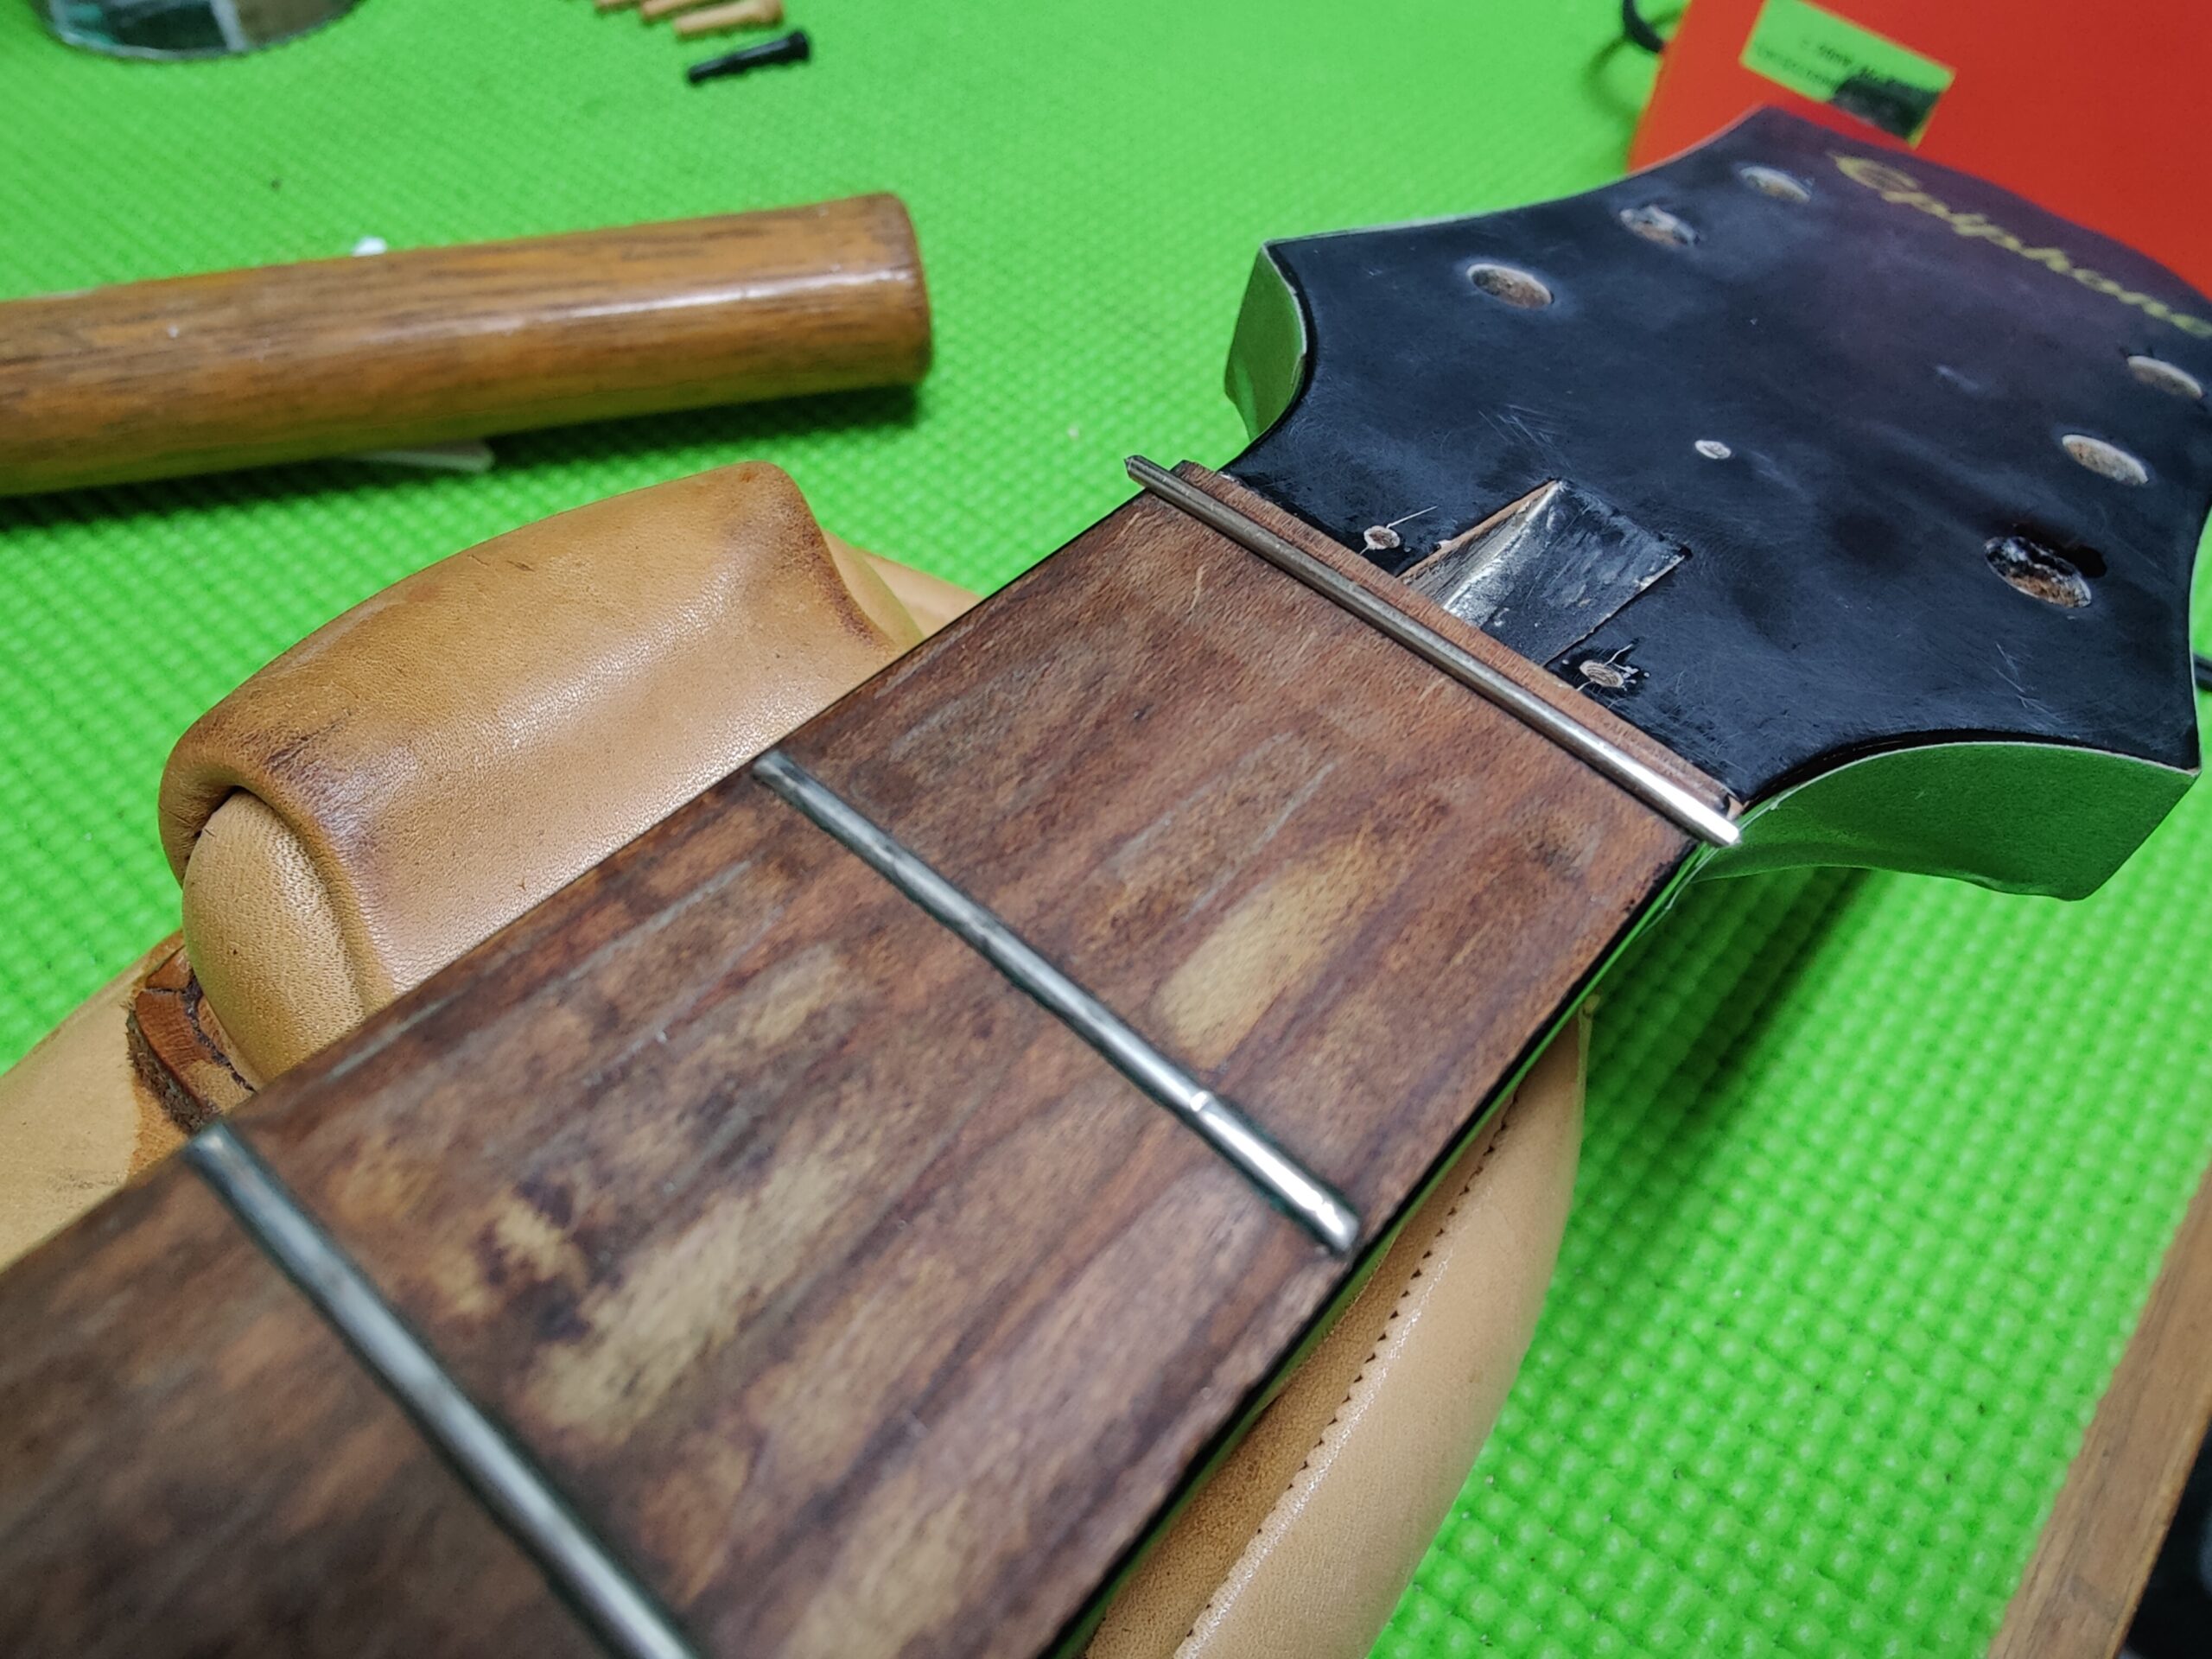
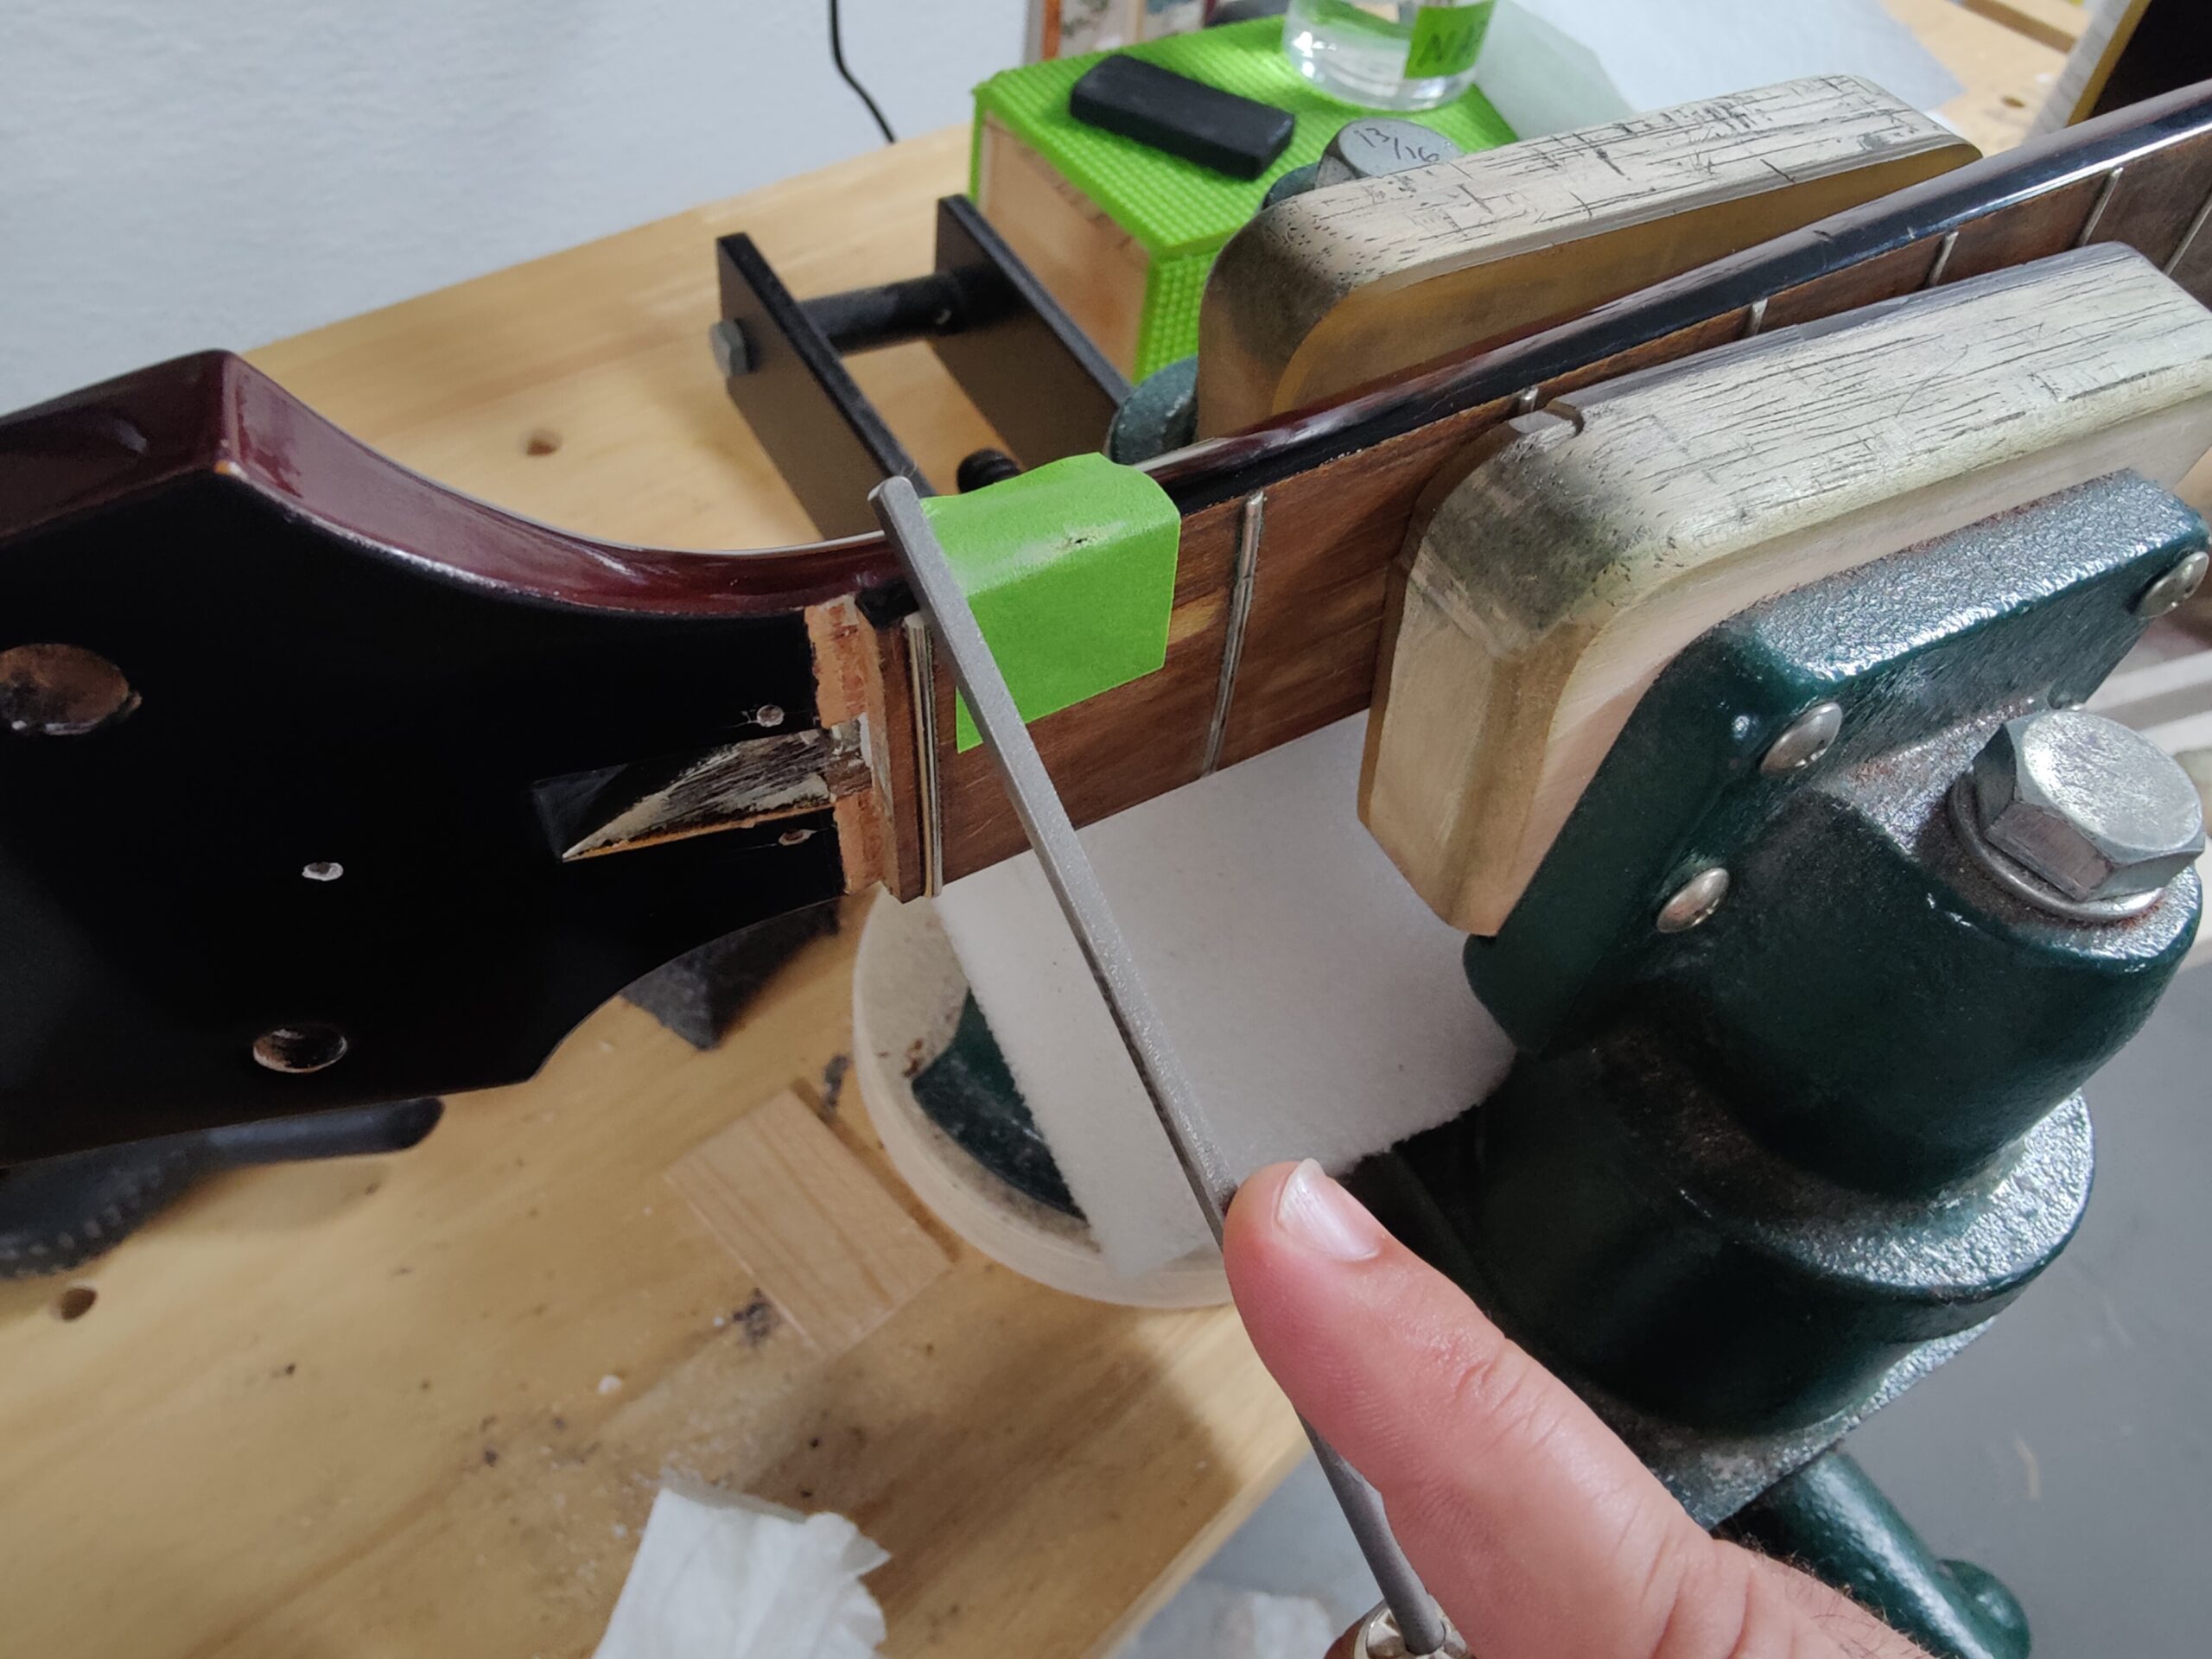
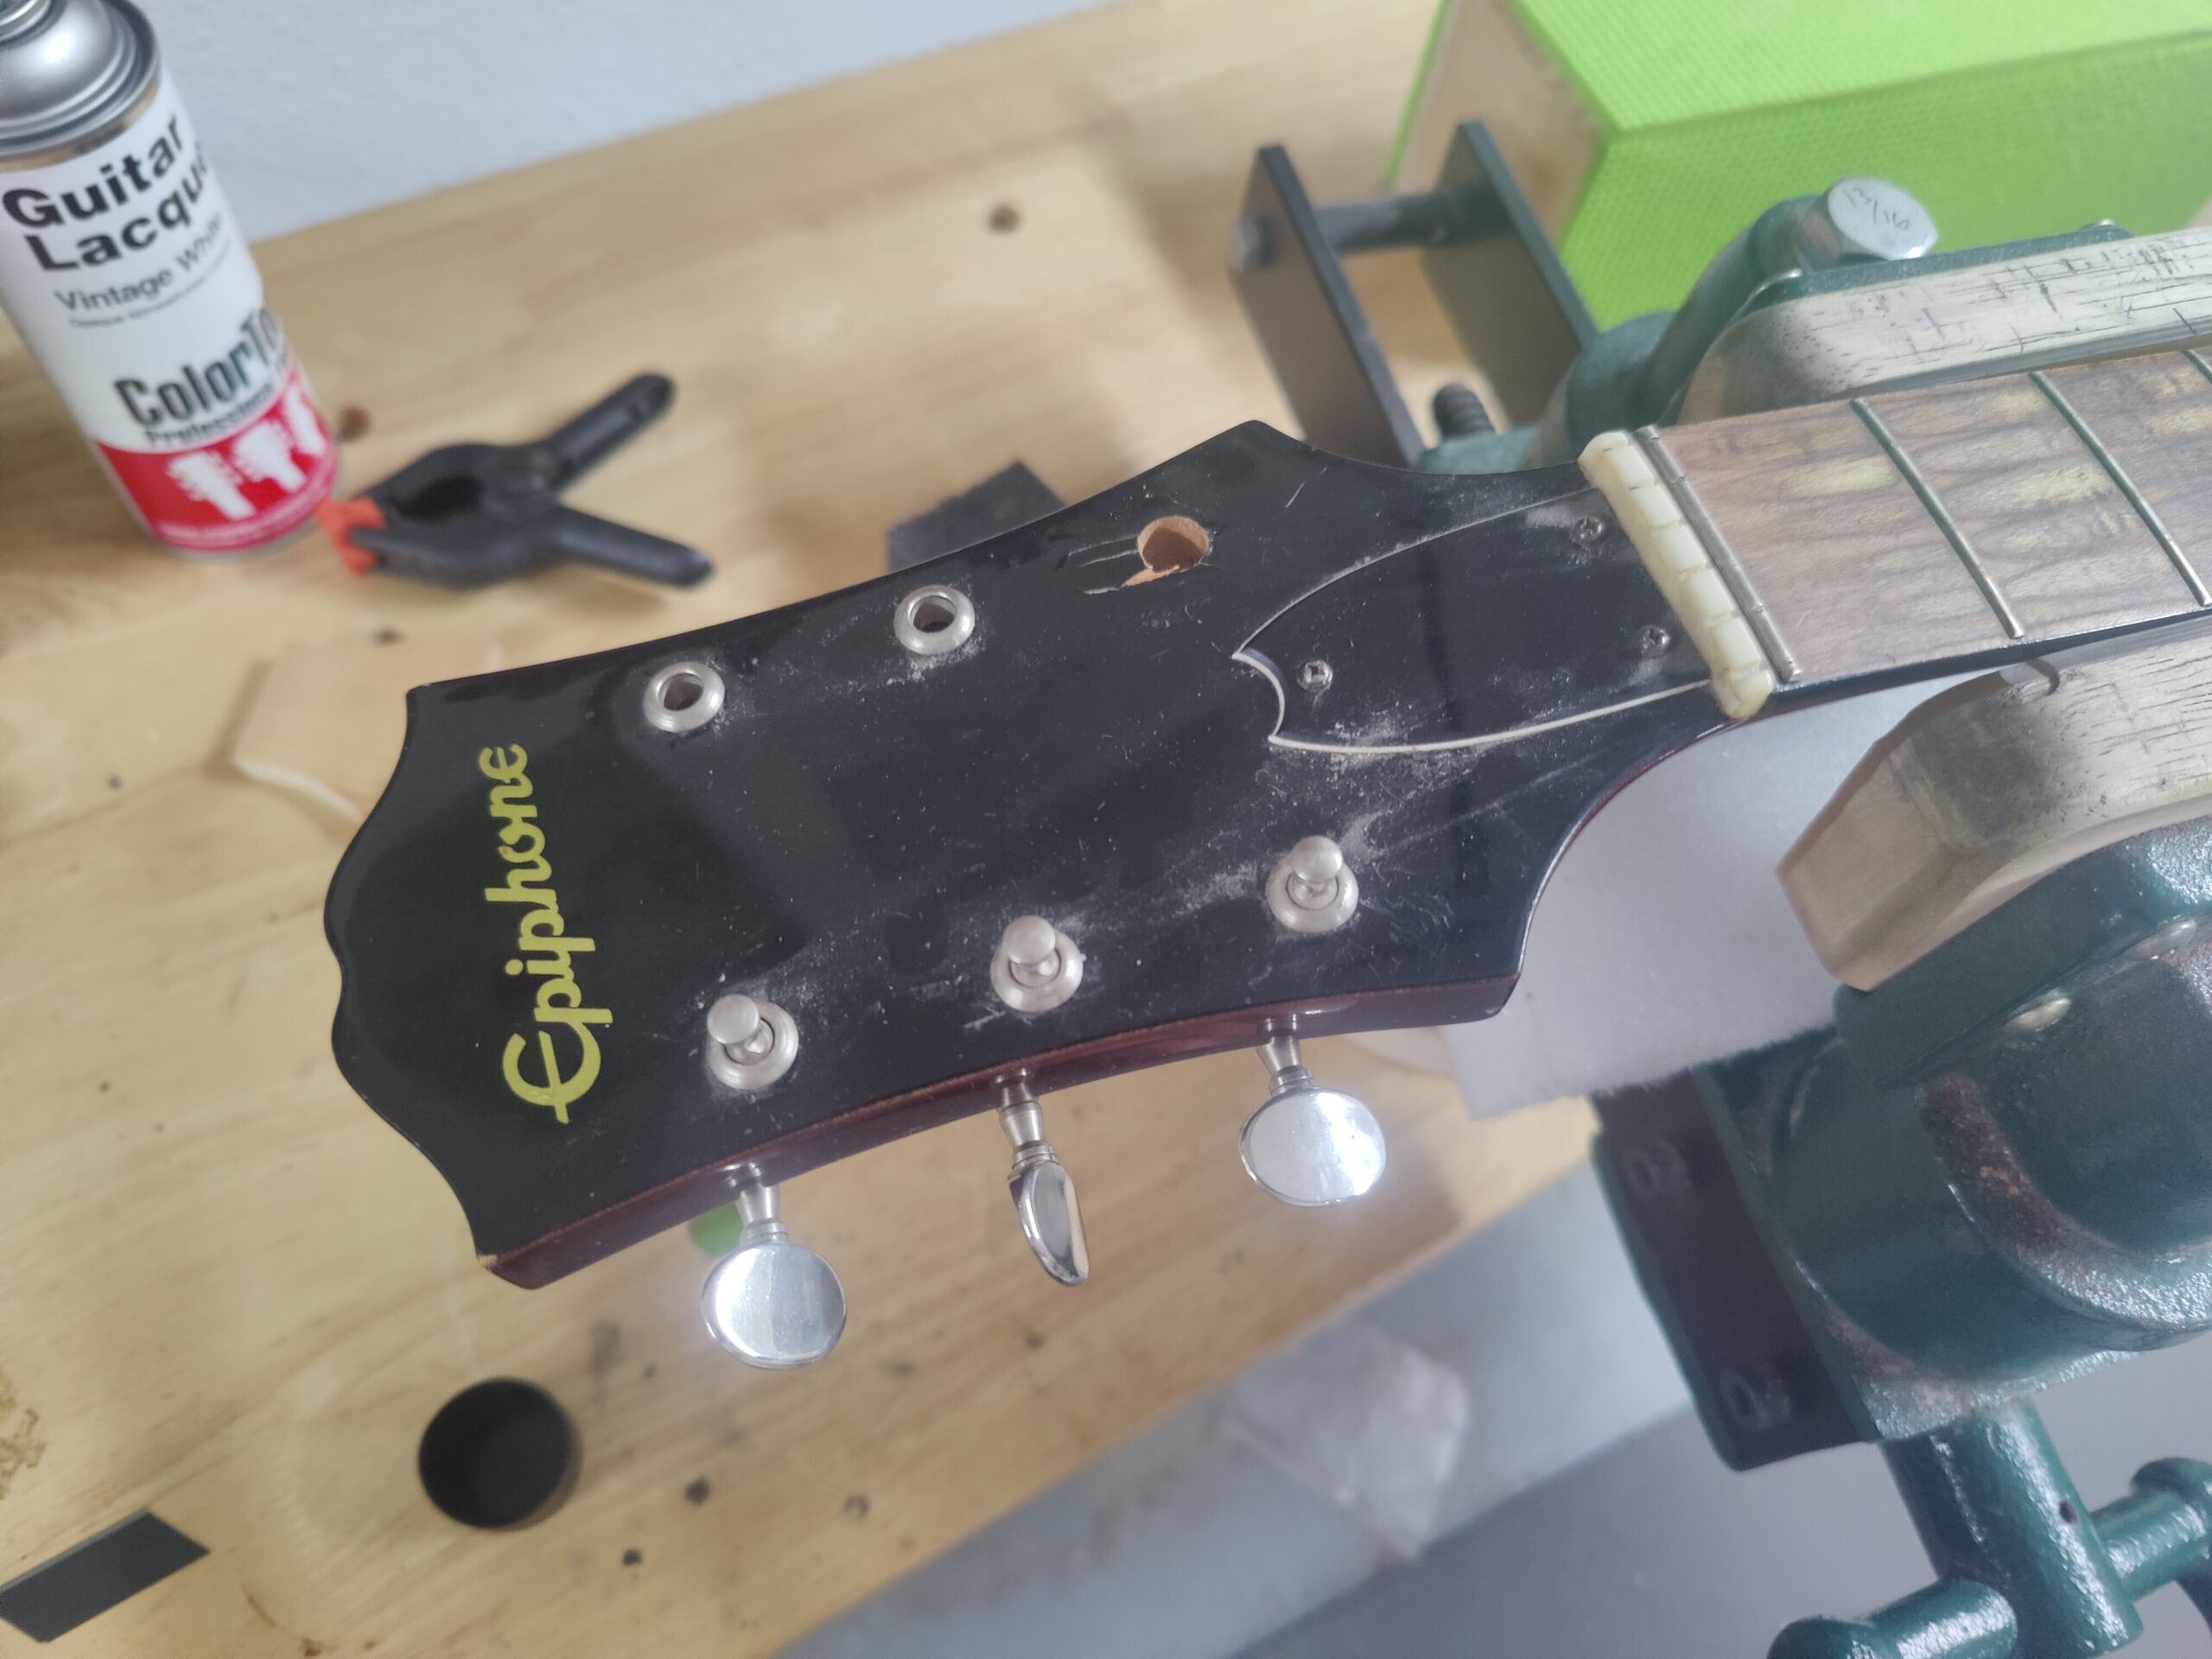
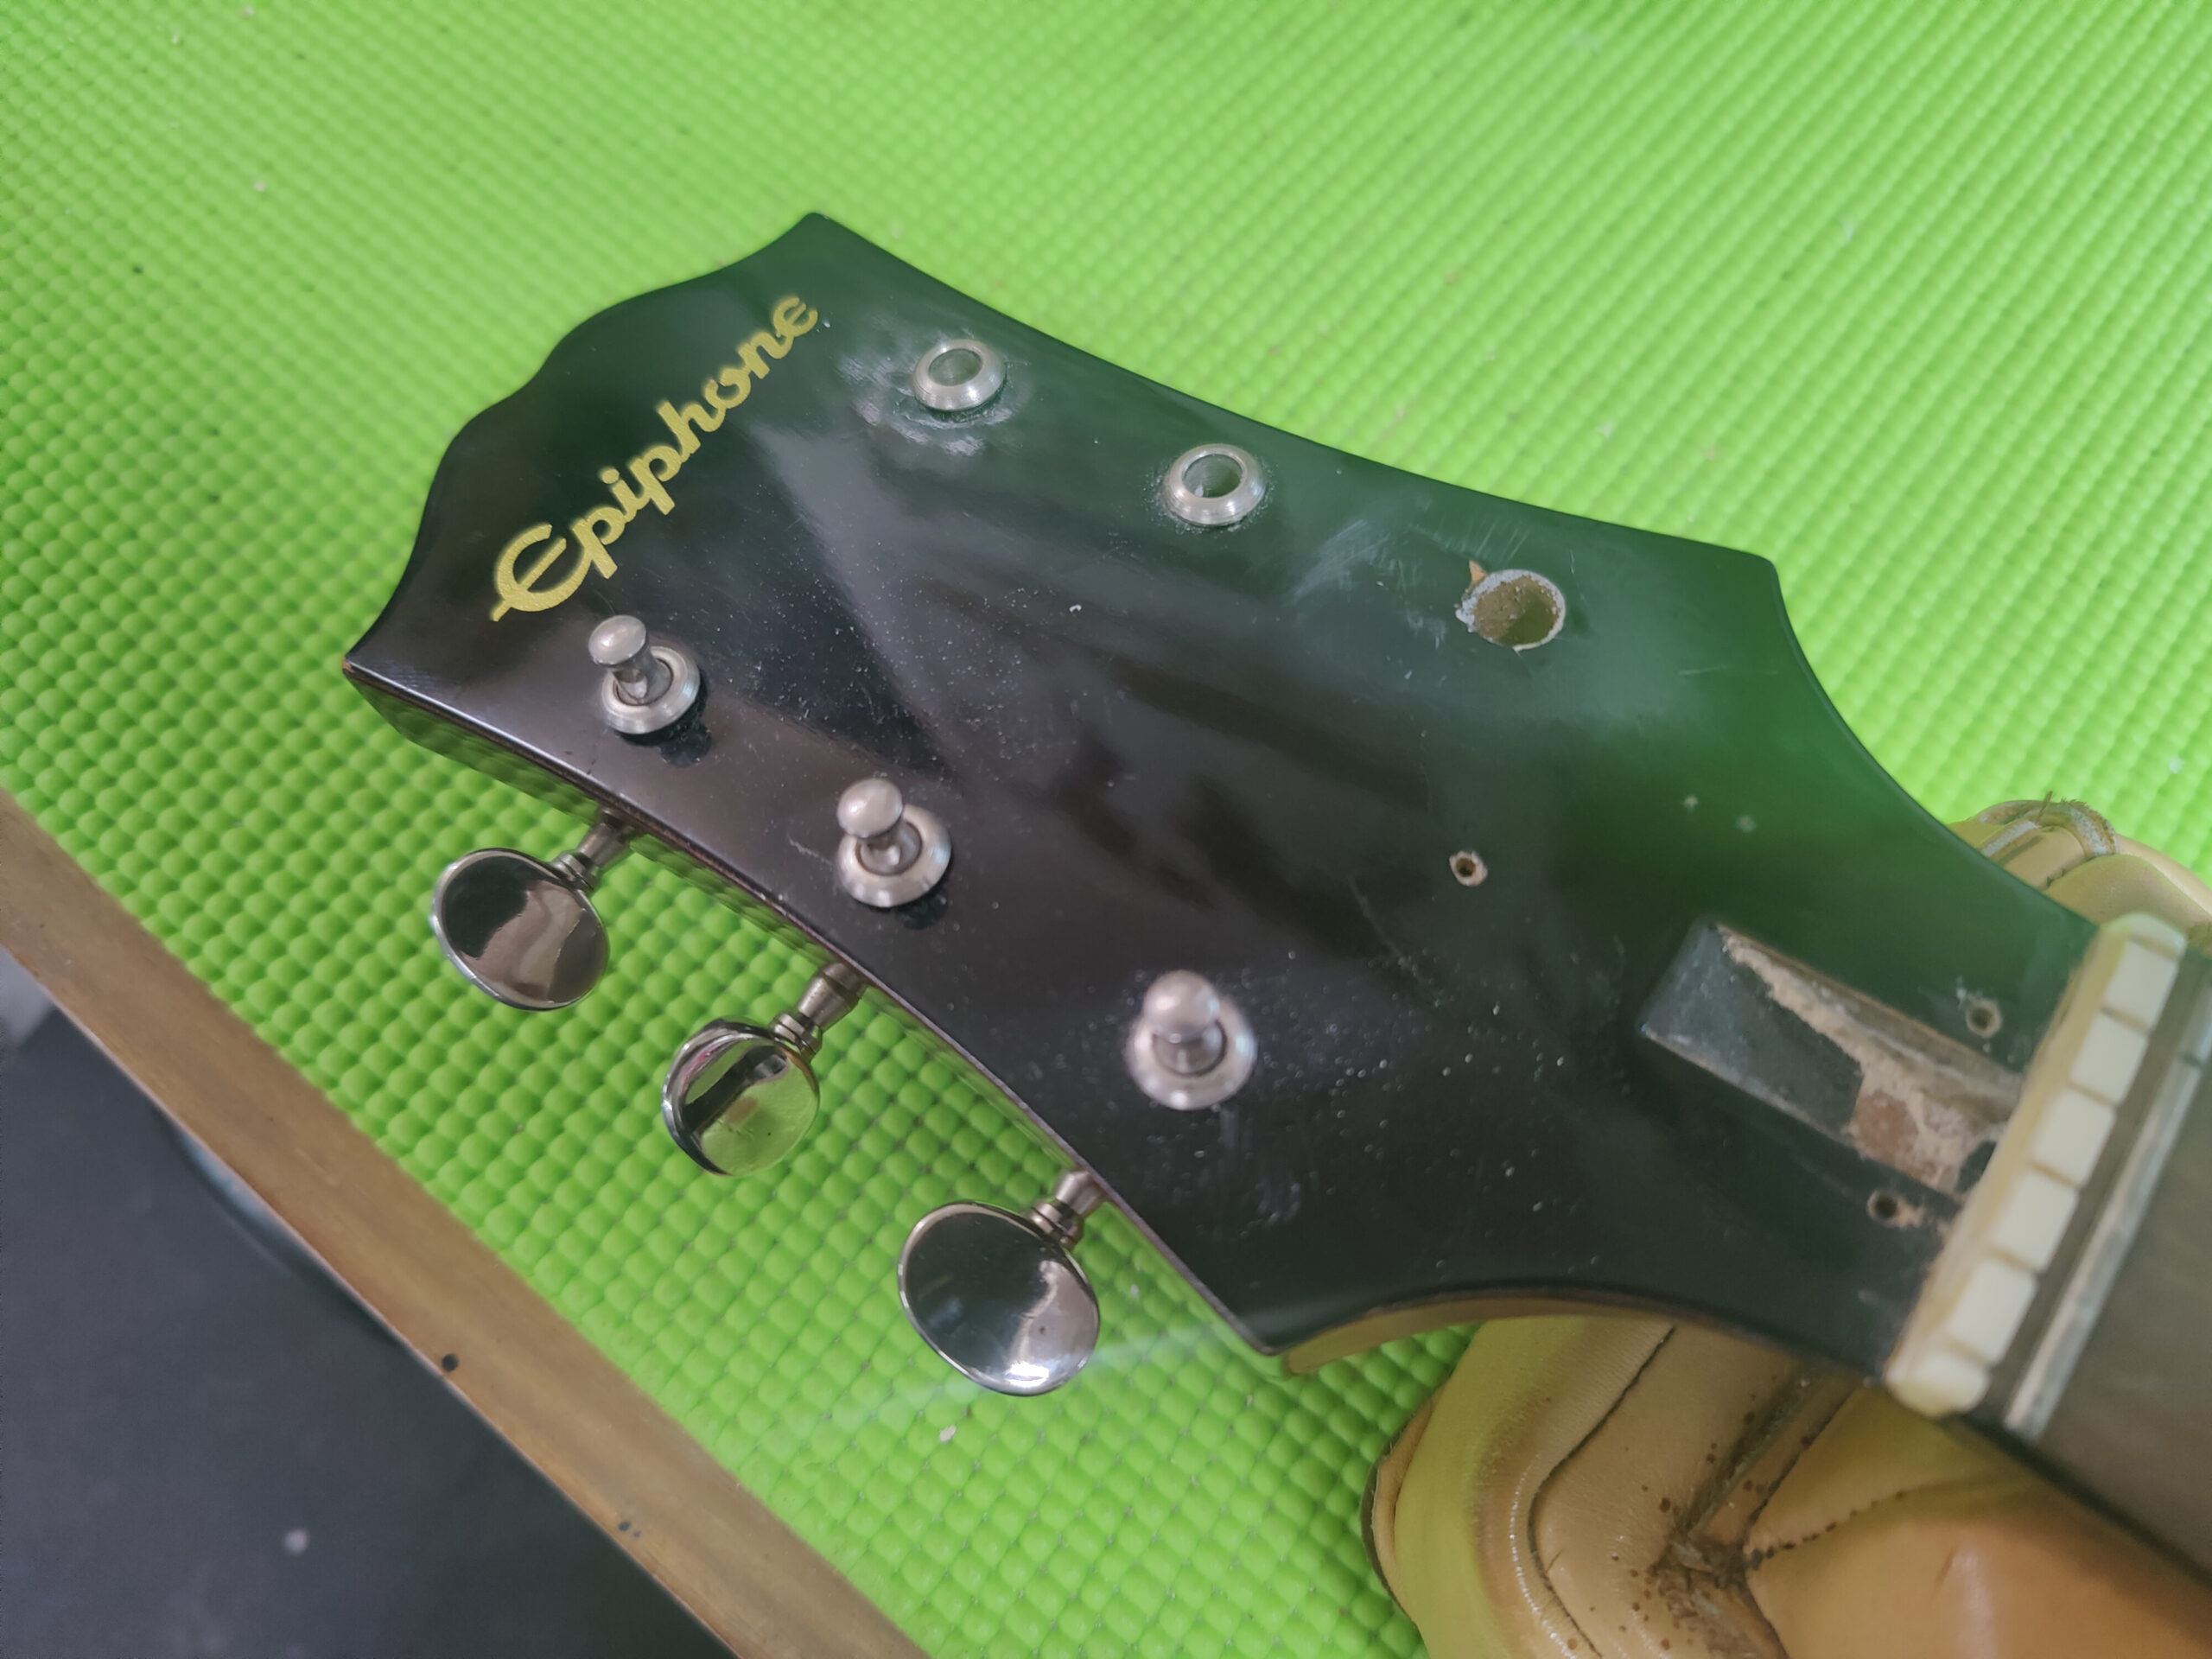
This Vintage Japanese Epiphone acoustic had several issues the owner wanted to address. The zero fret had considerable wear on the high E and B string locations. The pickguard had a crack running from one end into half way through the piece. Lastly, the headstock had some unfortunate cracks in the faceplate due to a few tuner bushings popping out and pulling fragments of wood up along with them.
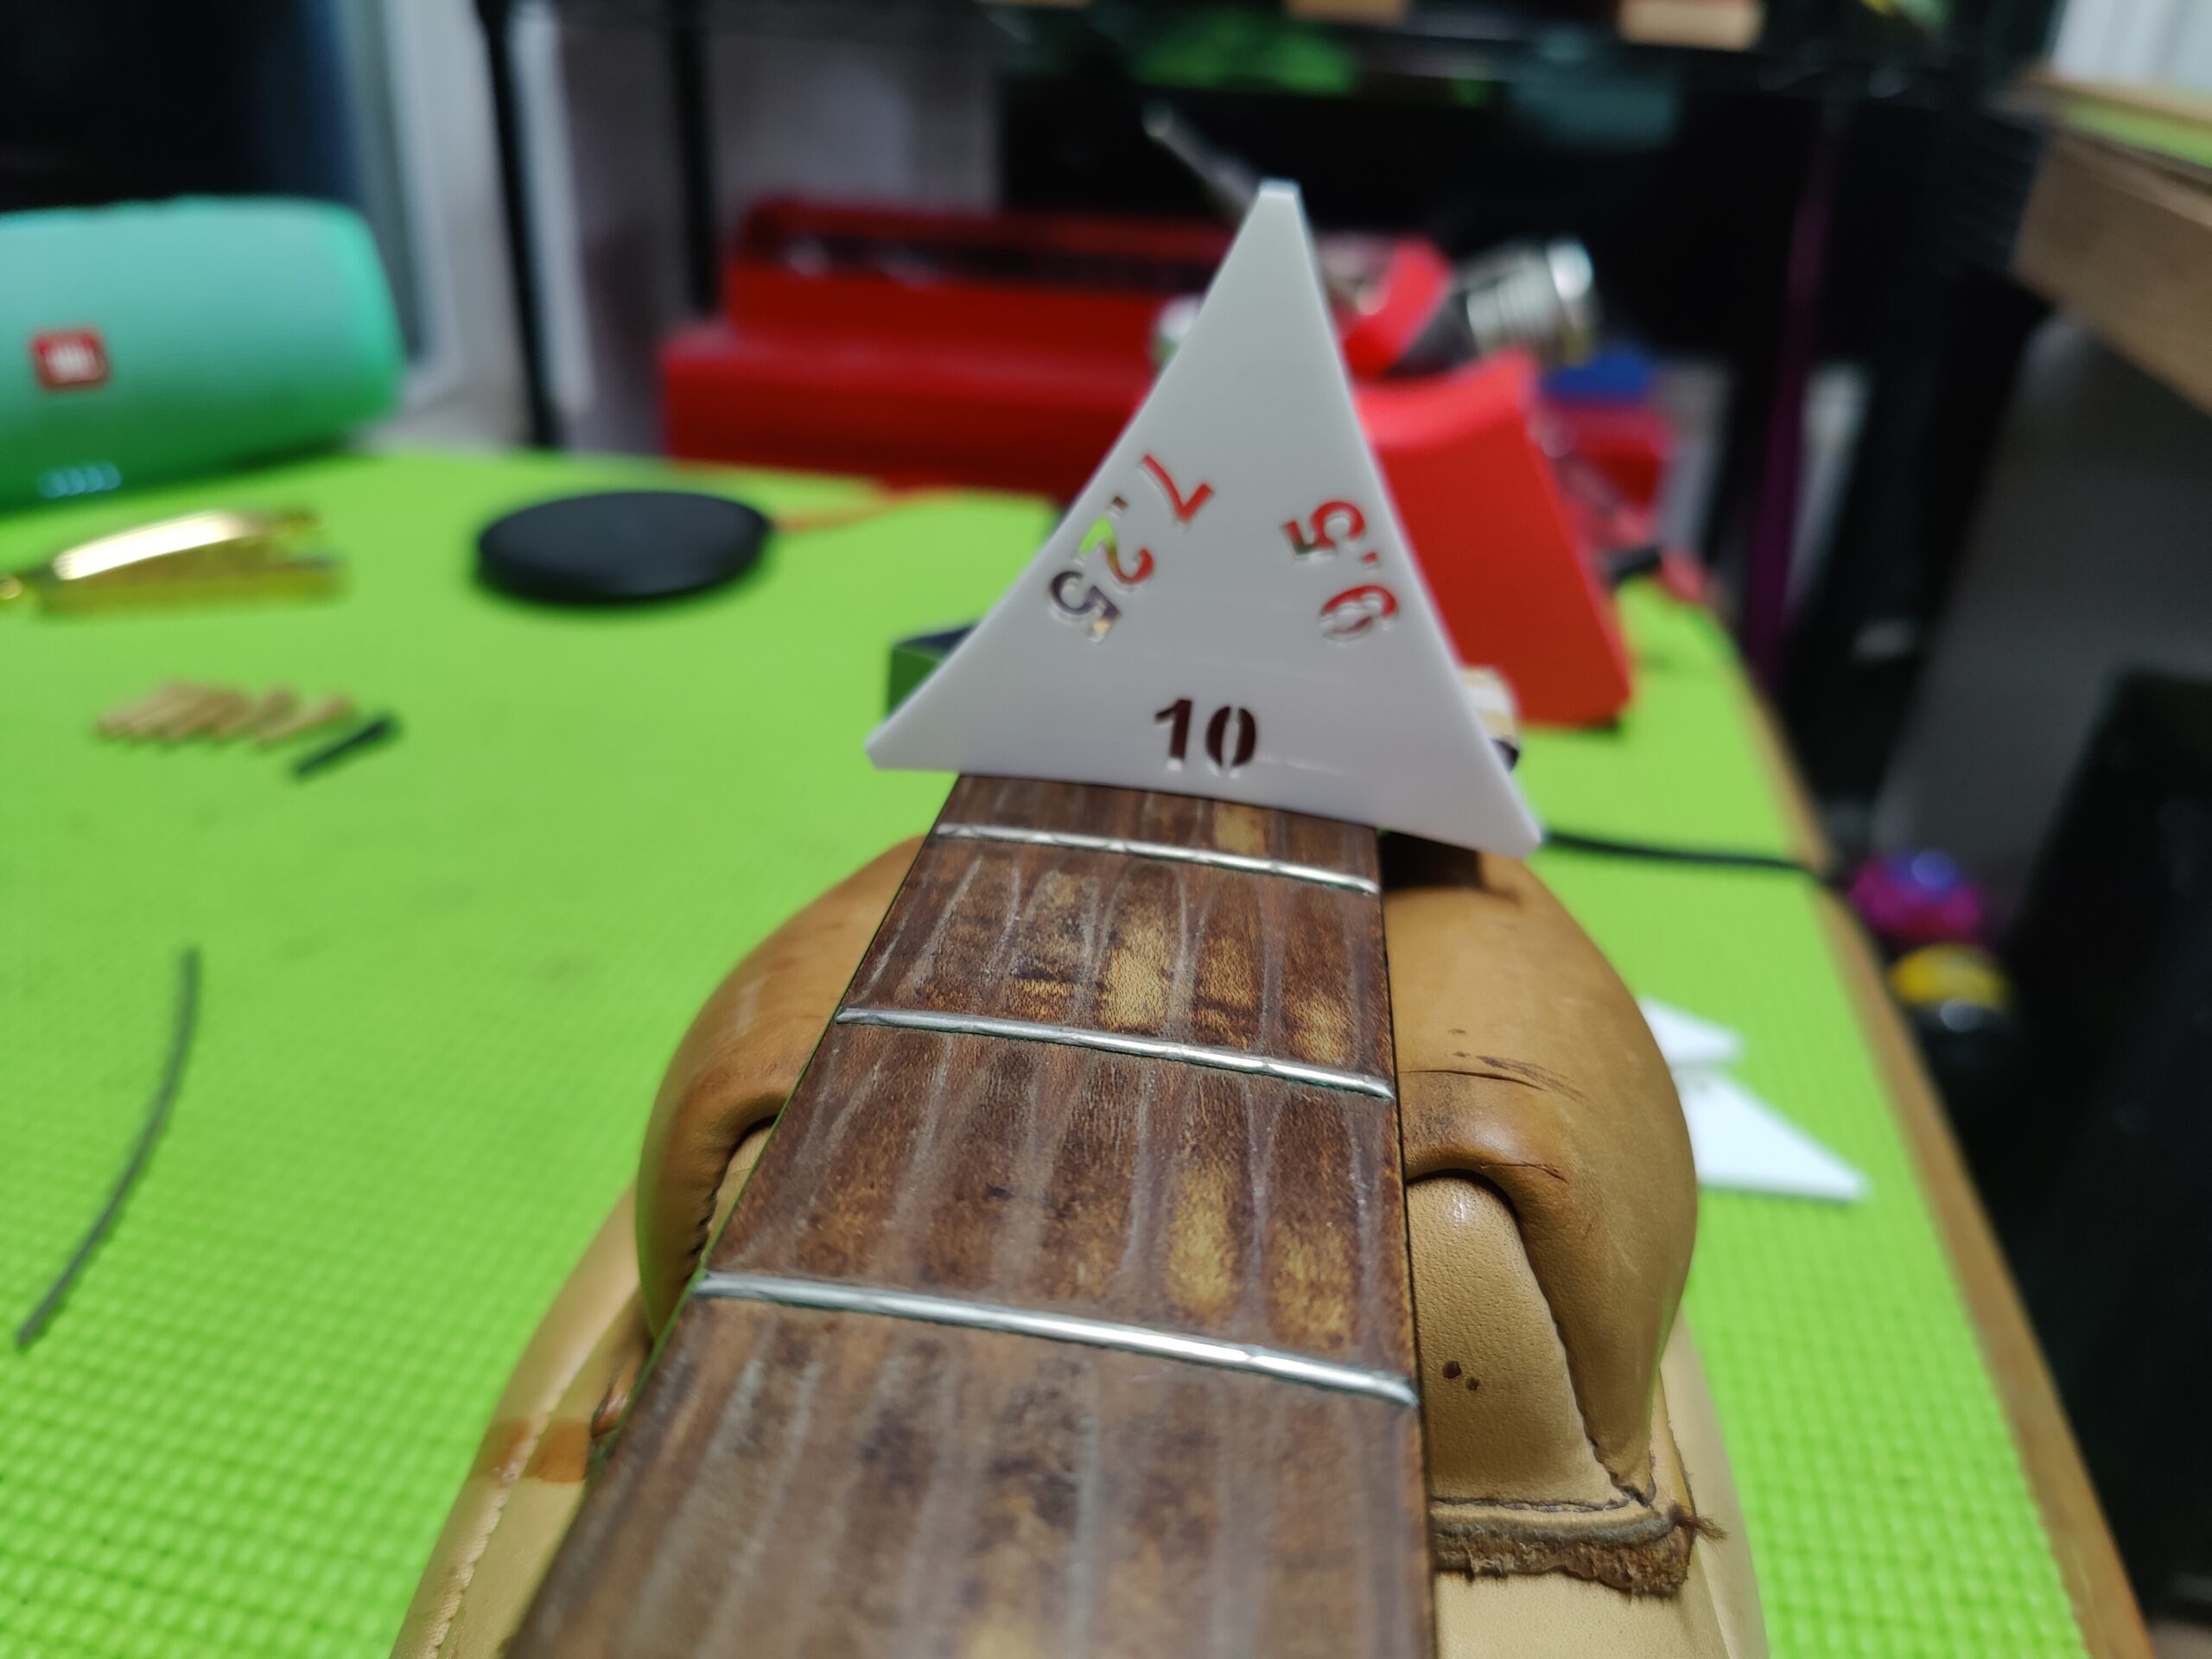
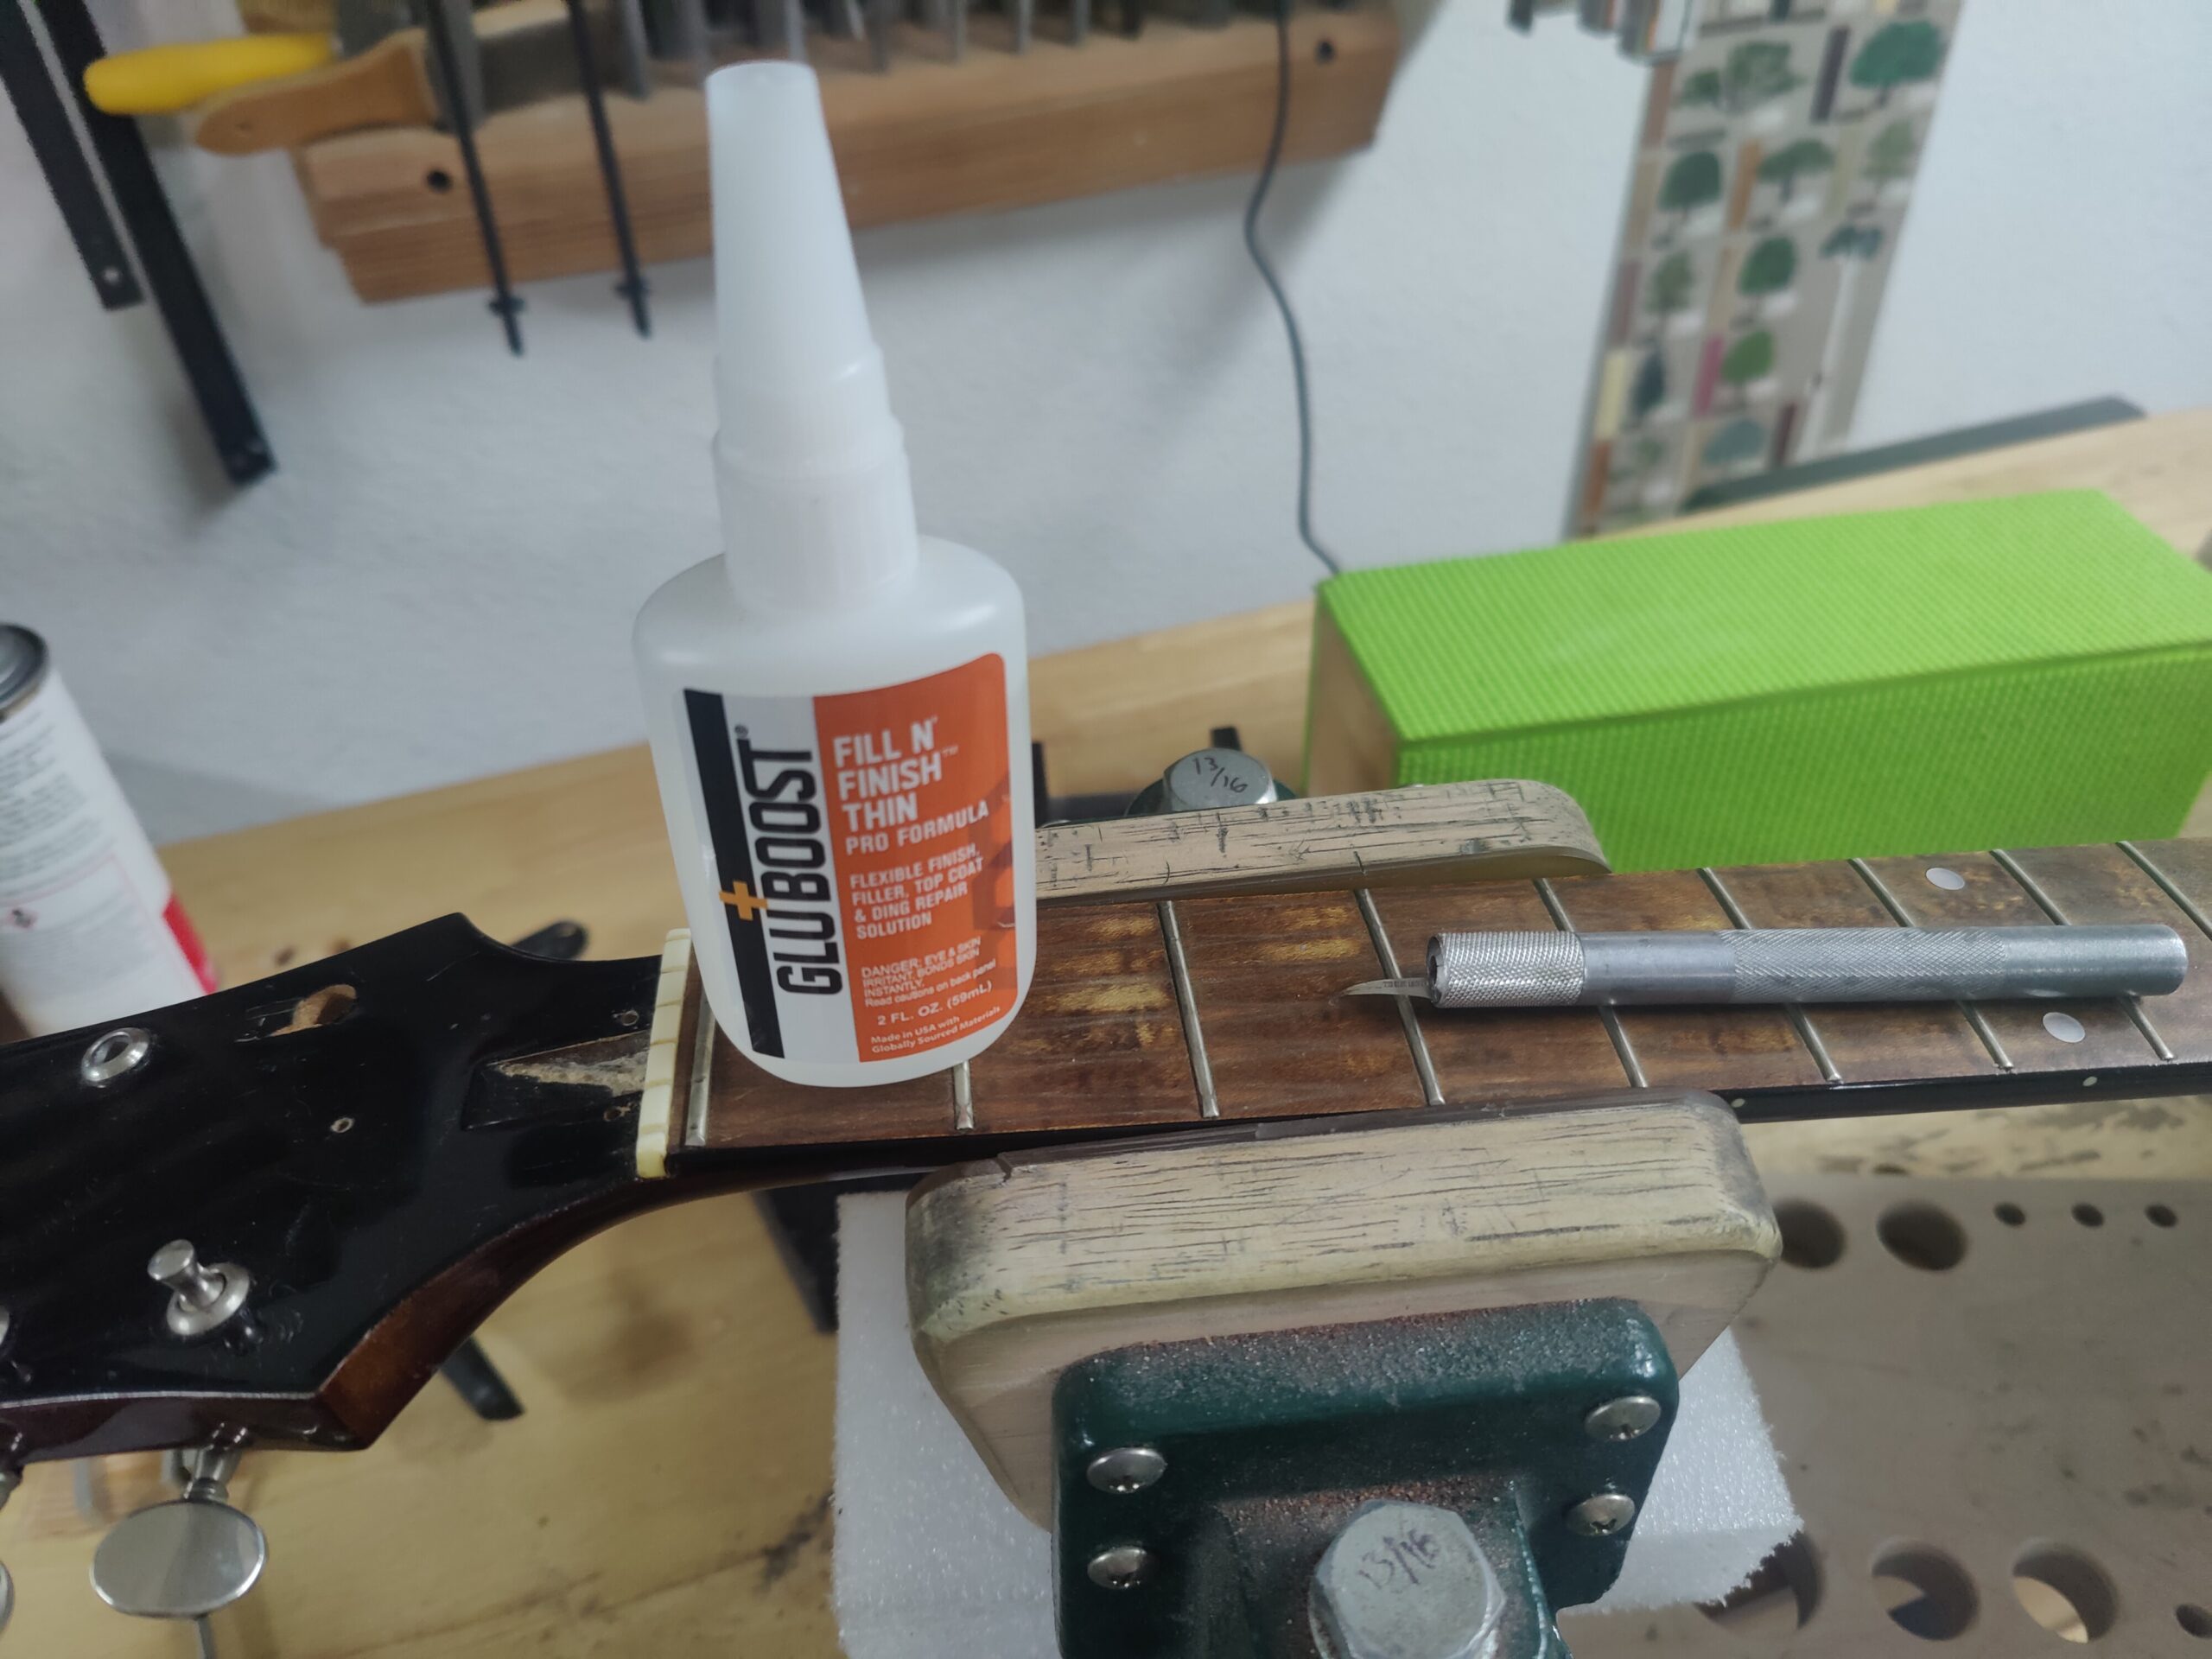
To get started, I heated up a soldering iron and applied the hot tip on the zero fret to soften the wood below and any old glue residue. Using a fret pulling tool, I gently rocked it back and forth from one end until the fret began to lift. I moved the jaws of the tool over 1/4″ and repeated the process until the fret pulled free with no chip out. I then measured the radius and selected a length of fret wire, bent it accordingly and installed to the fretboard. A little bit of fret end filing and it was ready to rock.
 |
 |
 |
 |
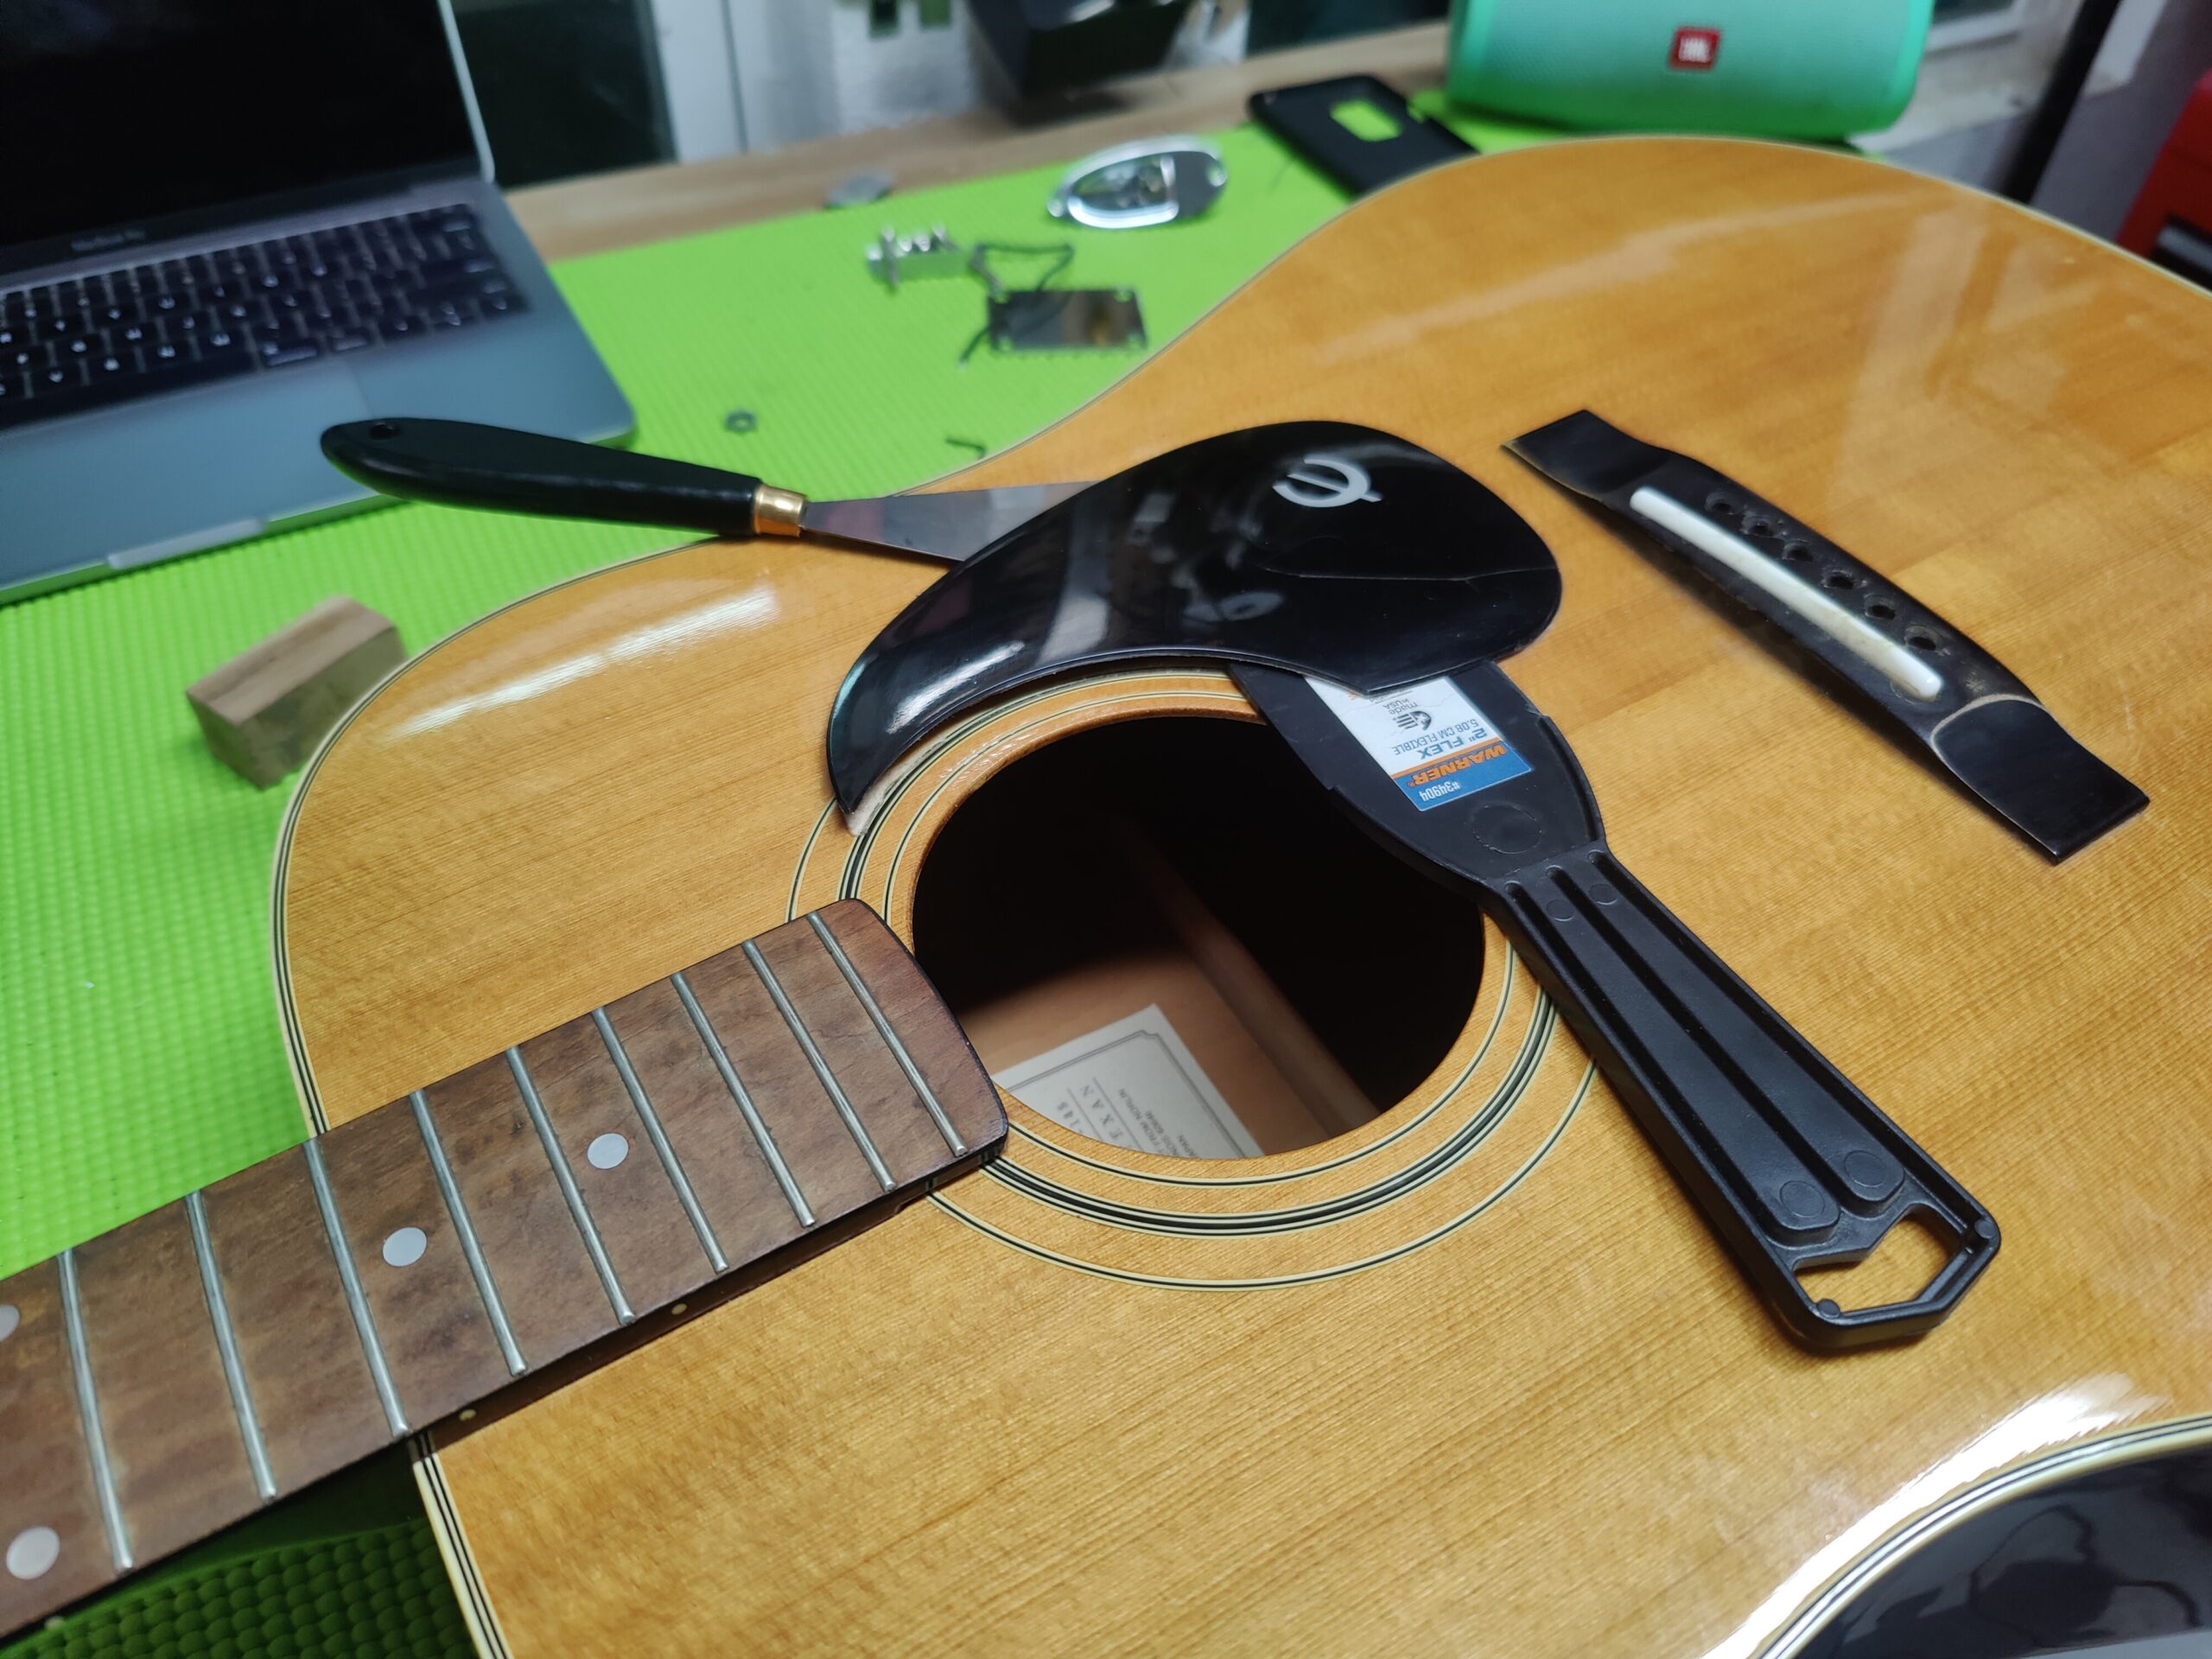
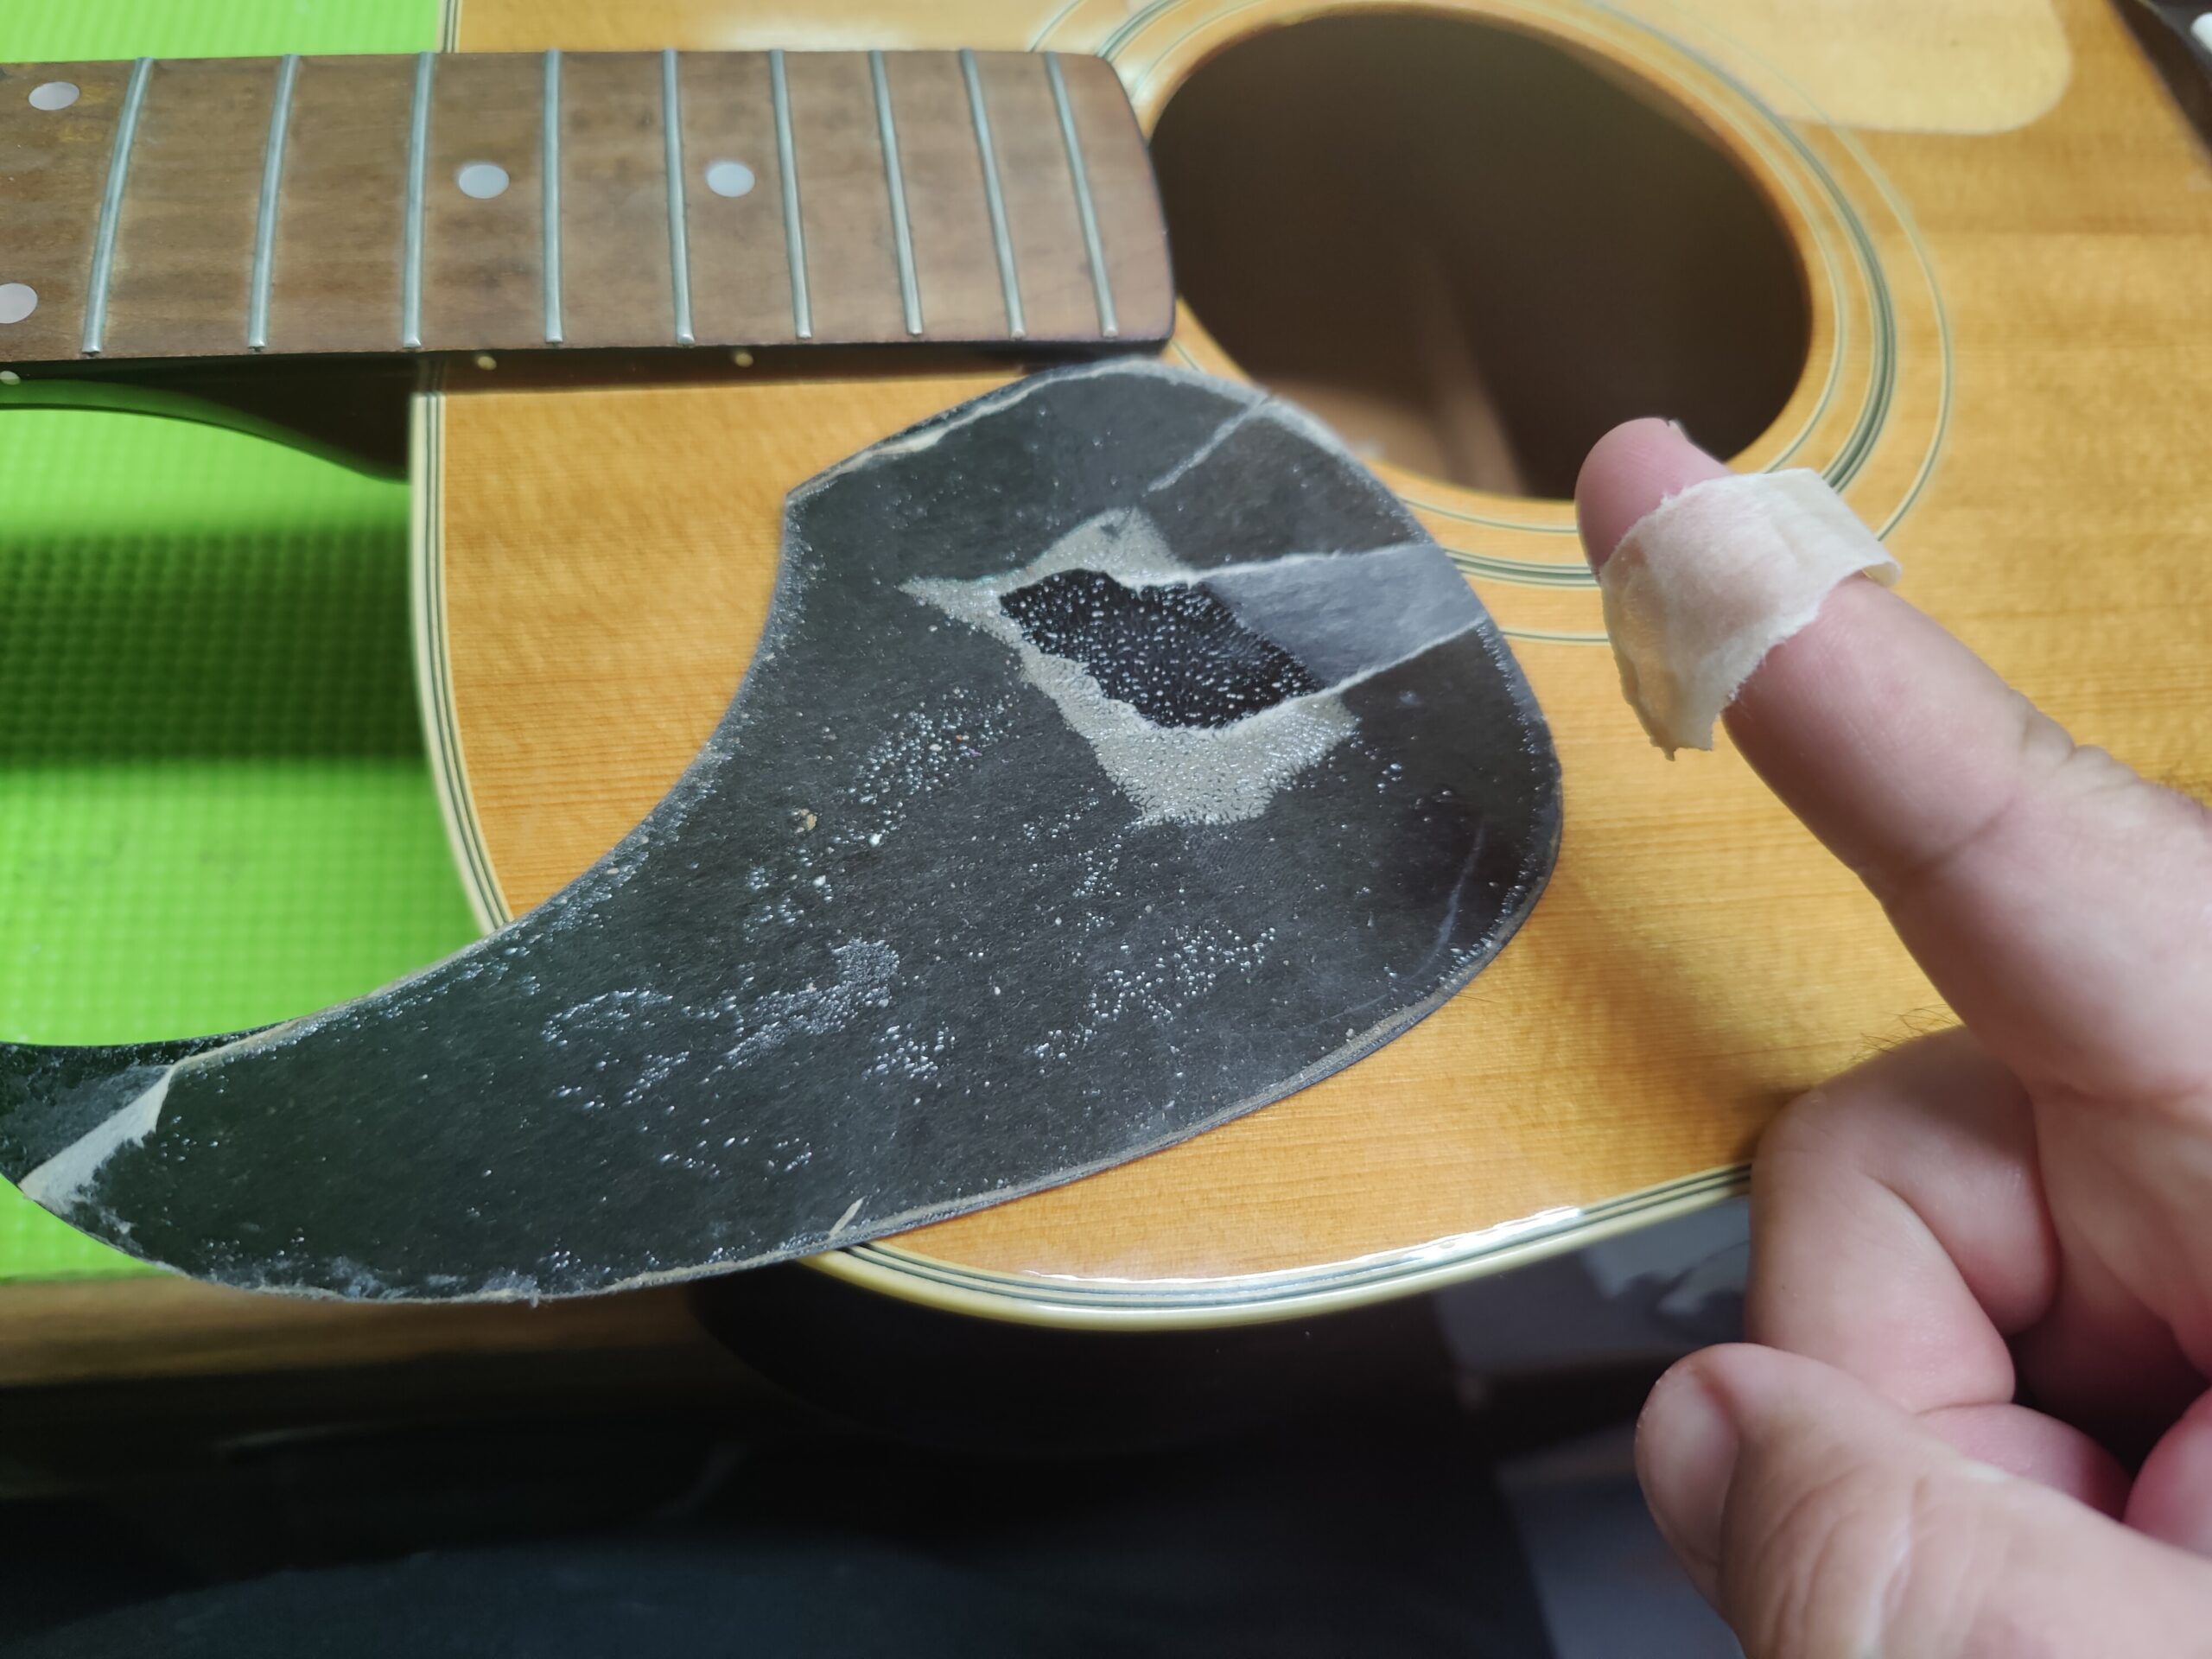
Next, it was time to address this cracked pickguard. A combination of the middle curve lifting and the crack was causing an odd vibration every time a string was plucked. I offered the customer to trace and cut out a new pickguard, I offered to track down one on the internet and swap out but they were uninterested and asked if I could just get the existing one back down against the body.
 |
 |
 |
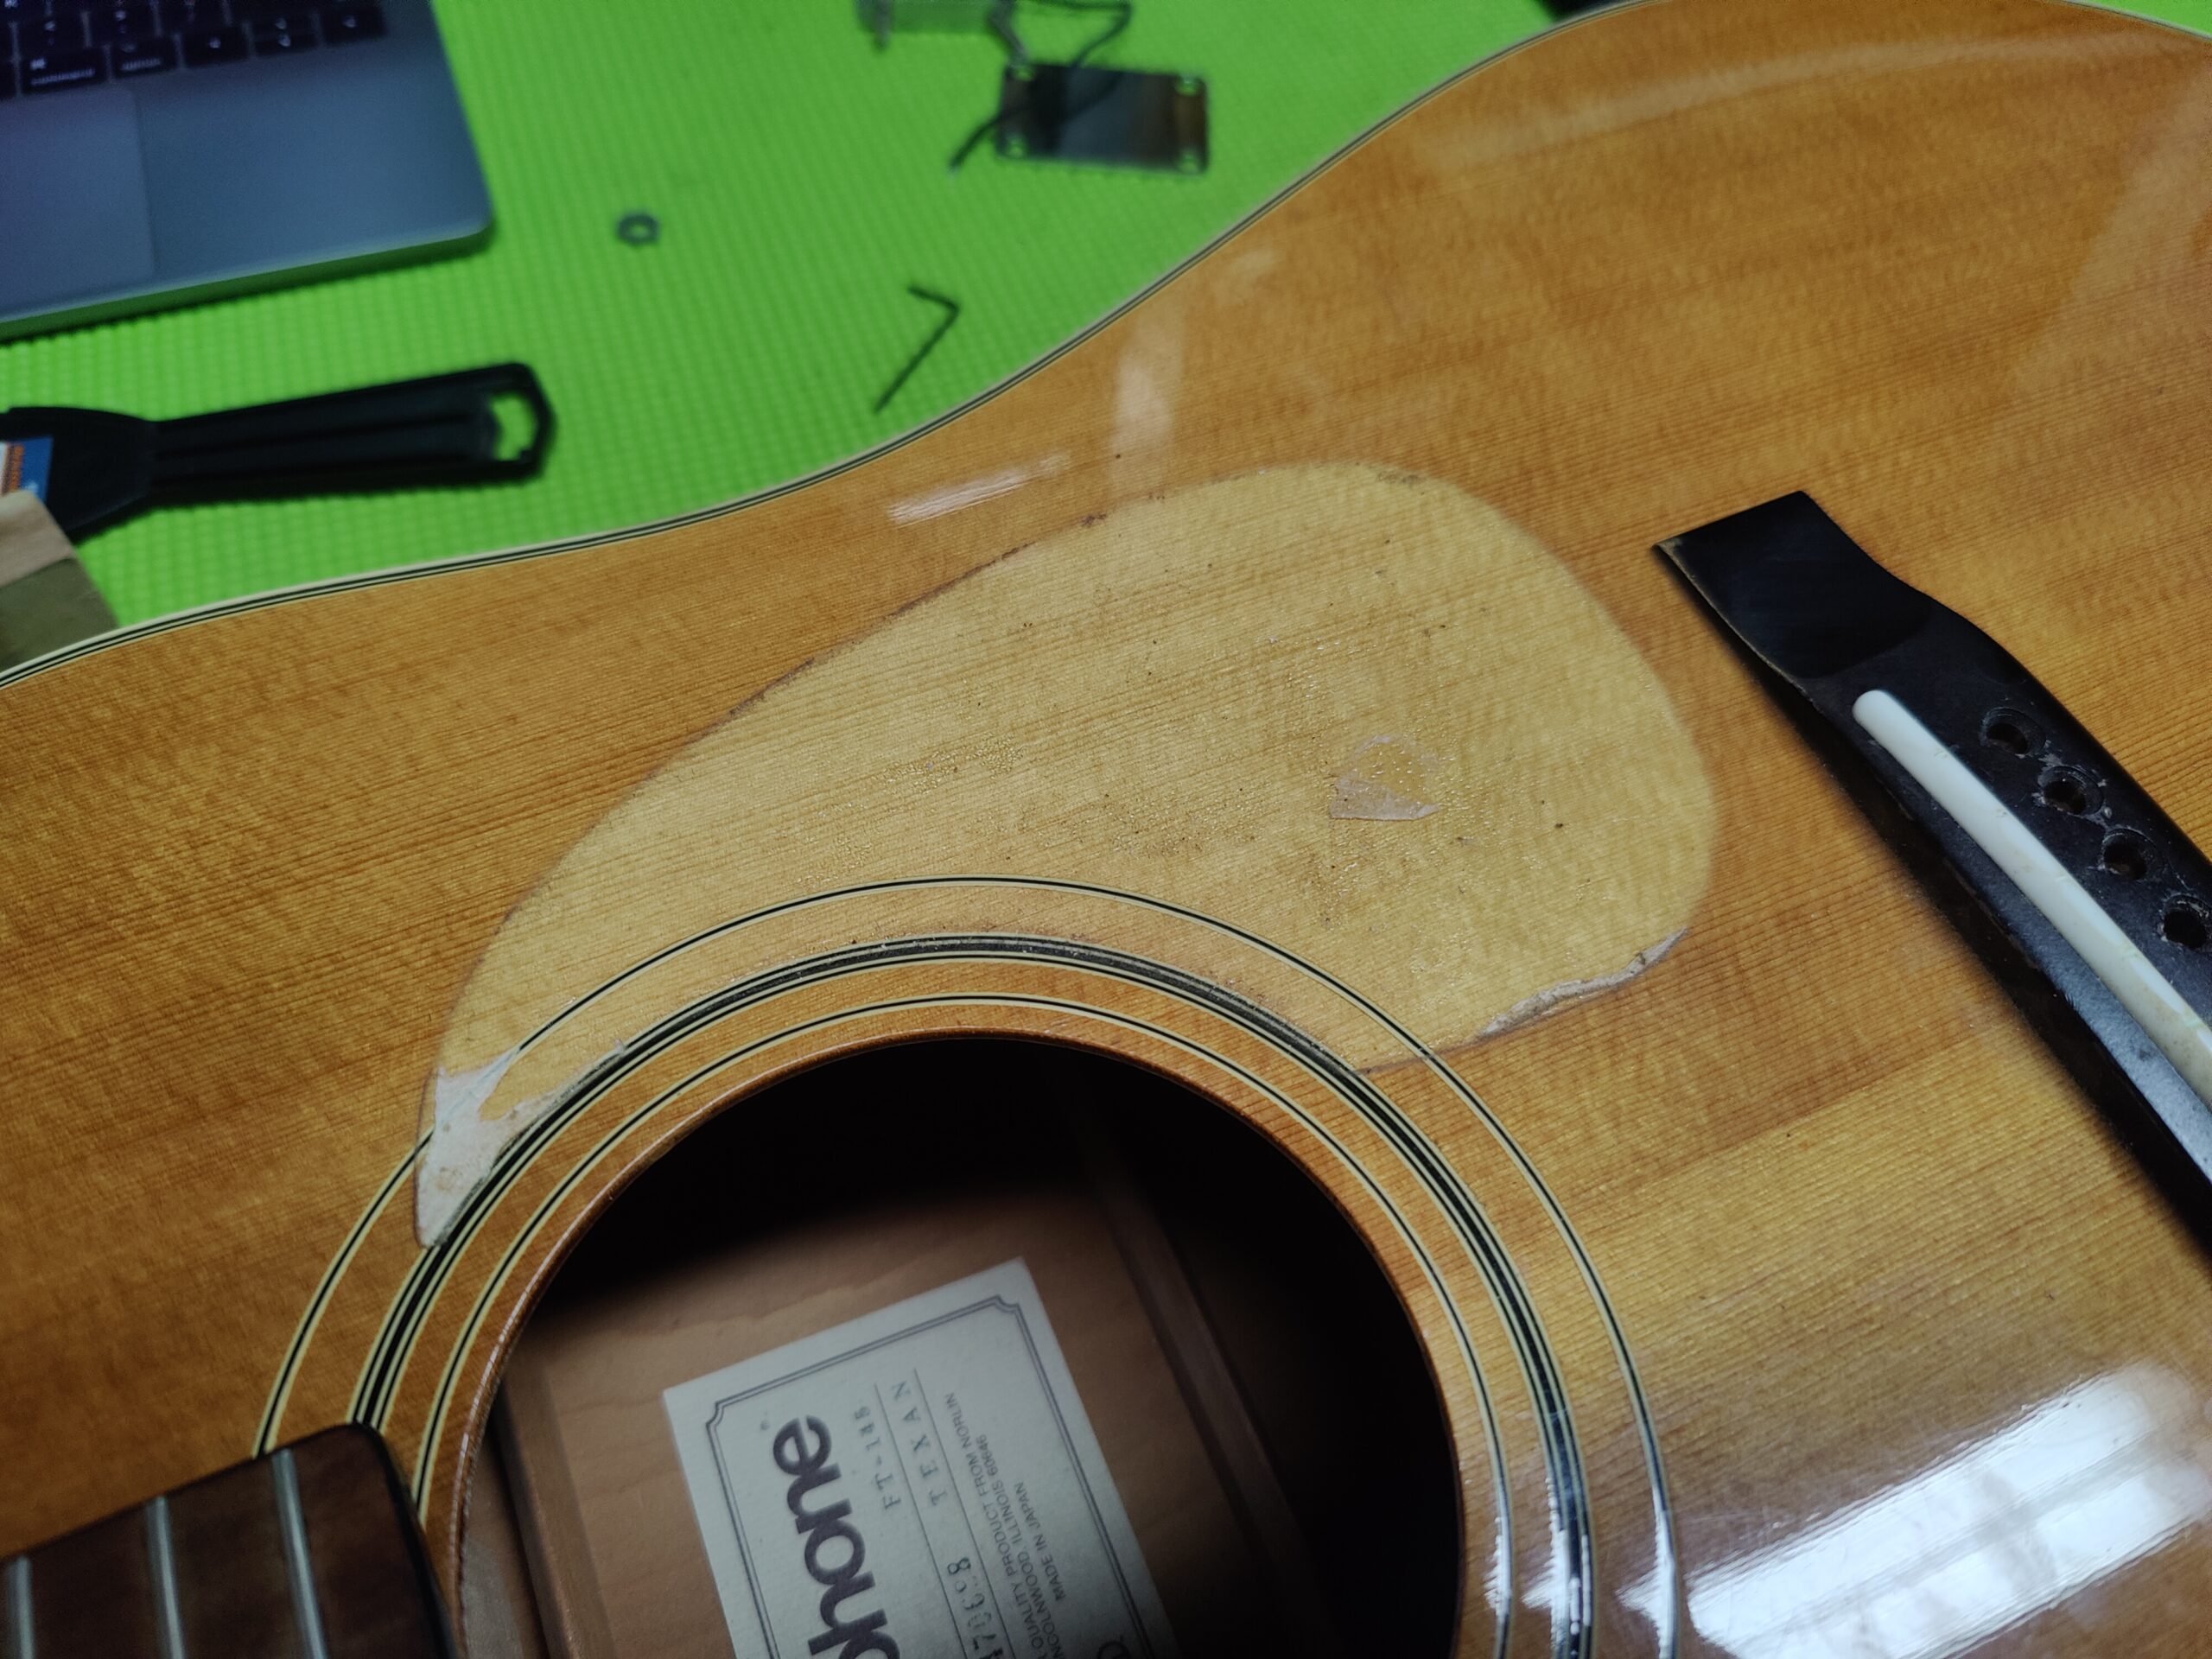 |
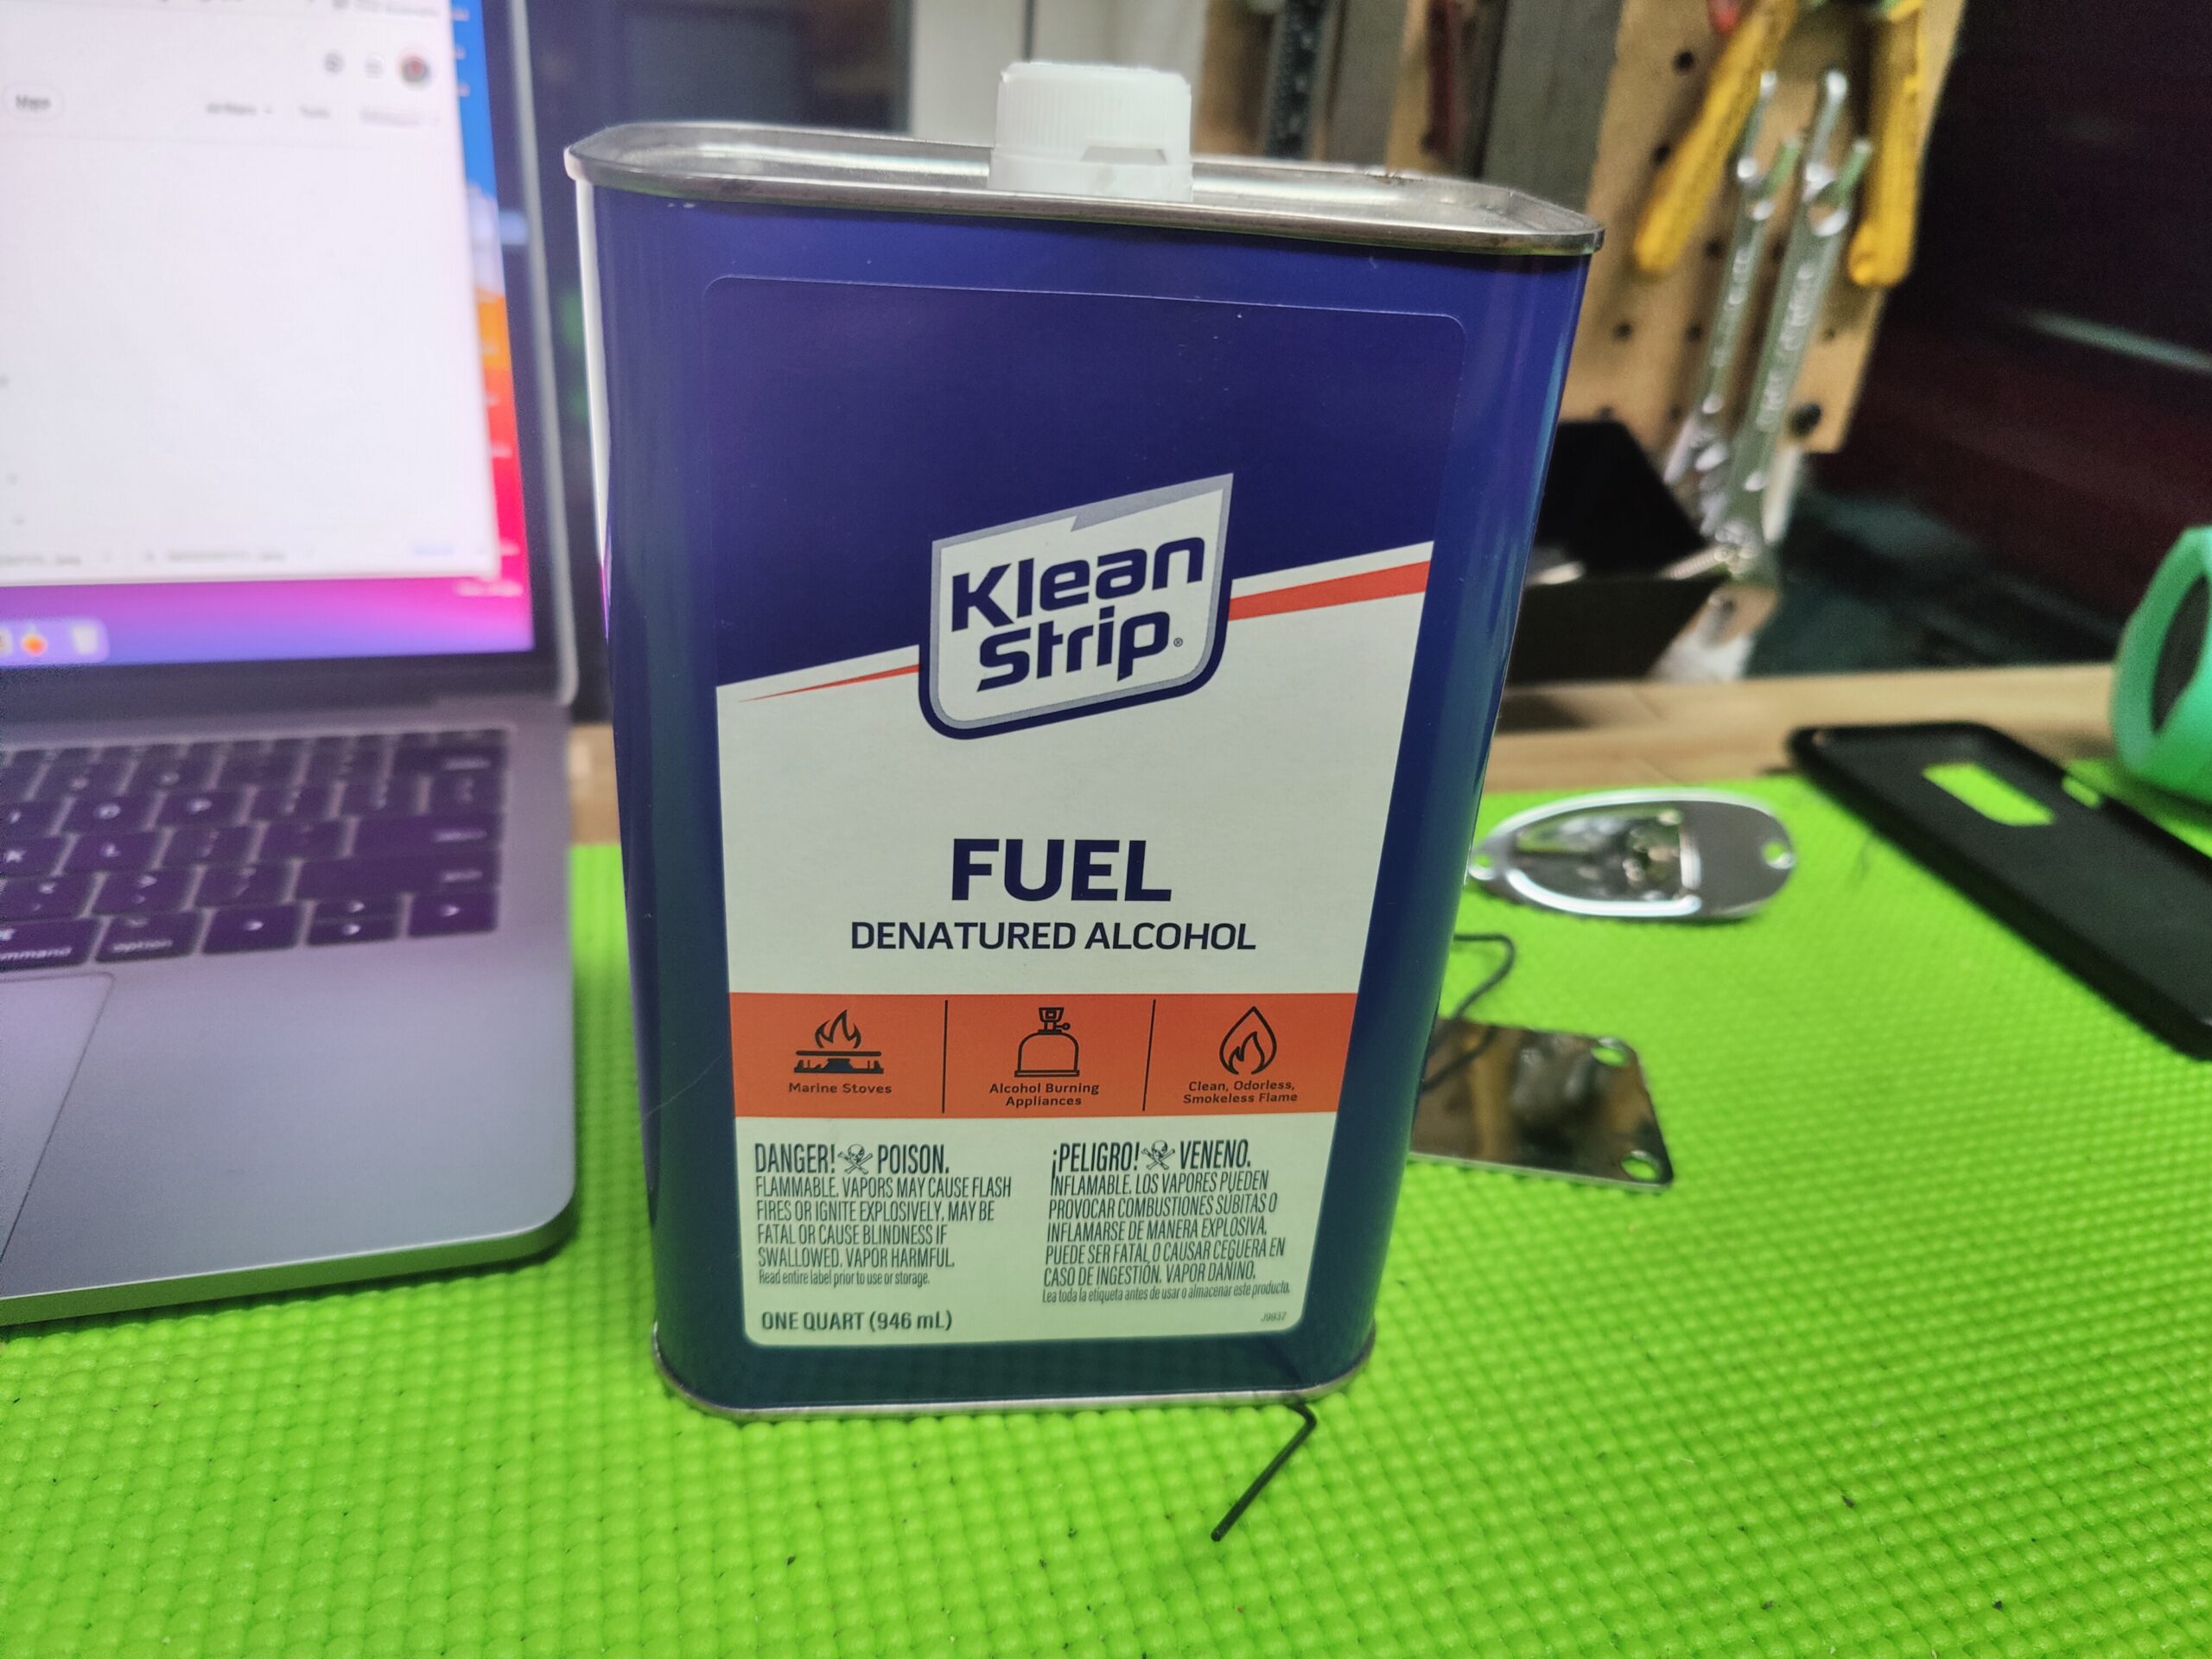
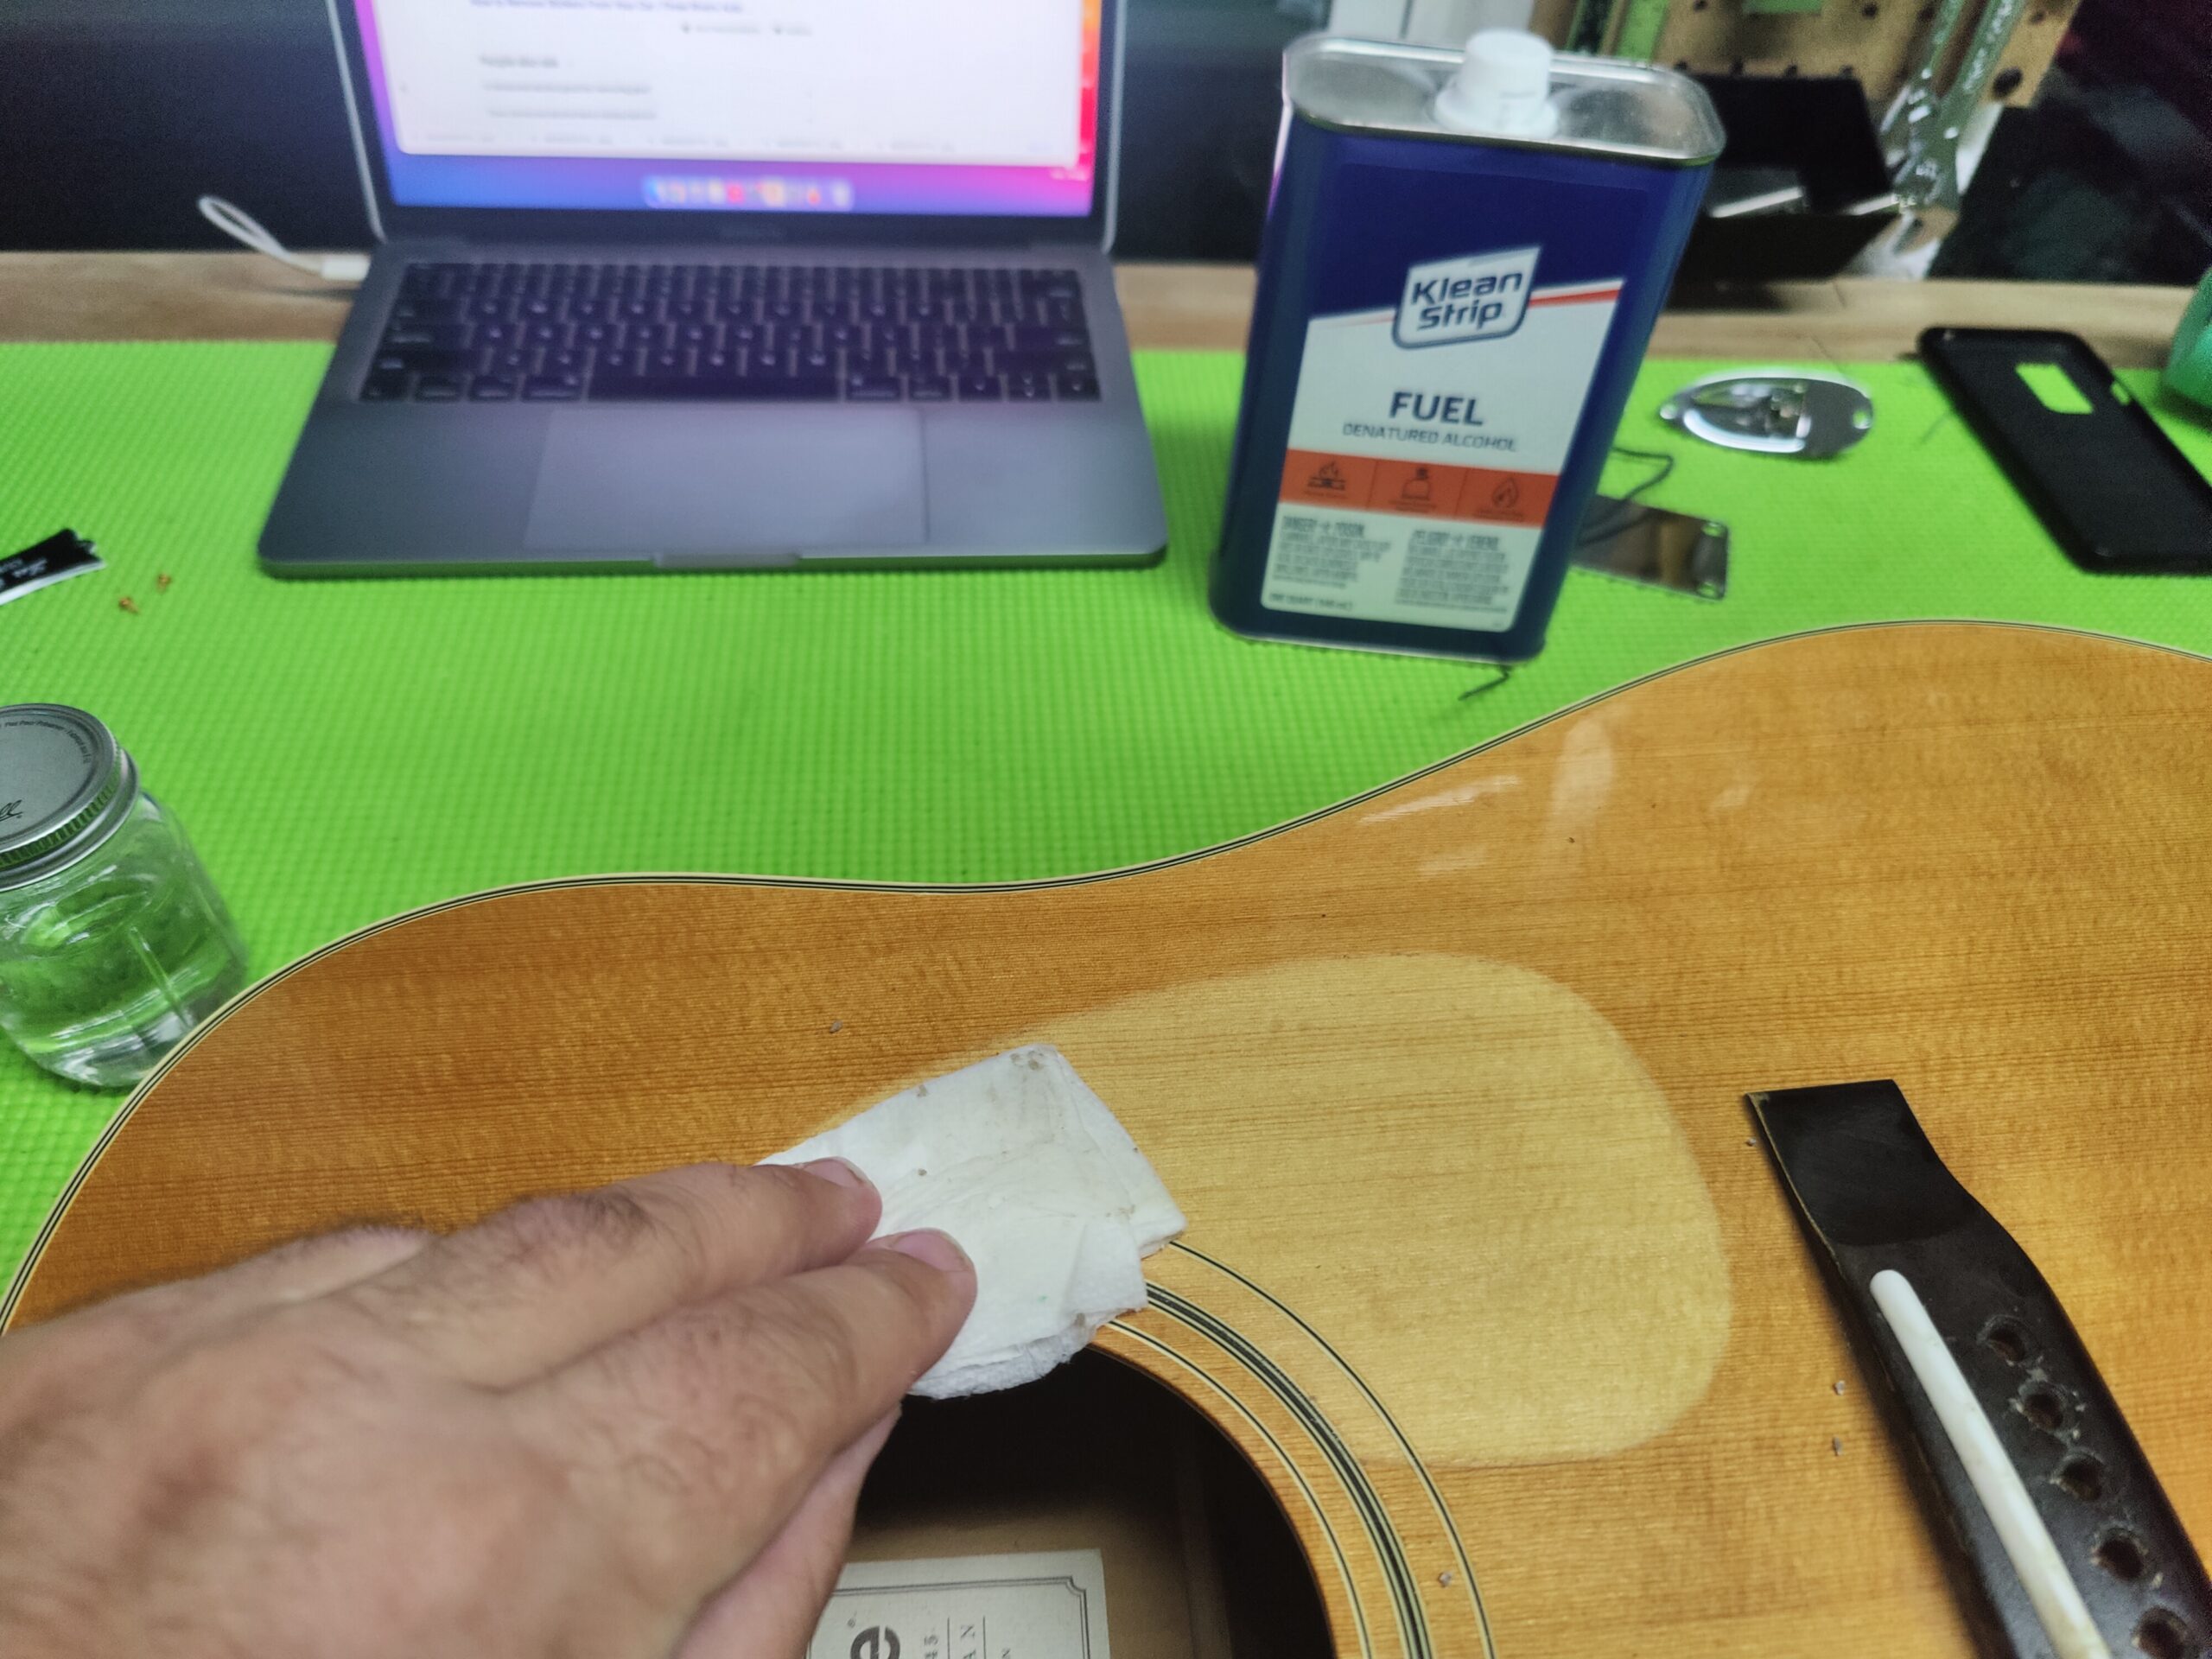
It was easy to remove with the lifting pickguard. A combination of spatulas pried it from the top with no hassle. But the easy removal was followed by a lengthy process of removing the petrified adhesive backing. I applied denatured alcohol in attempt to soften the adhesive backing to loosen the bond and left the rest to a razor blade and peeling to finish this step. From there, I used additional denatured alcohol on a rag to clean up any adhesive residue on the body.
 |
 |
 |
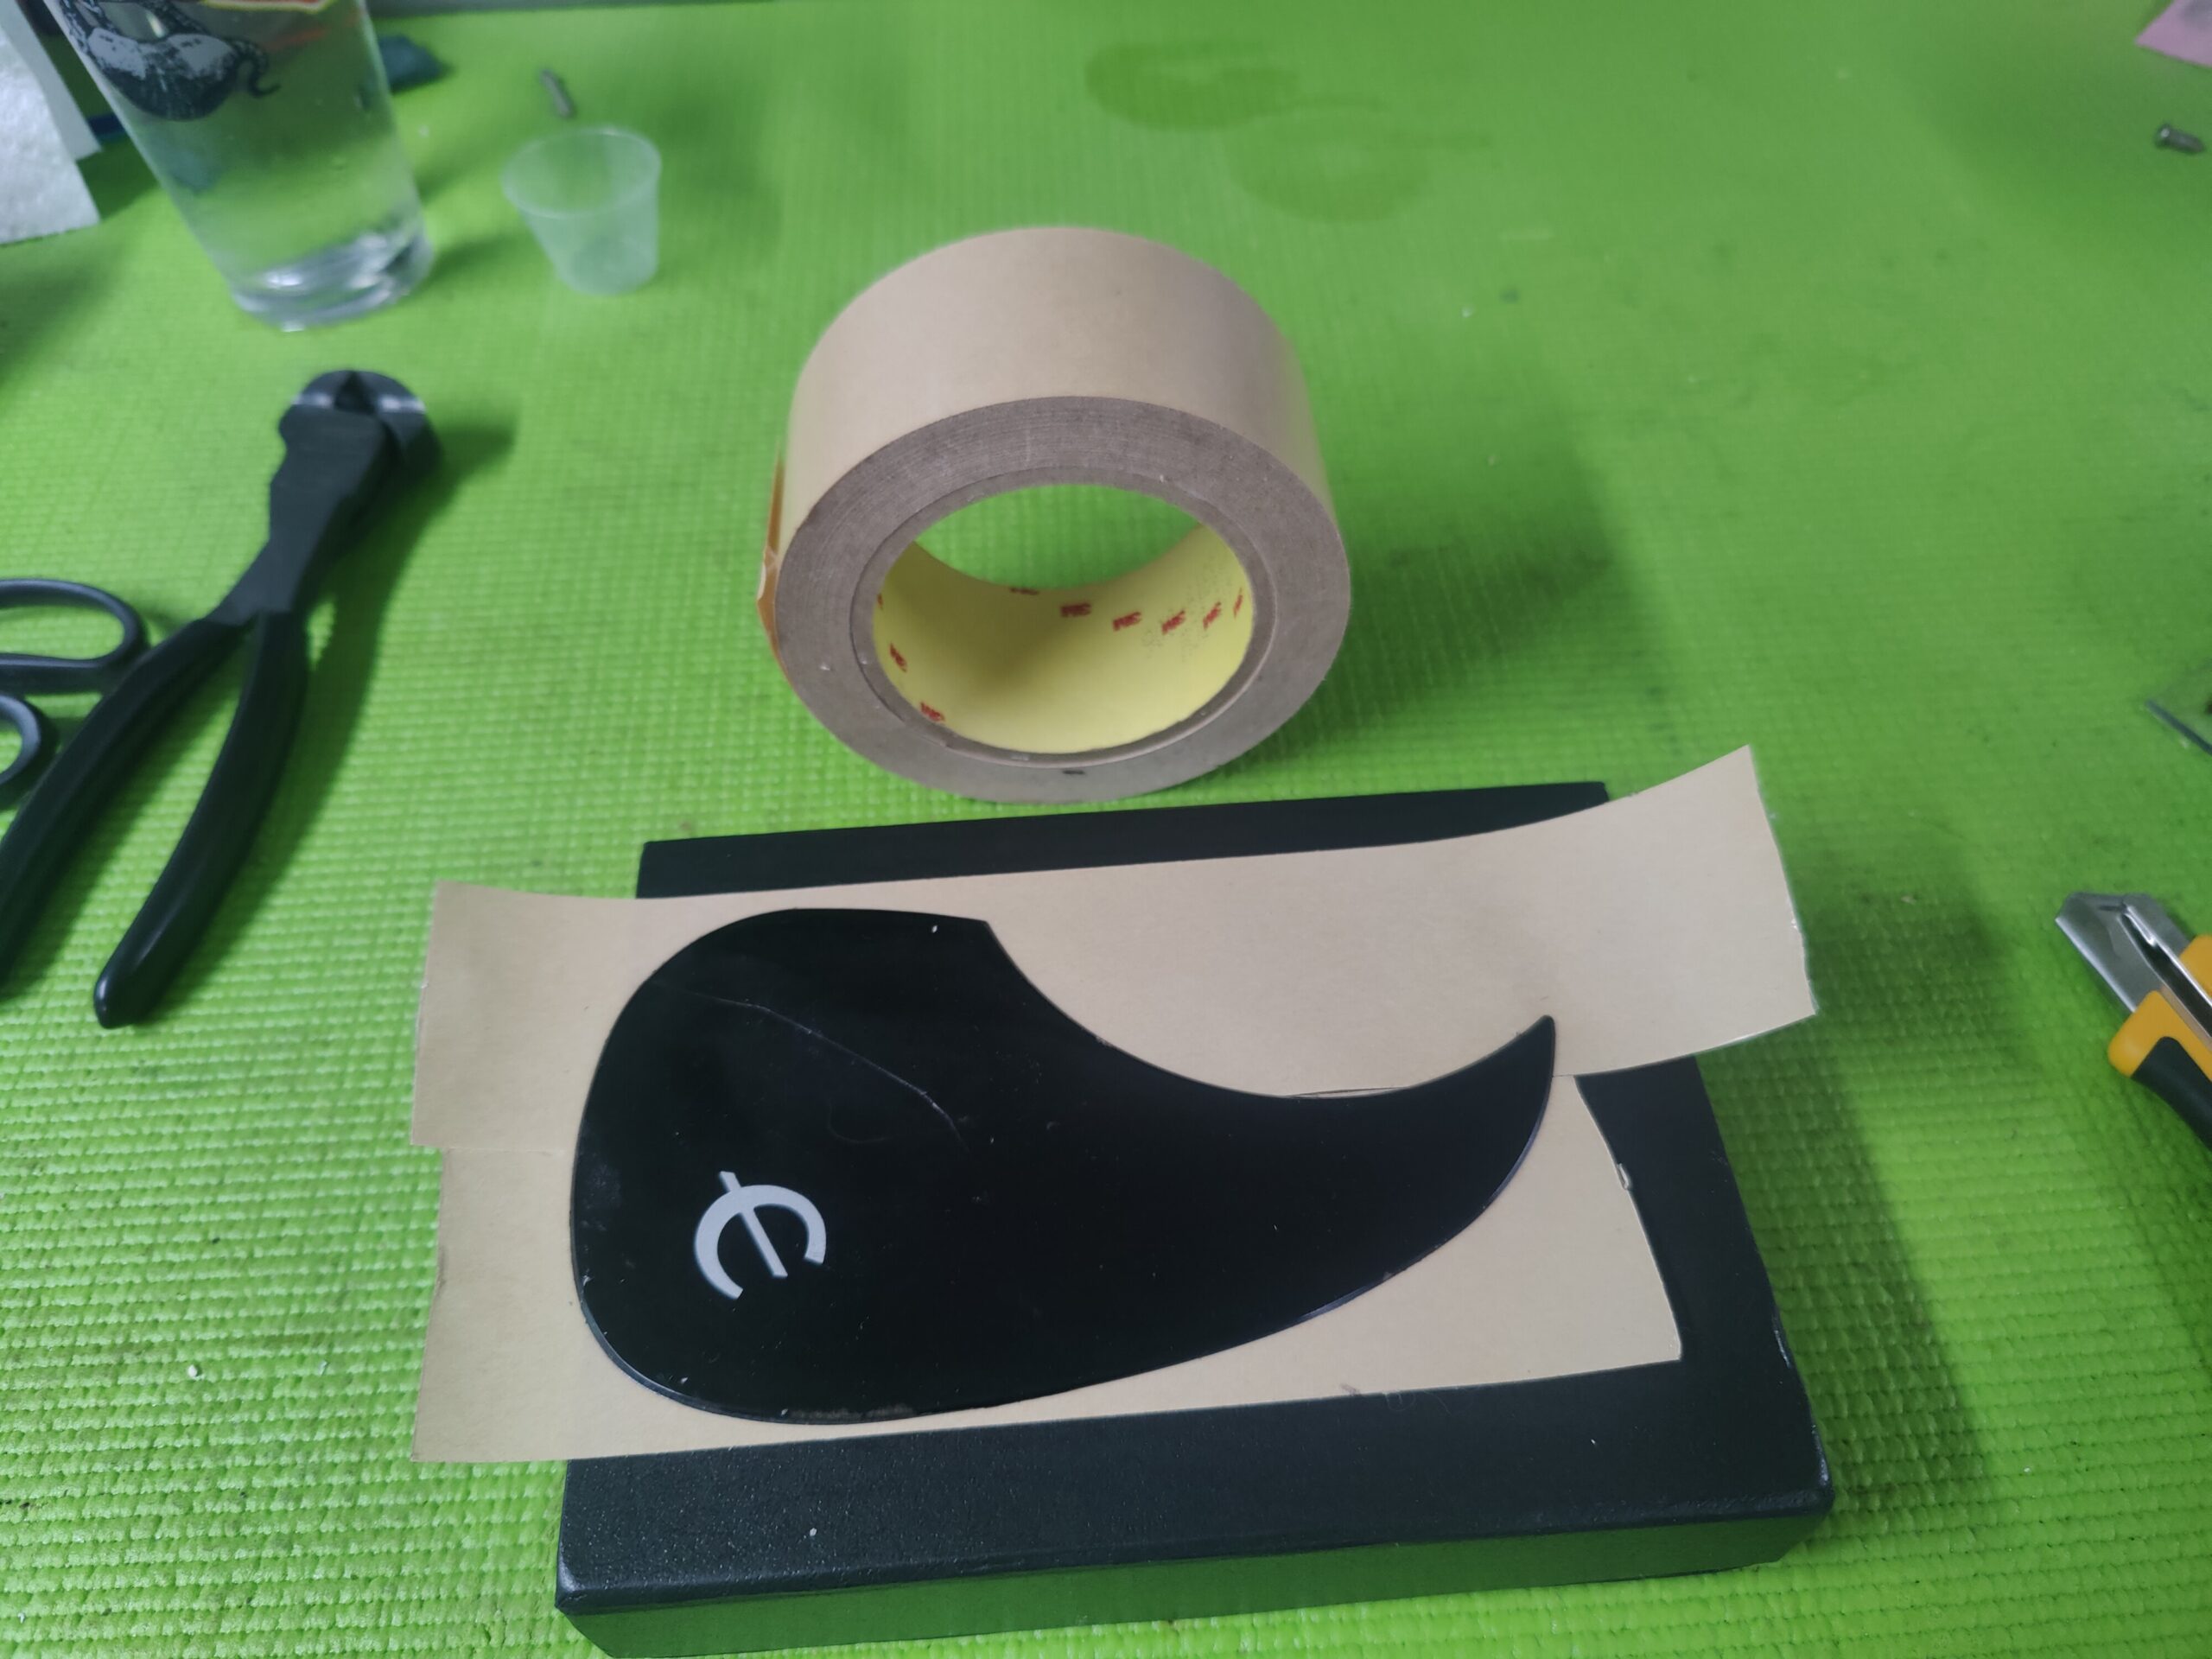
After applying a layer of thin double sided tape to the back of the pickguard, I carefully cut out the excess of the adhesive sheet and position the pickguard back onto the old footprint on the body. Using two strips of tape, I create a hinge to fold the pickguard onto it’s front side, peel off the tape backing and fold the pickguard back onto the body.
 |
 |
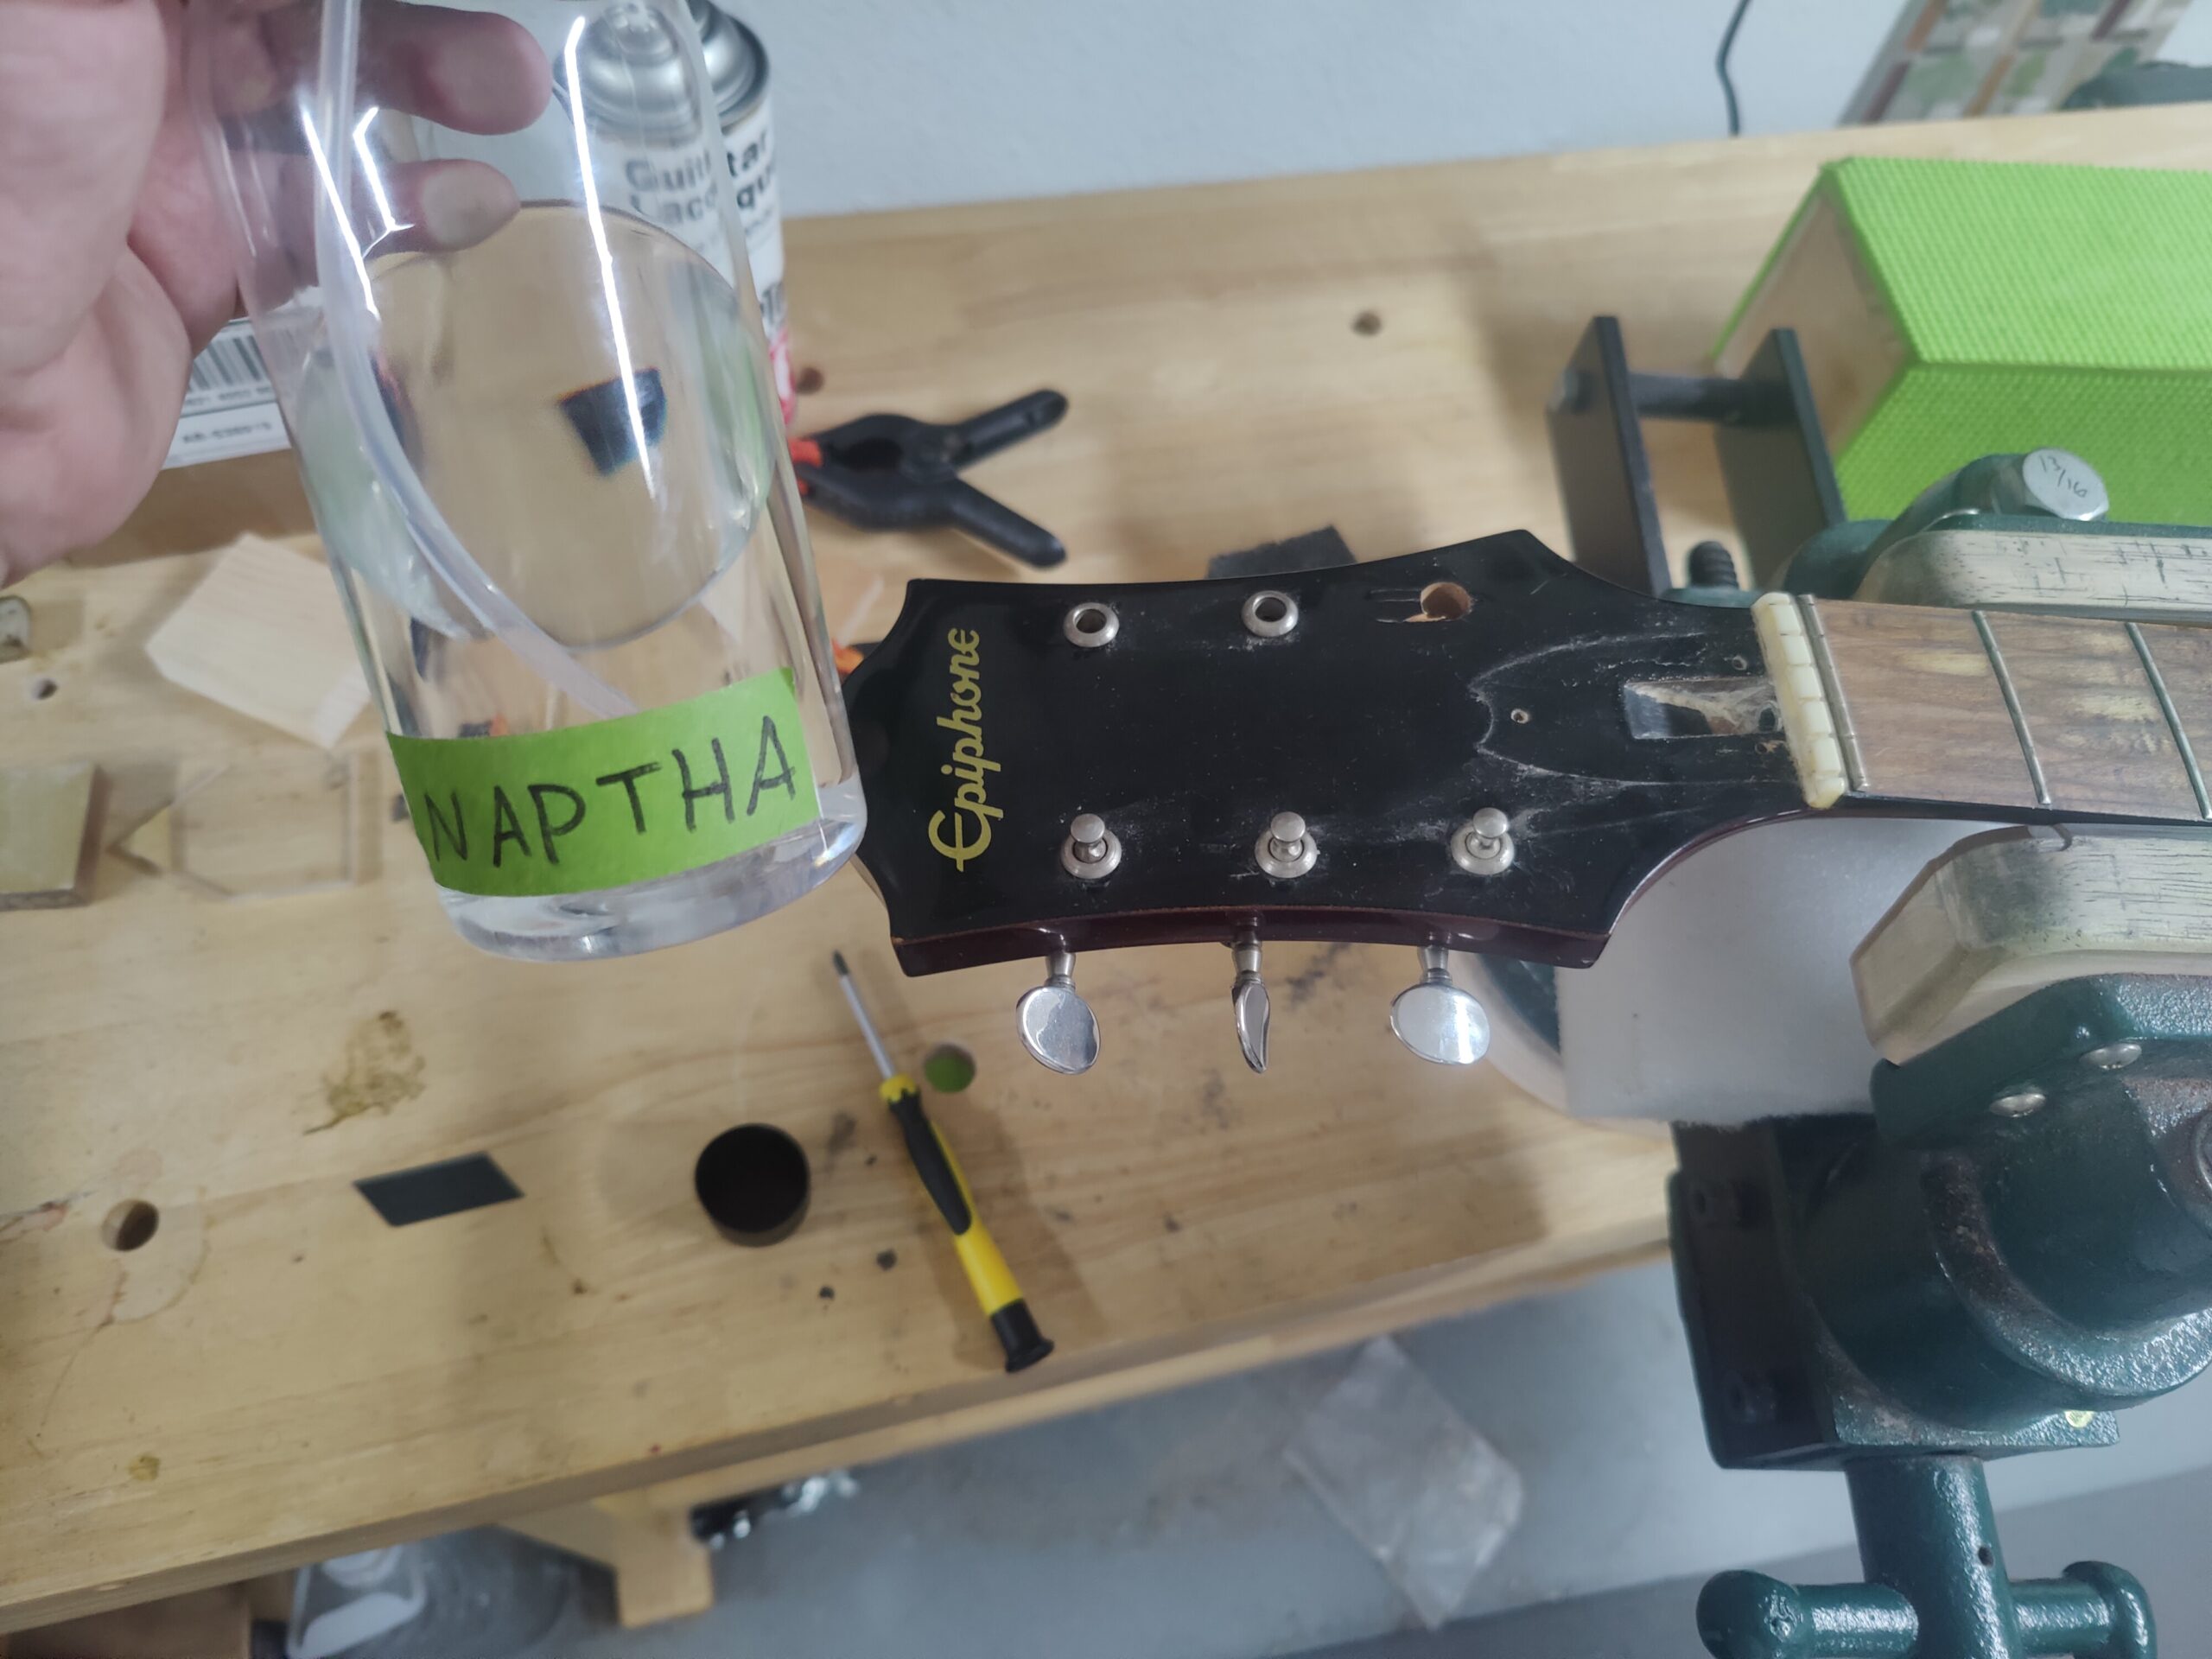 |
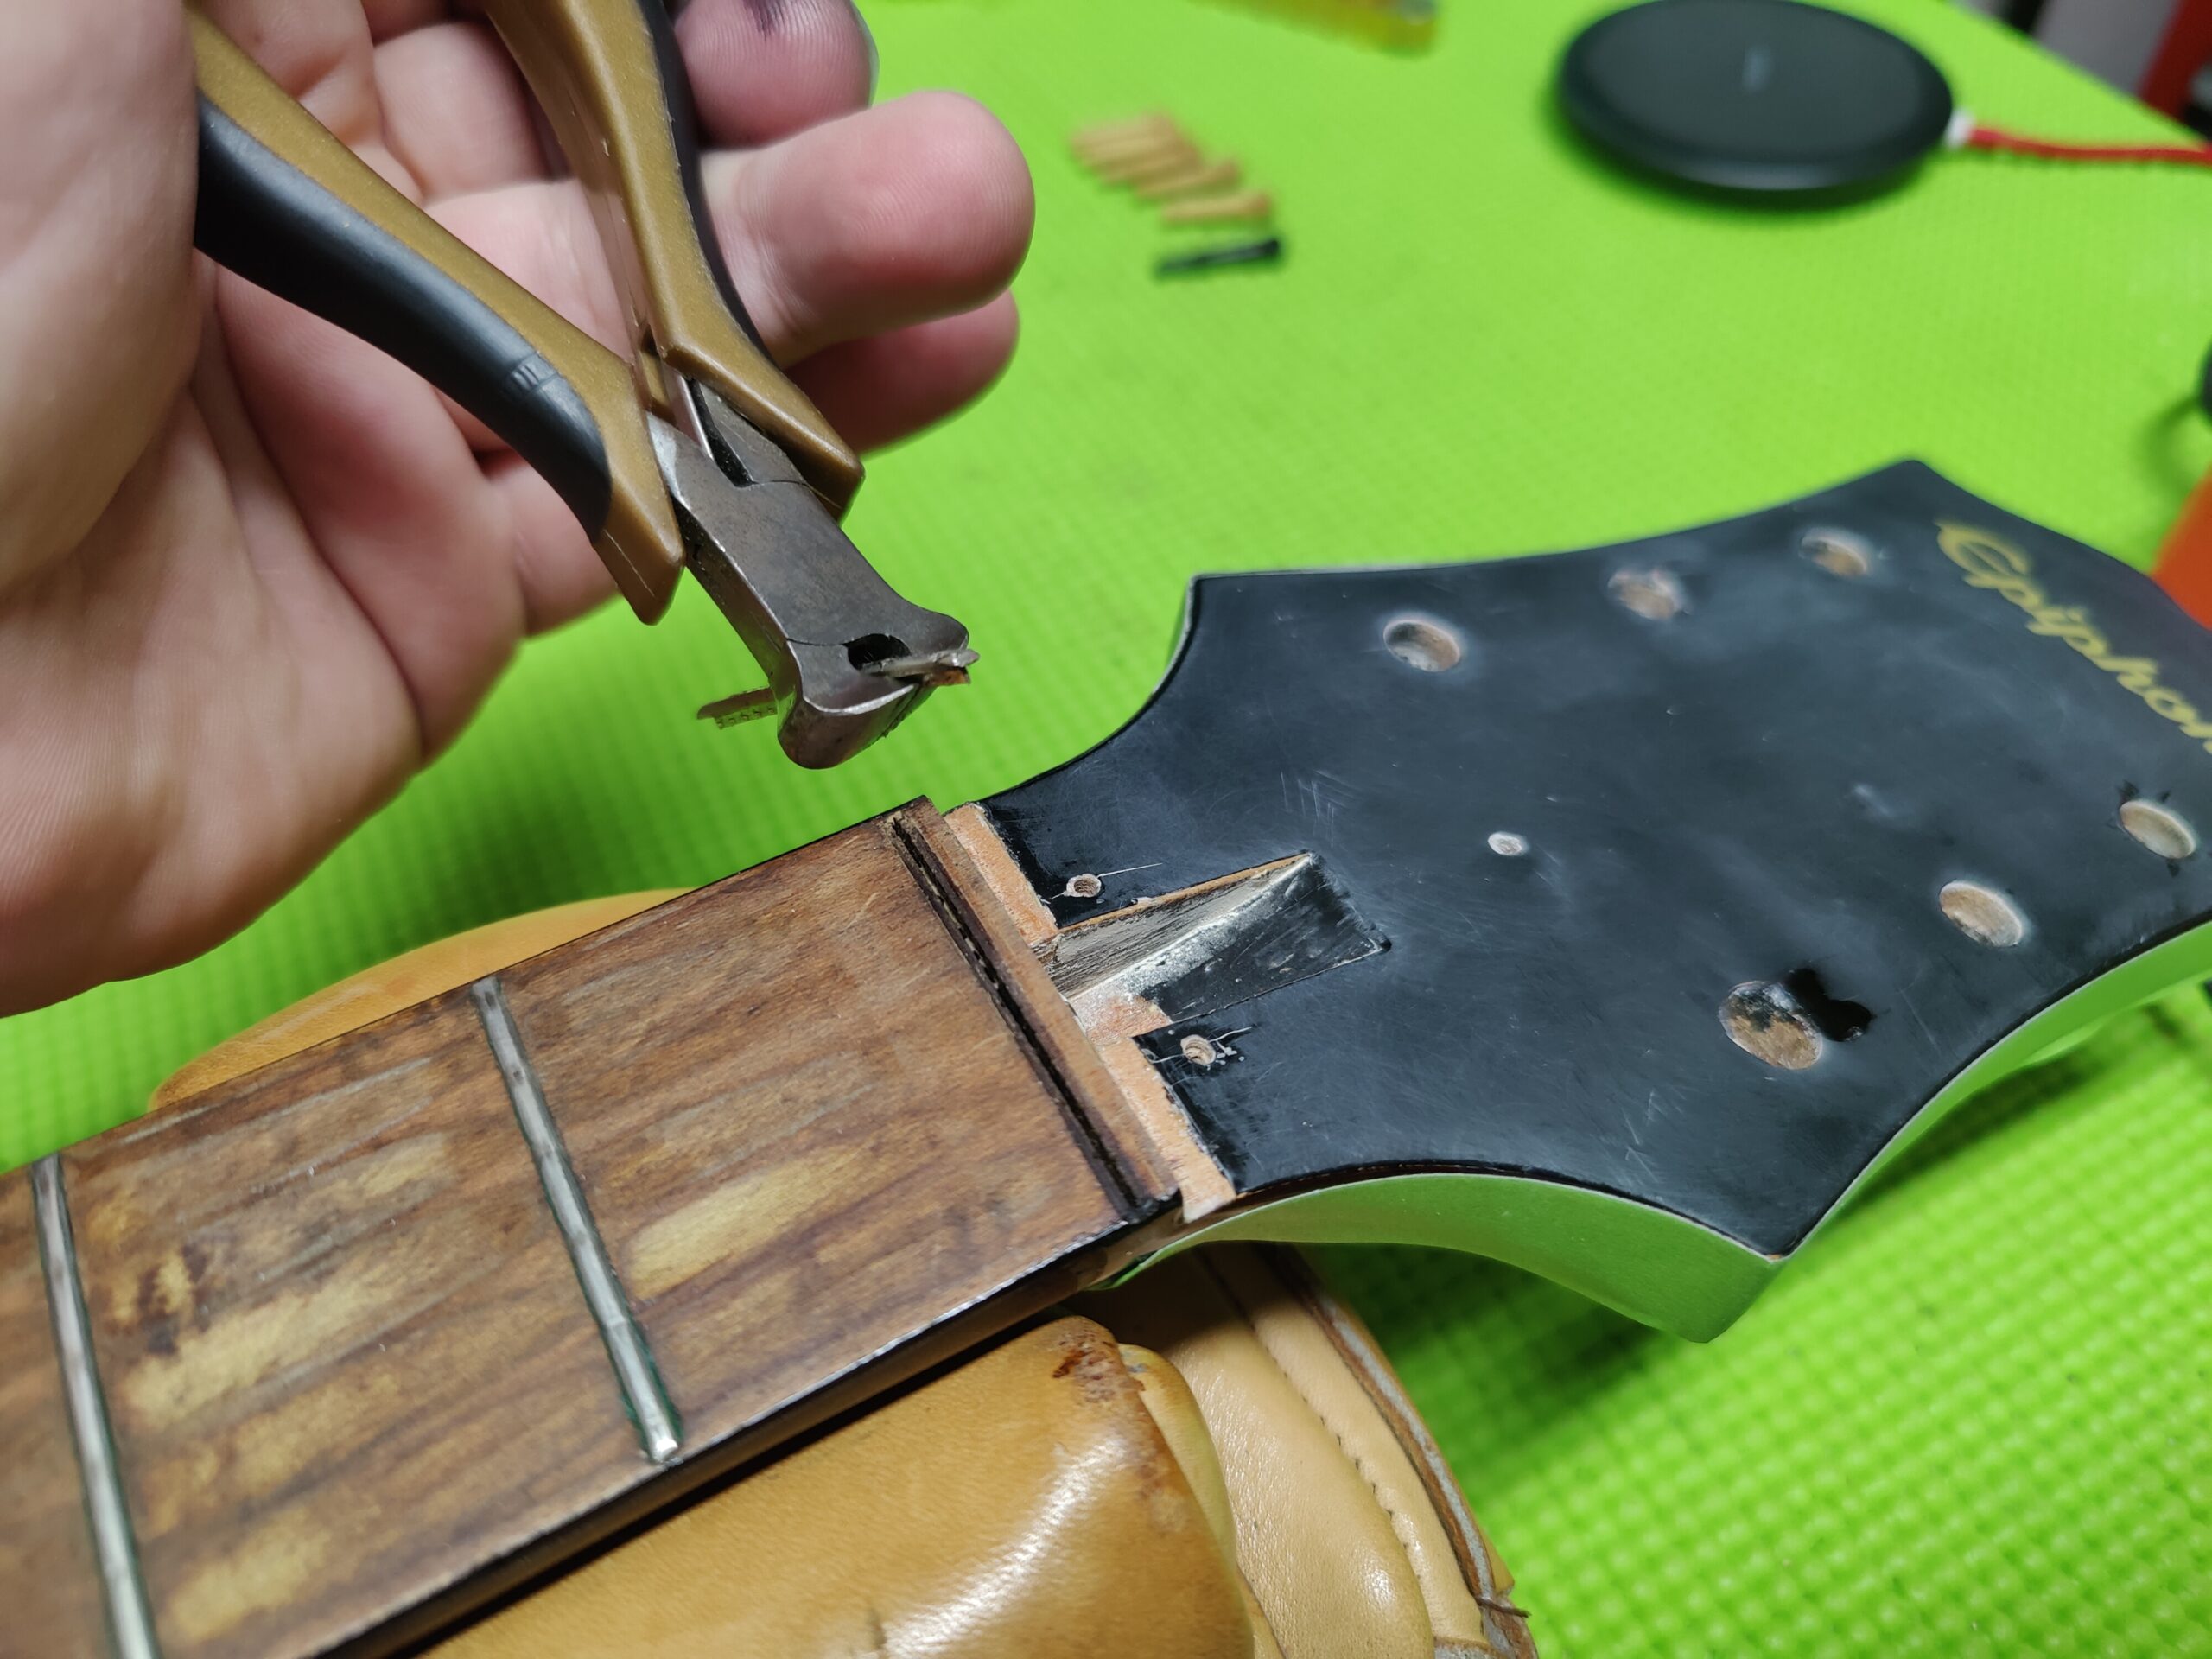
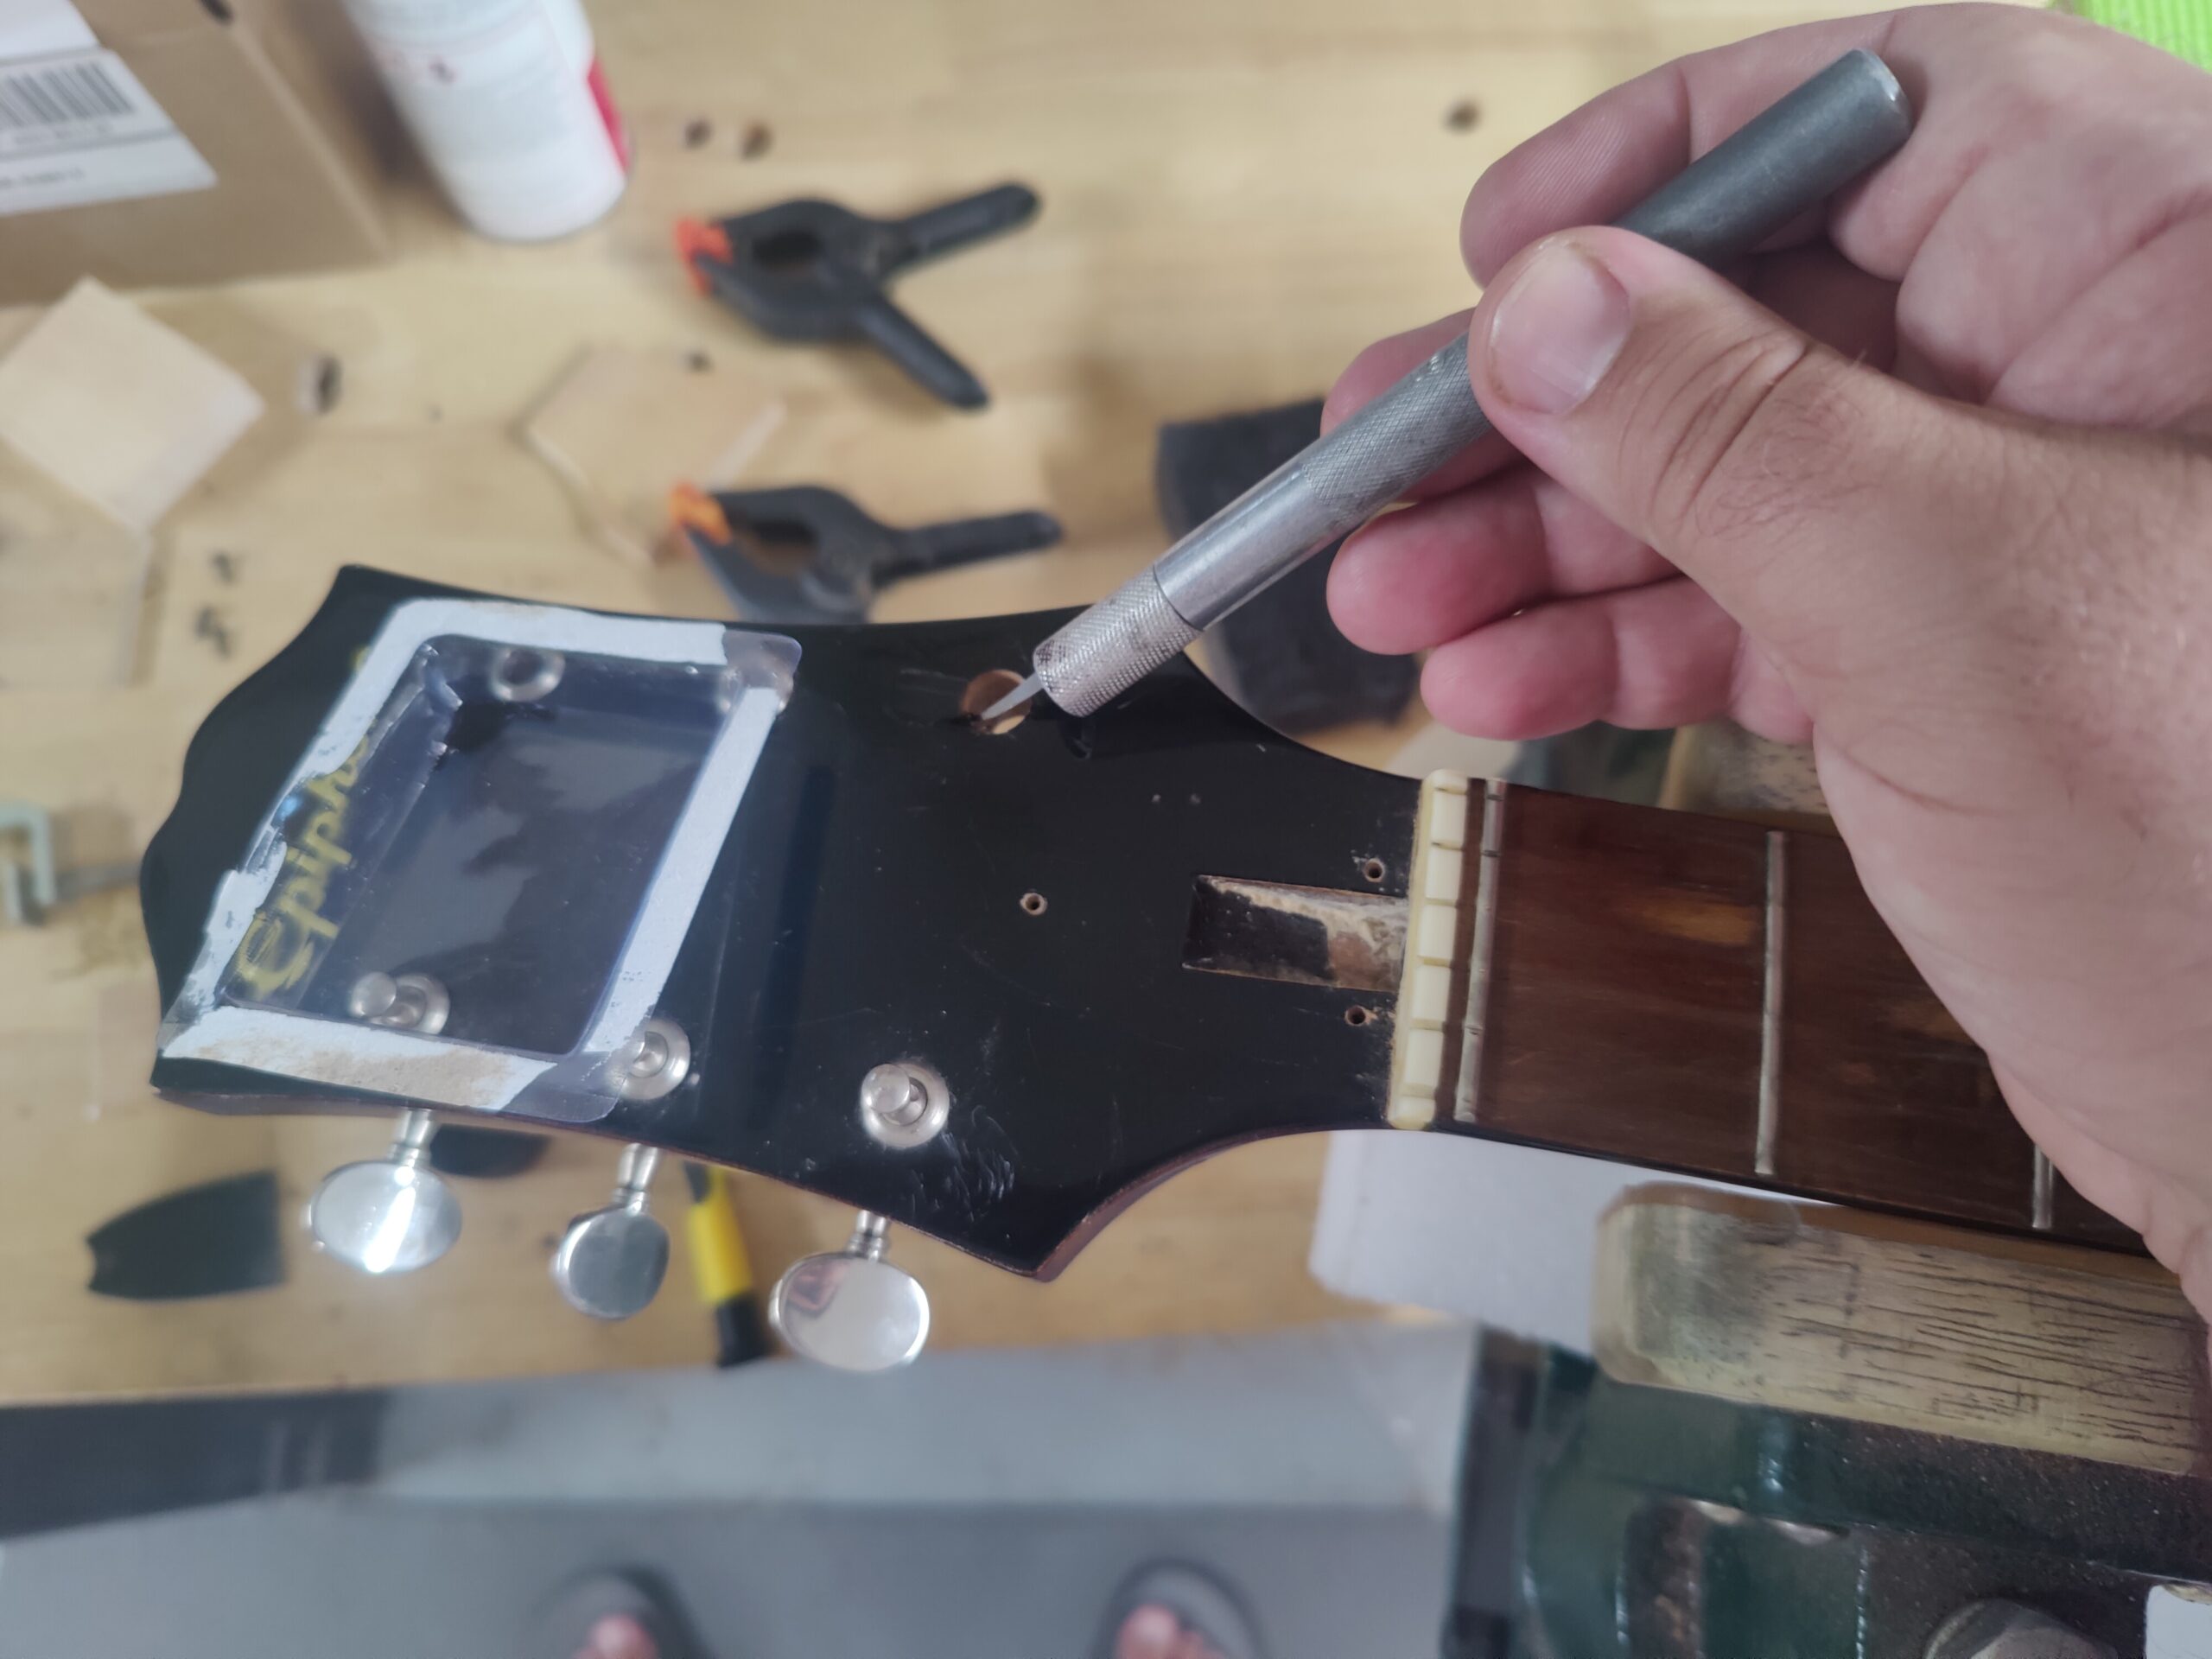
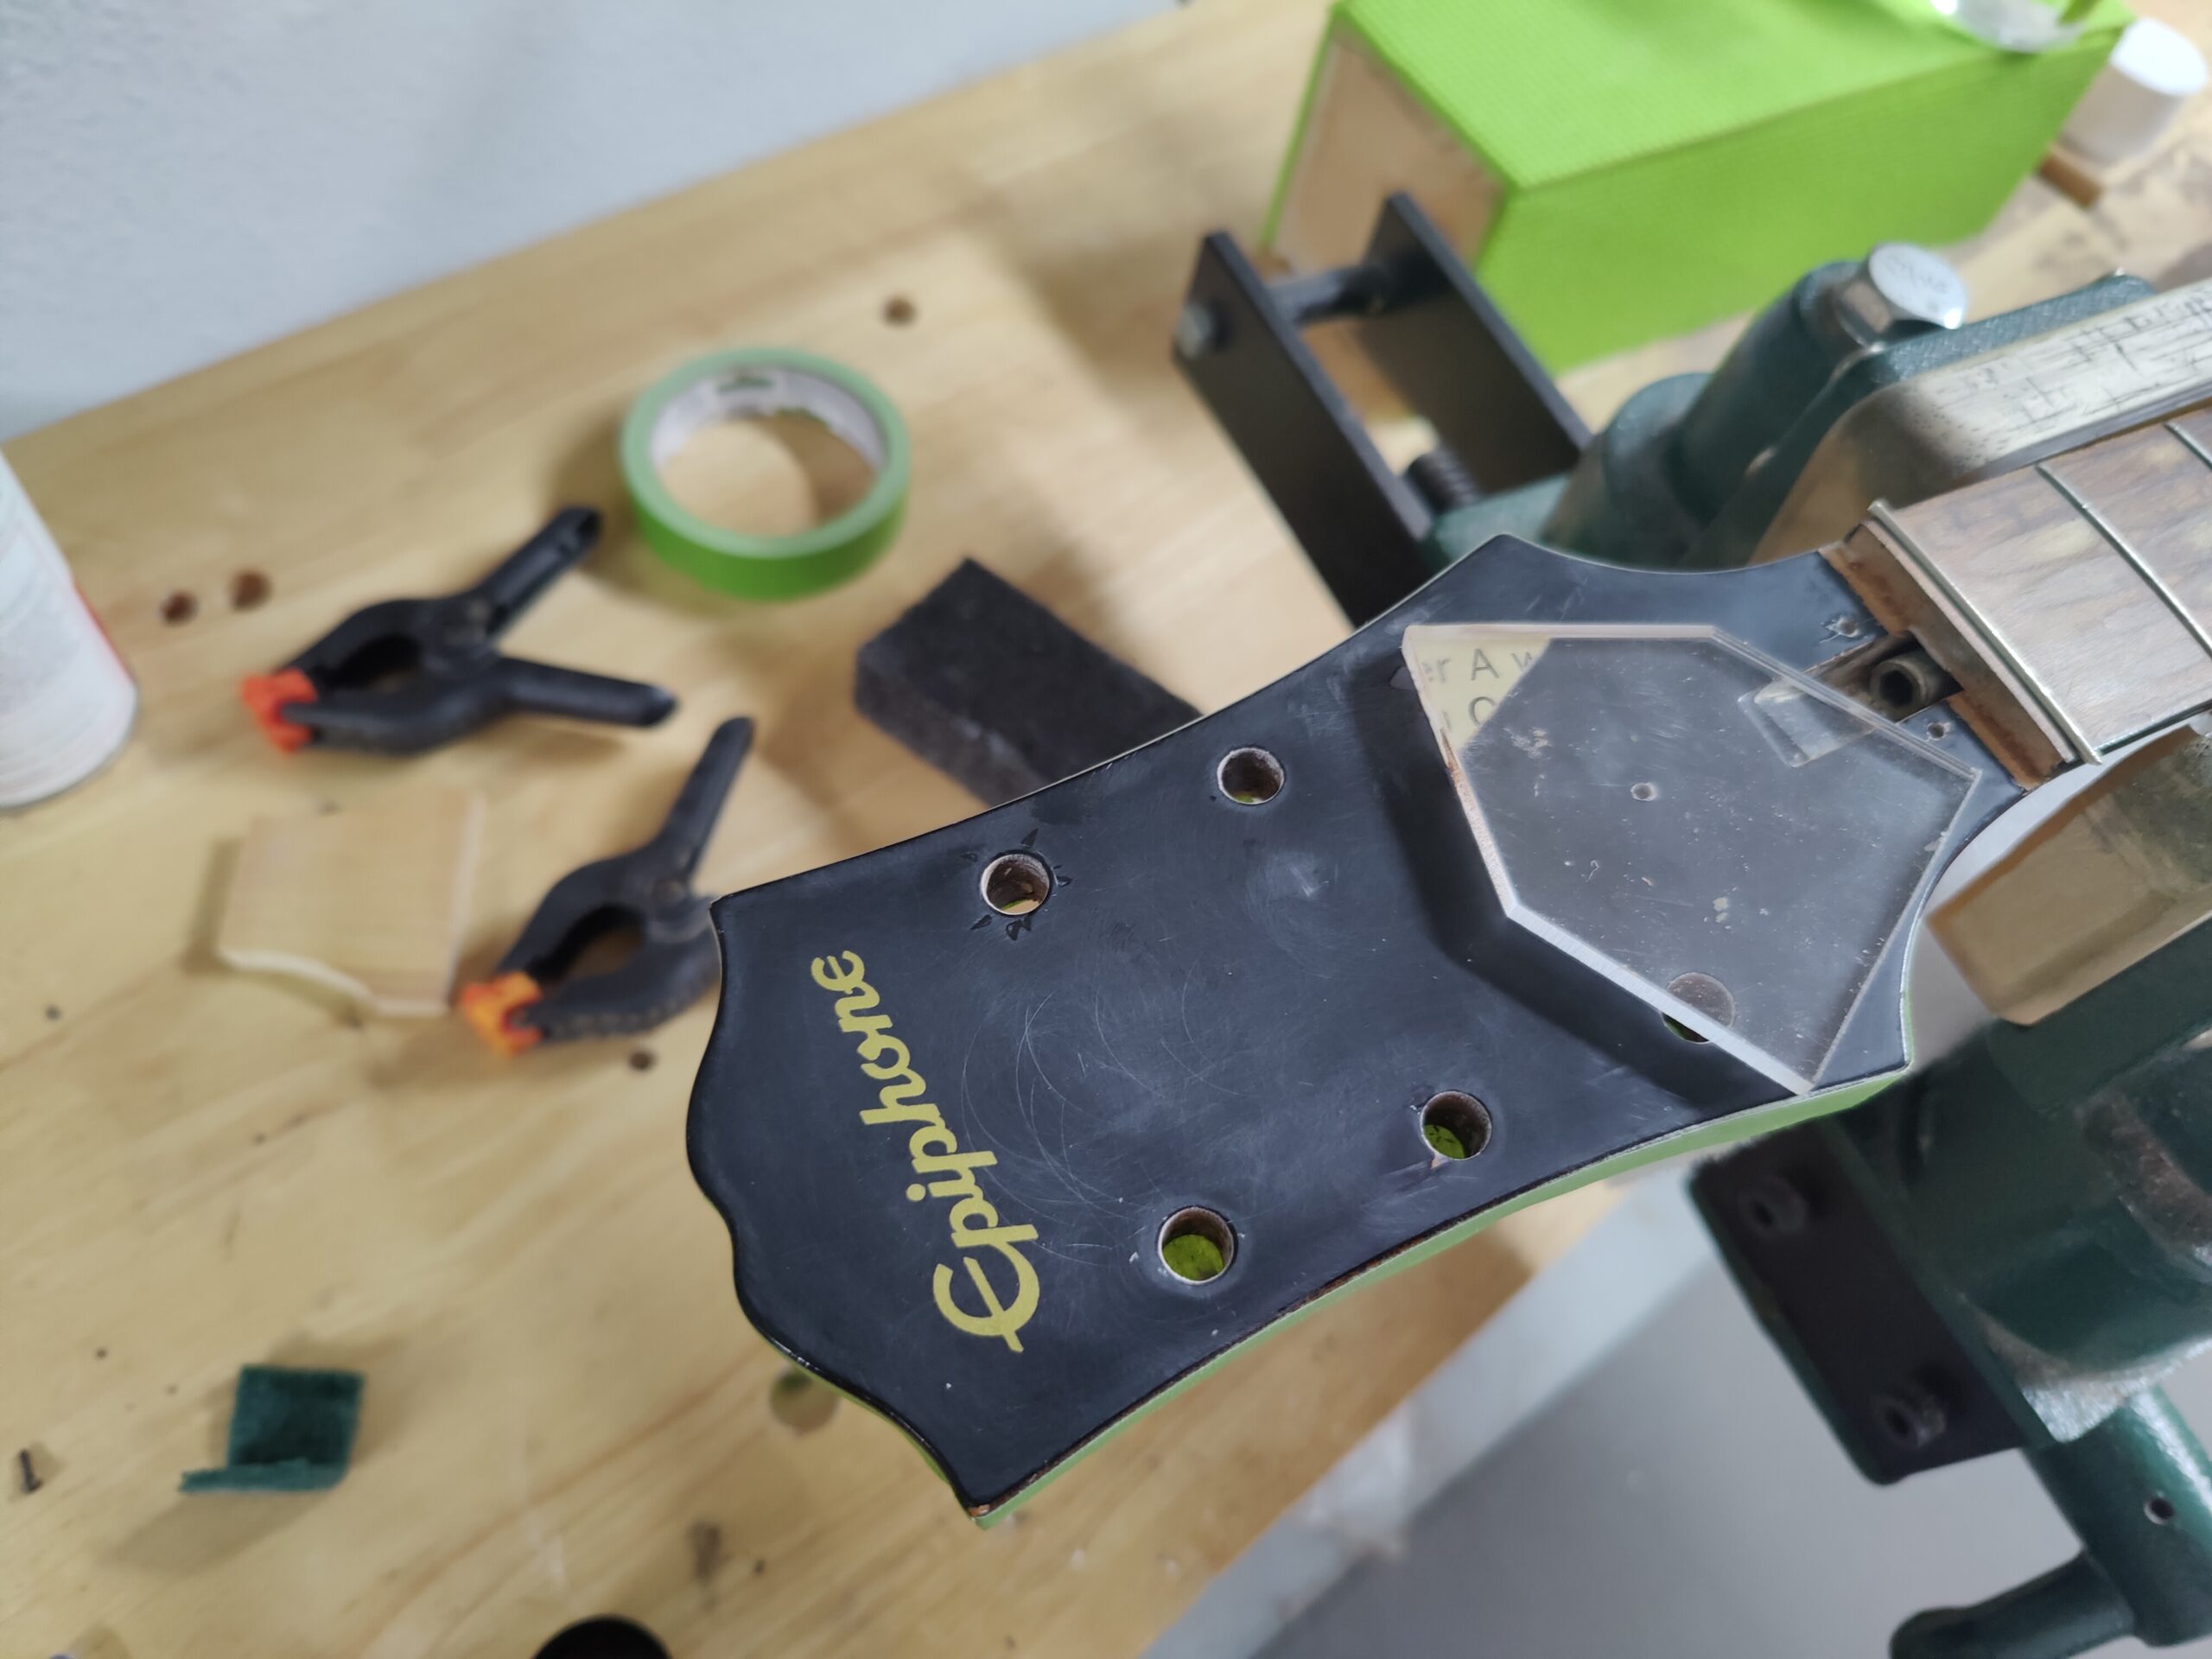
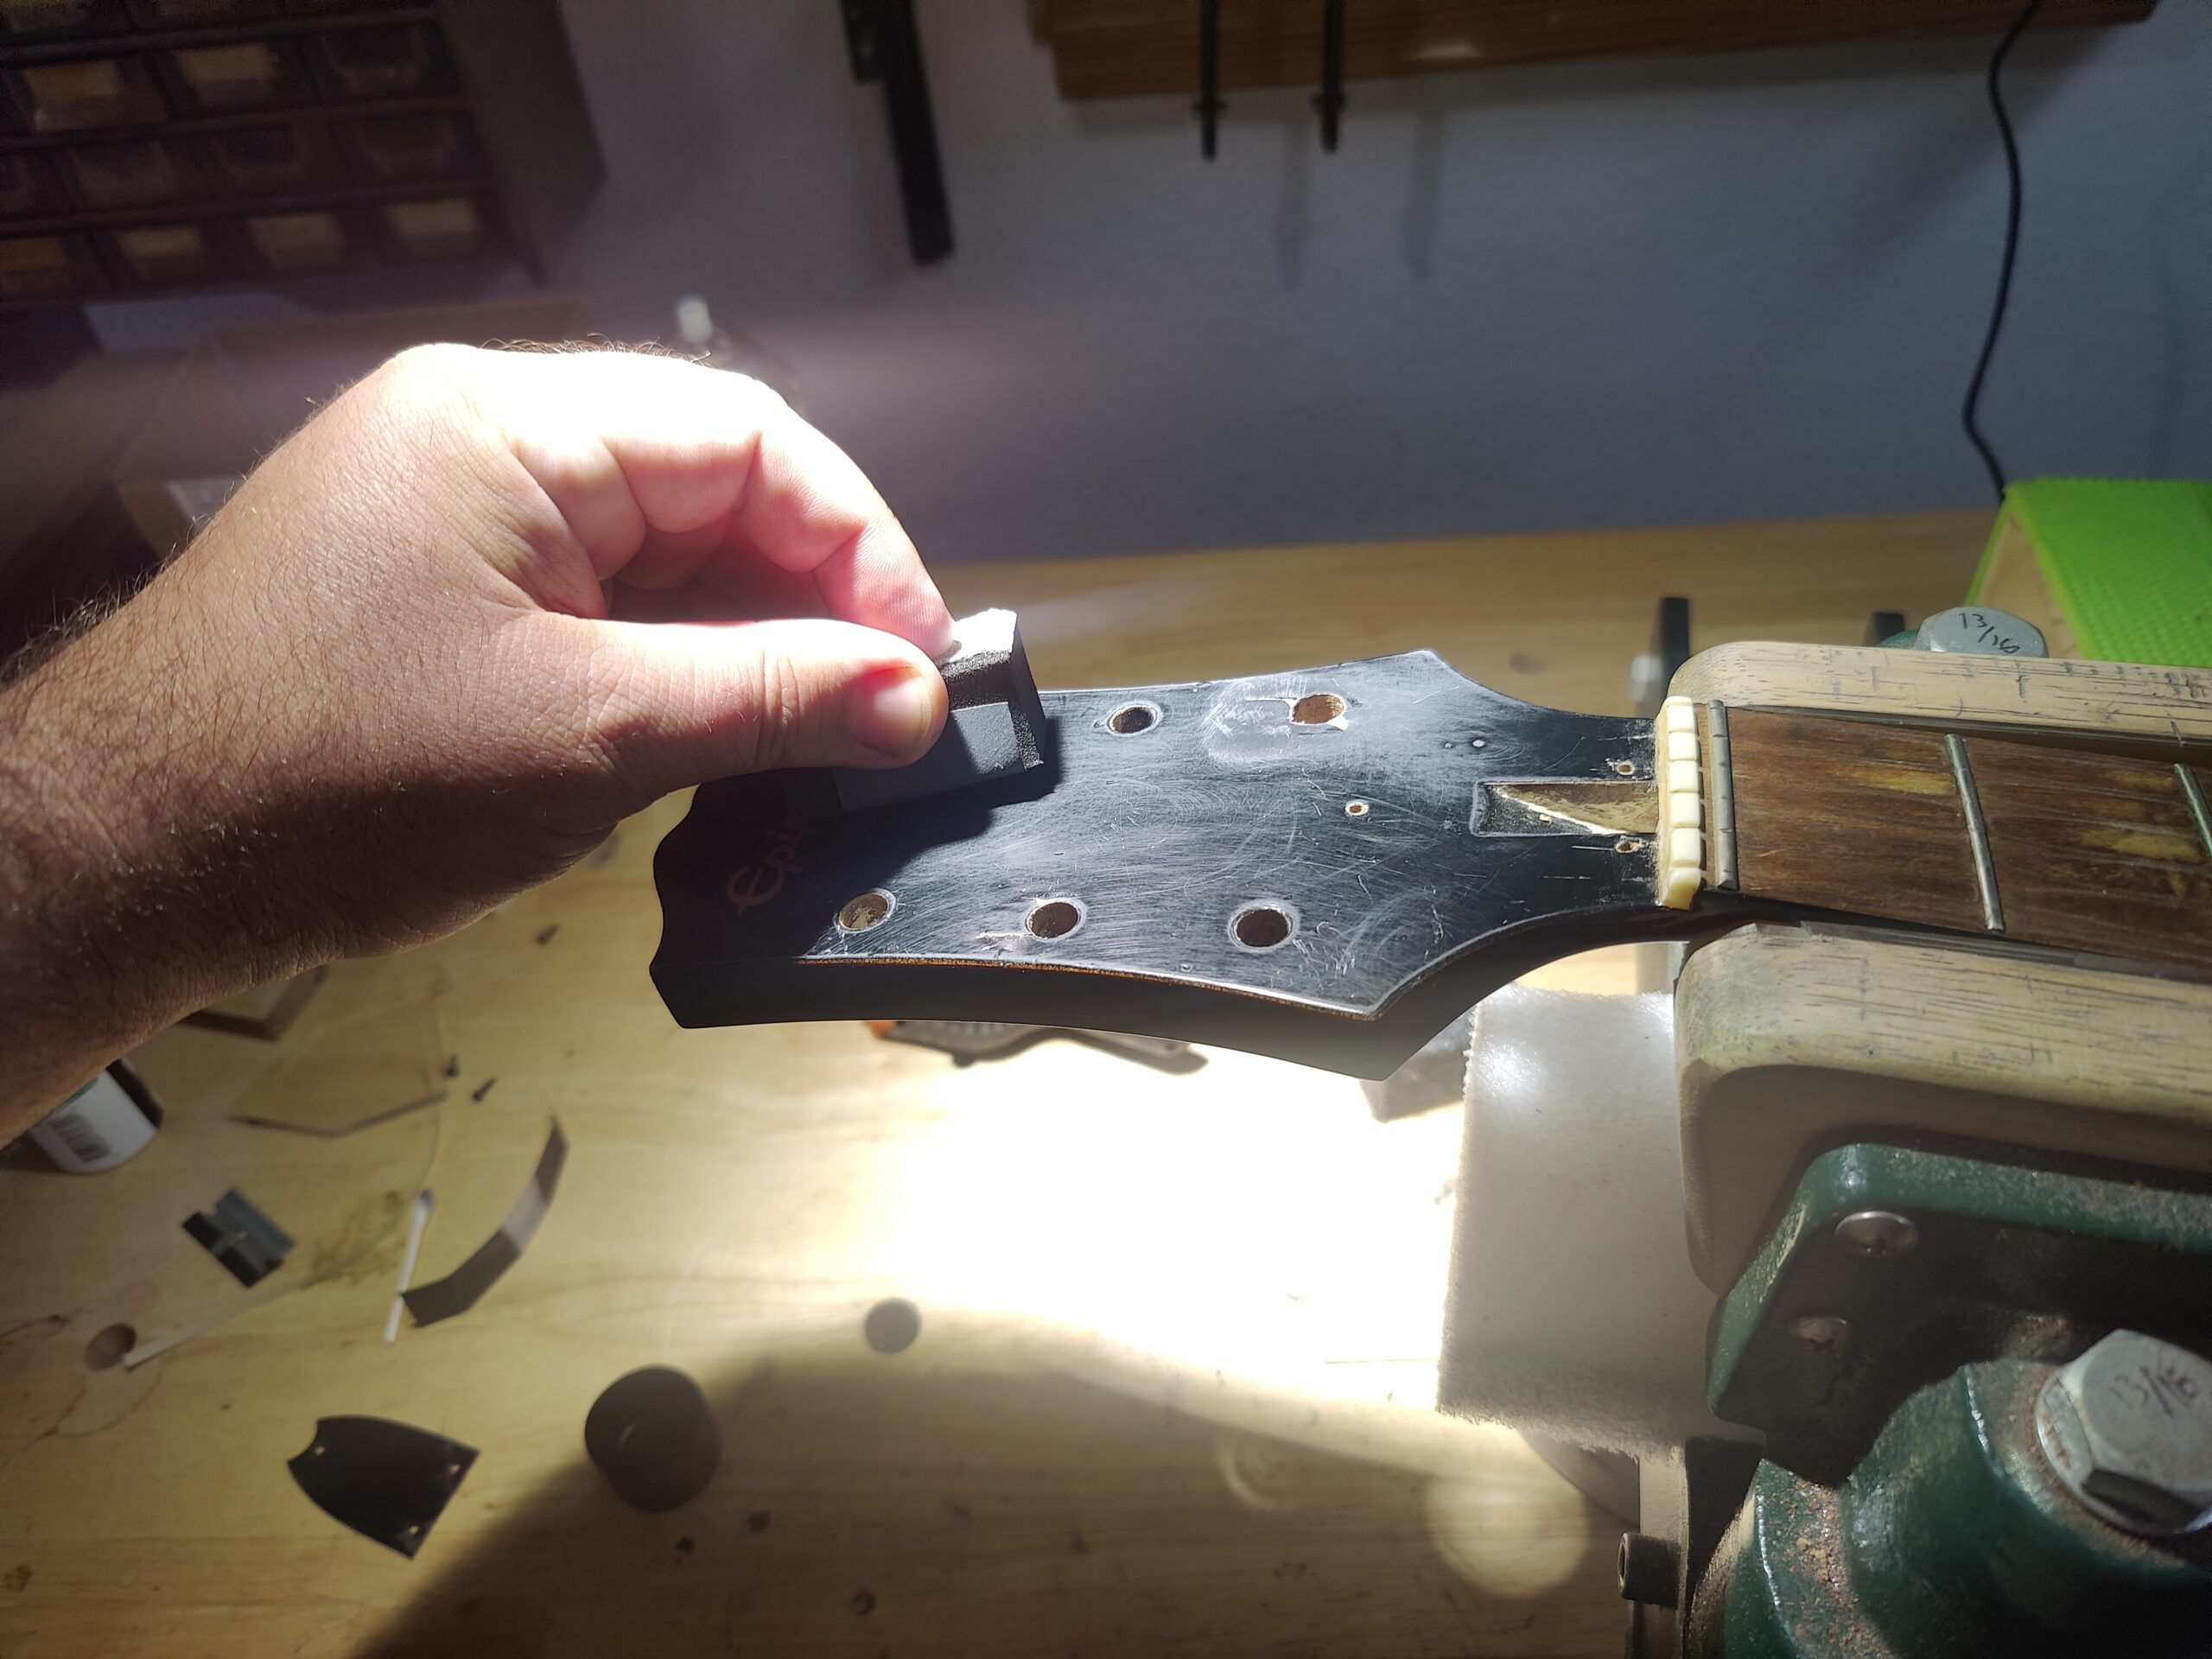
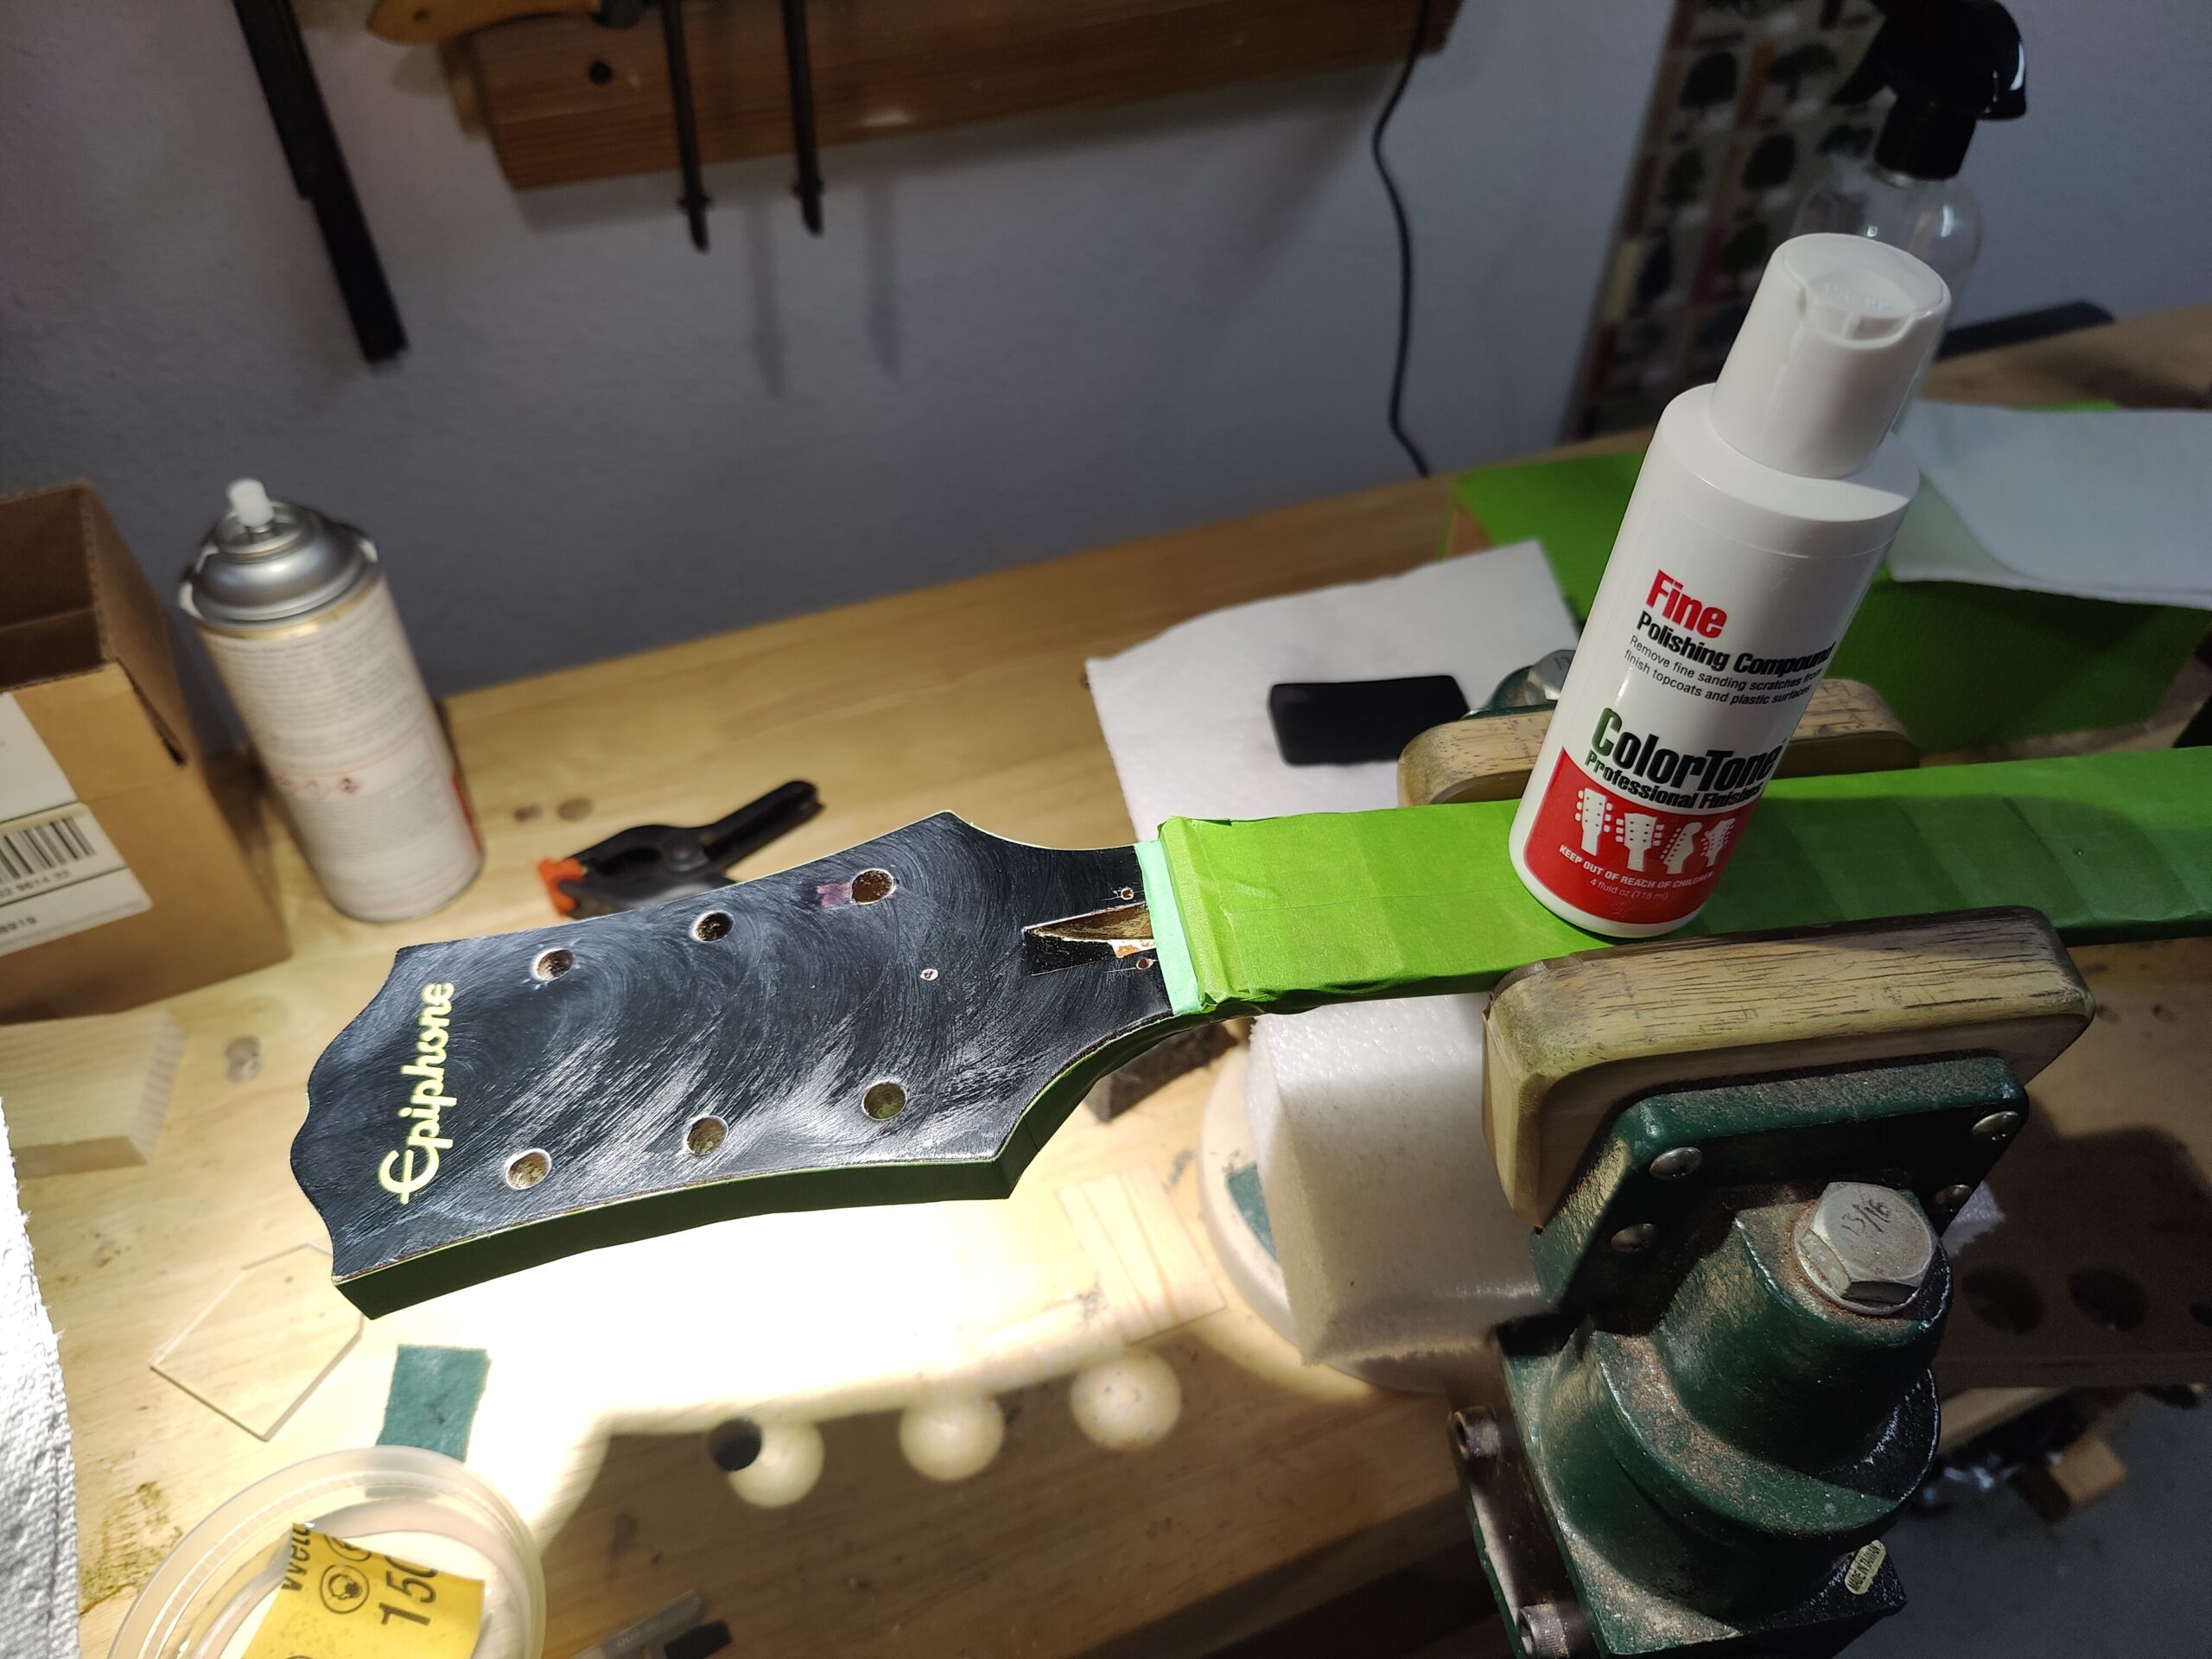
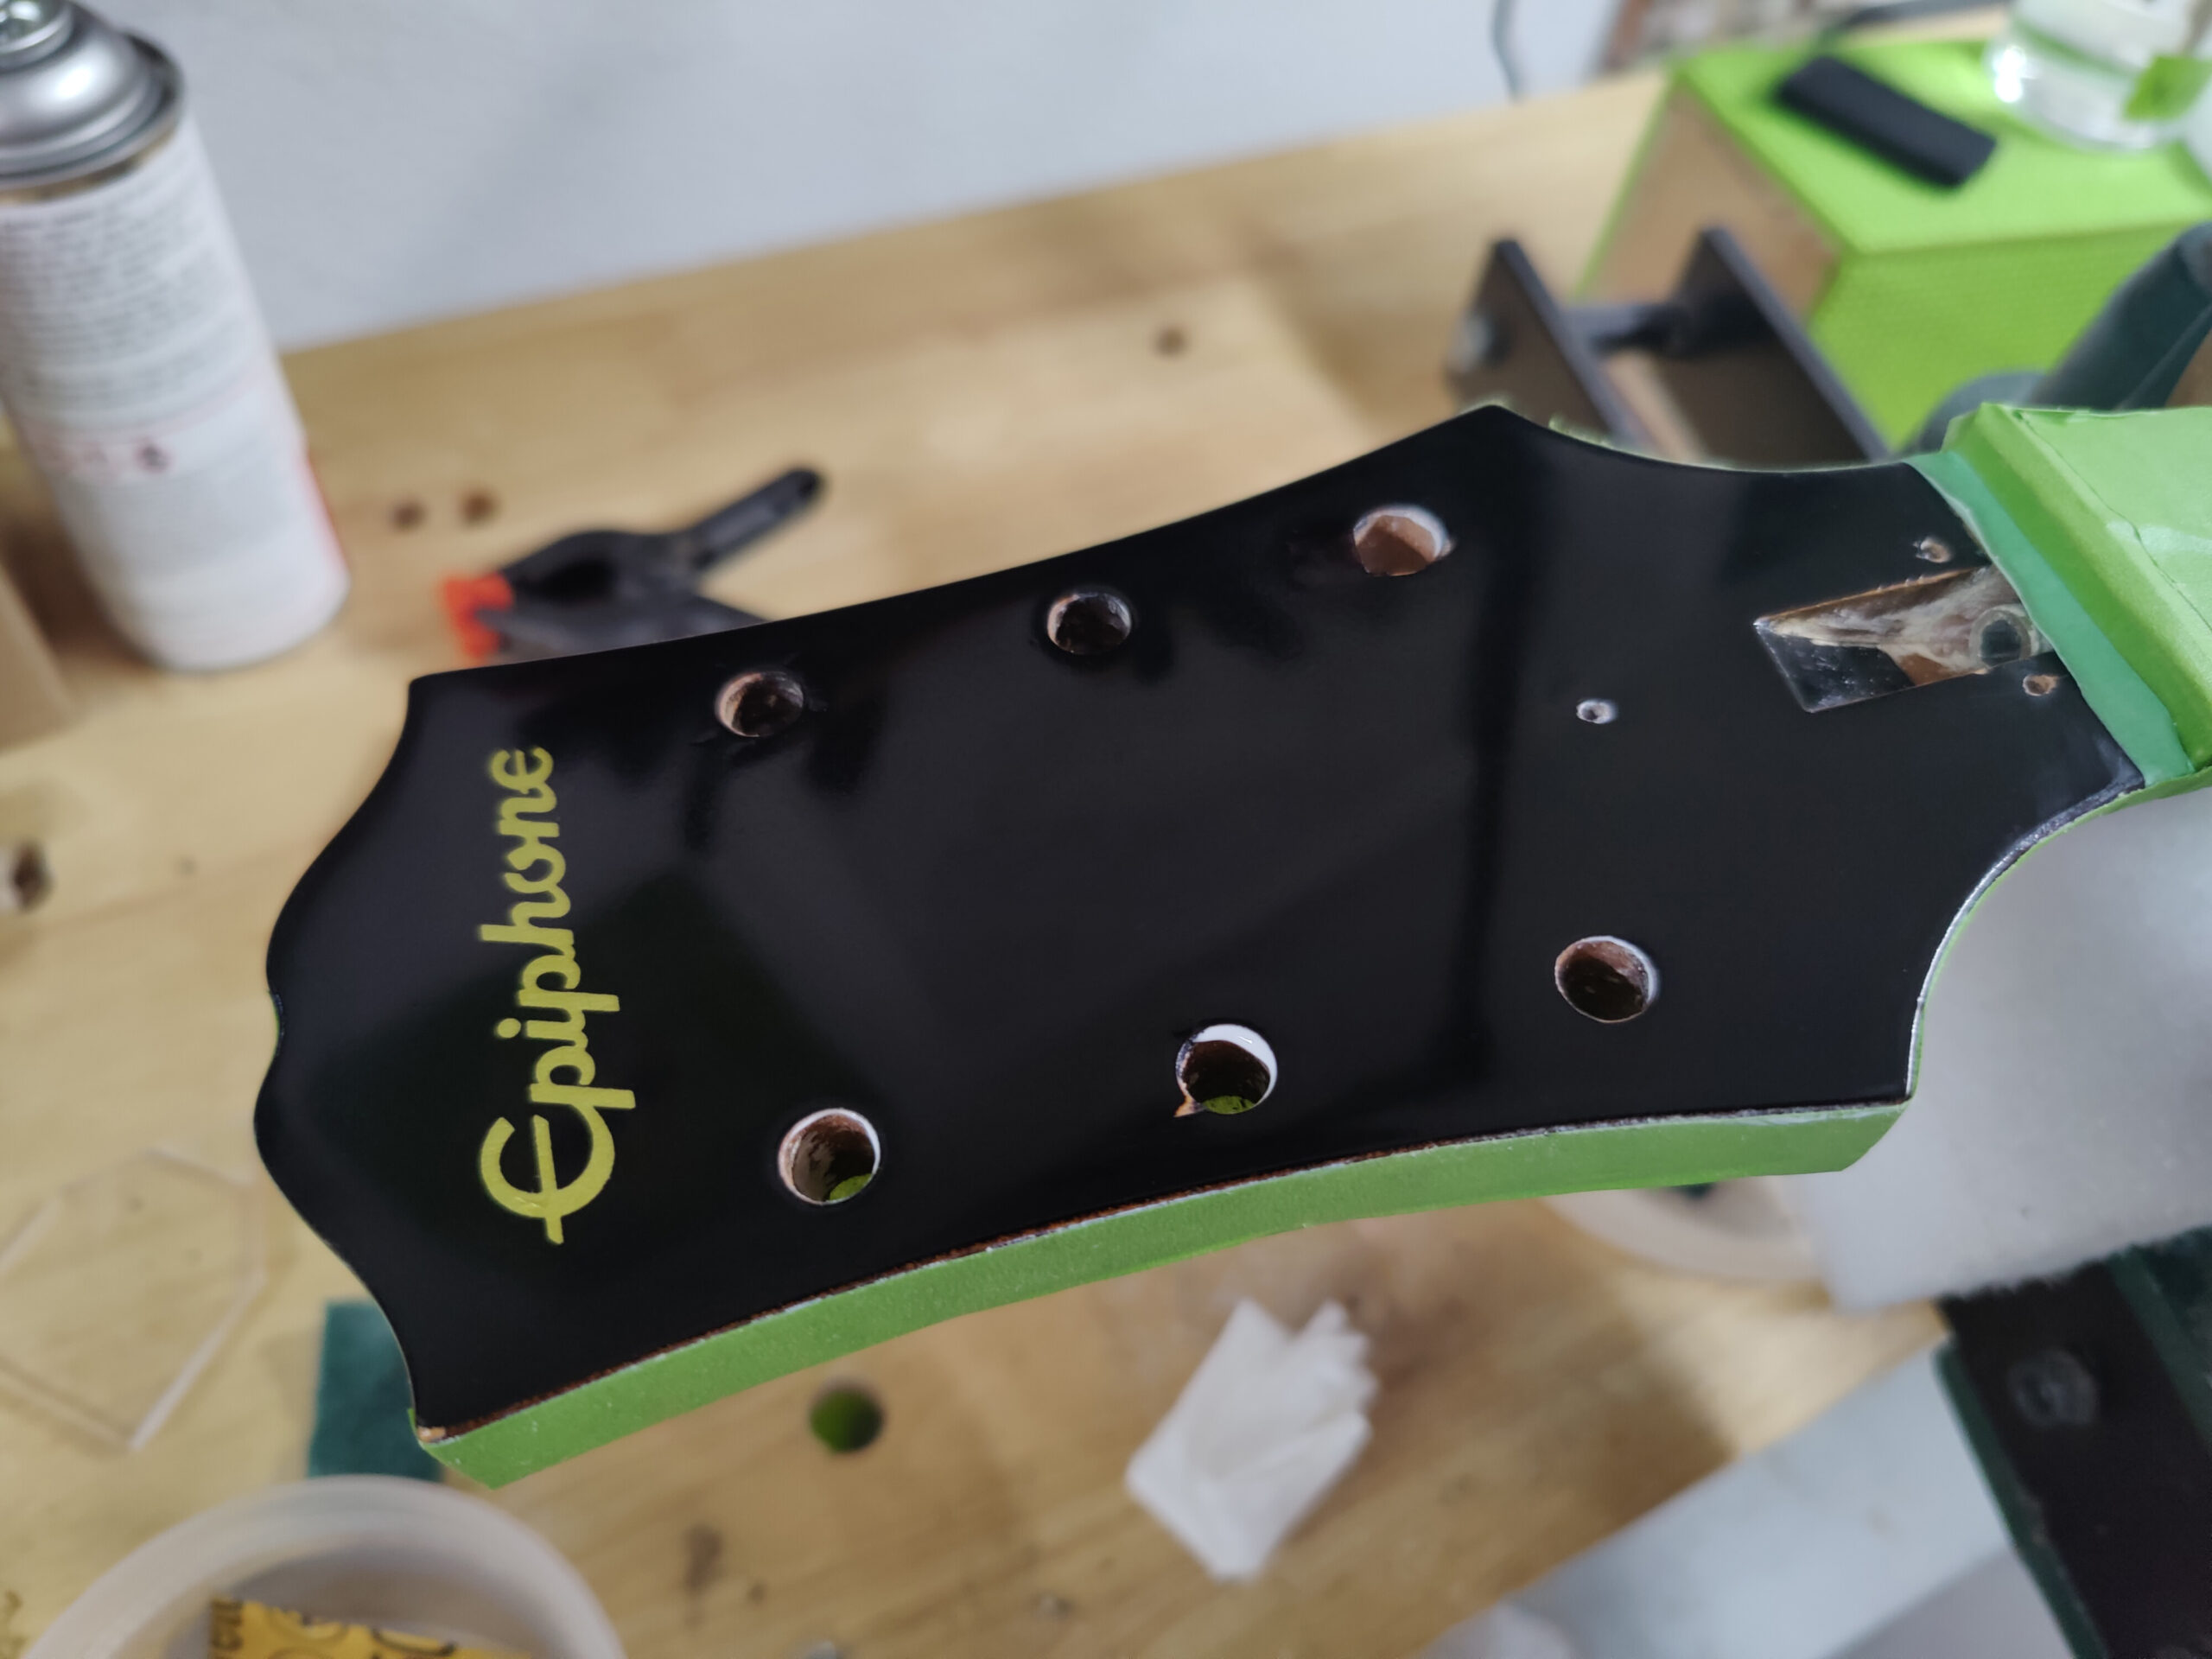
Lastly, the chipped out headstock veneer. I clean off the dust and grime with naphtha and a rag. I glue down the chip out and sand the glued area flat. Using the “Glue Looper” I apply some black dye to cover the areas sanded past the veneer and into bare wood. I then seal off the black dye with a few layers of my favorite super glue. I take off the rest of the tuner hardware and give the rest of the faceplate a sanding with 800, 1200 and 2000 grit papers followed up by an application of buffing compounds and the headstock finished out looking good as new.
 |
 |
 |
 |
 |
 |
 |
 |
For all of your idiosyncratic vintage guitar repairs, call Andrew 512-590-1225.