Acoustic Side Hole Repair with Mahogany Veneer
South Austin Guitar Repair
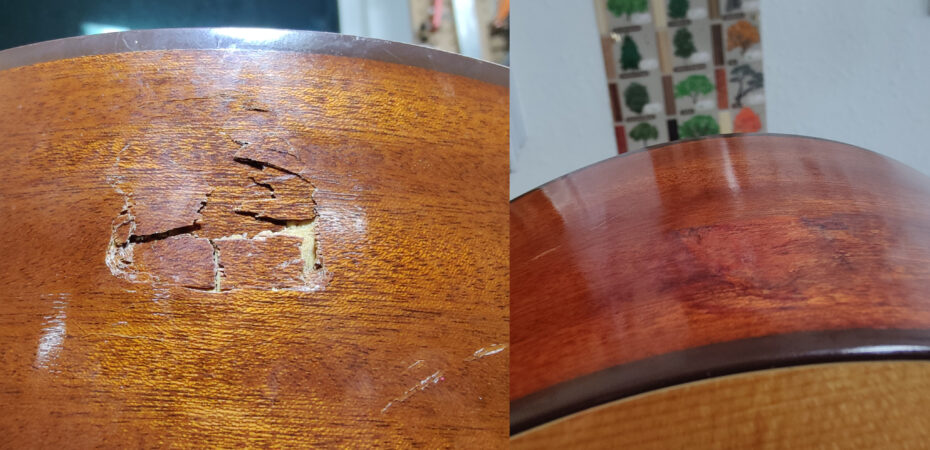
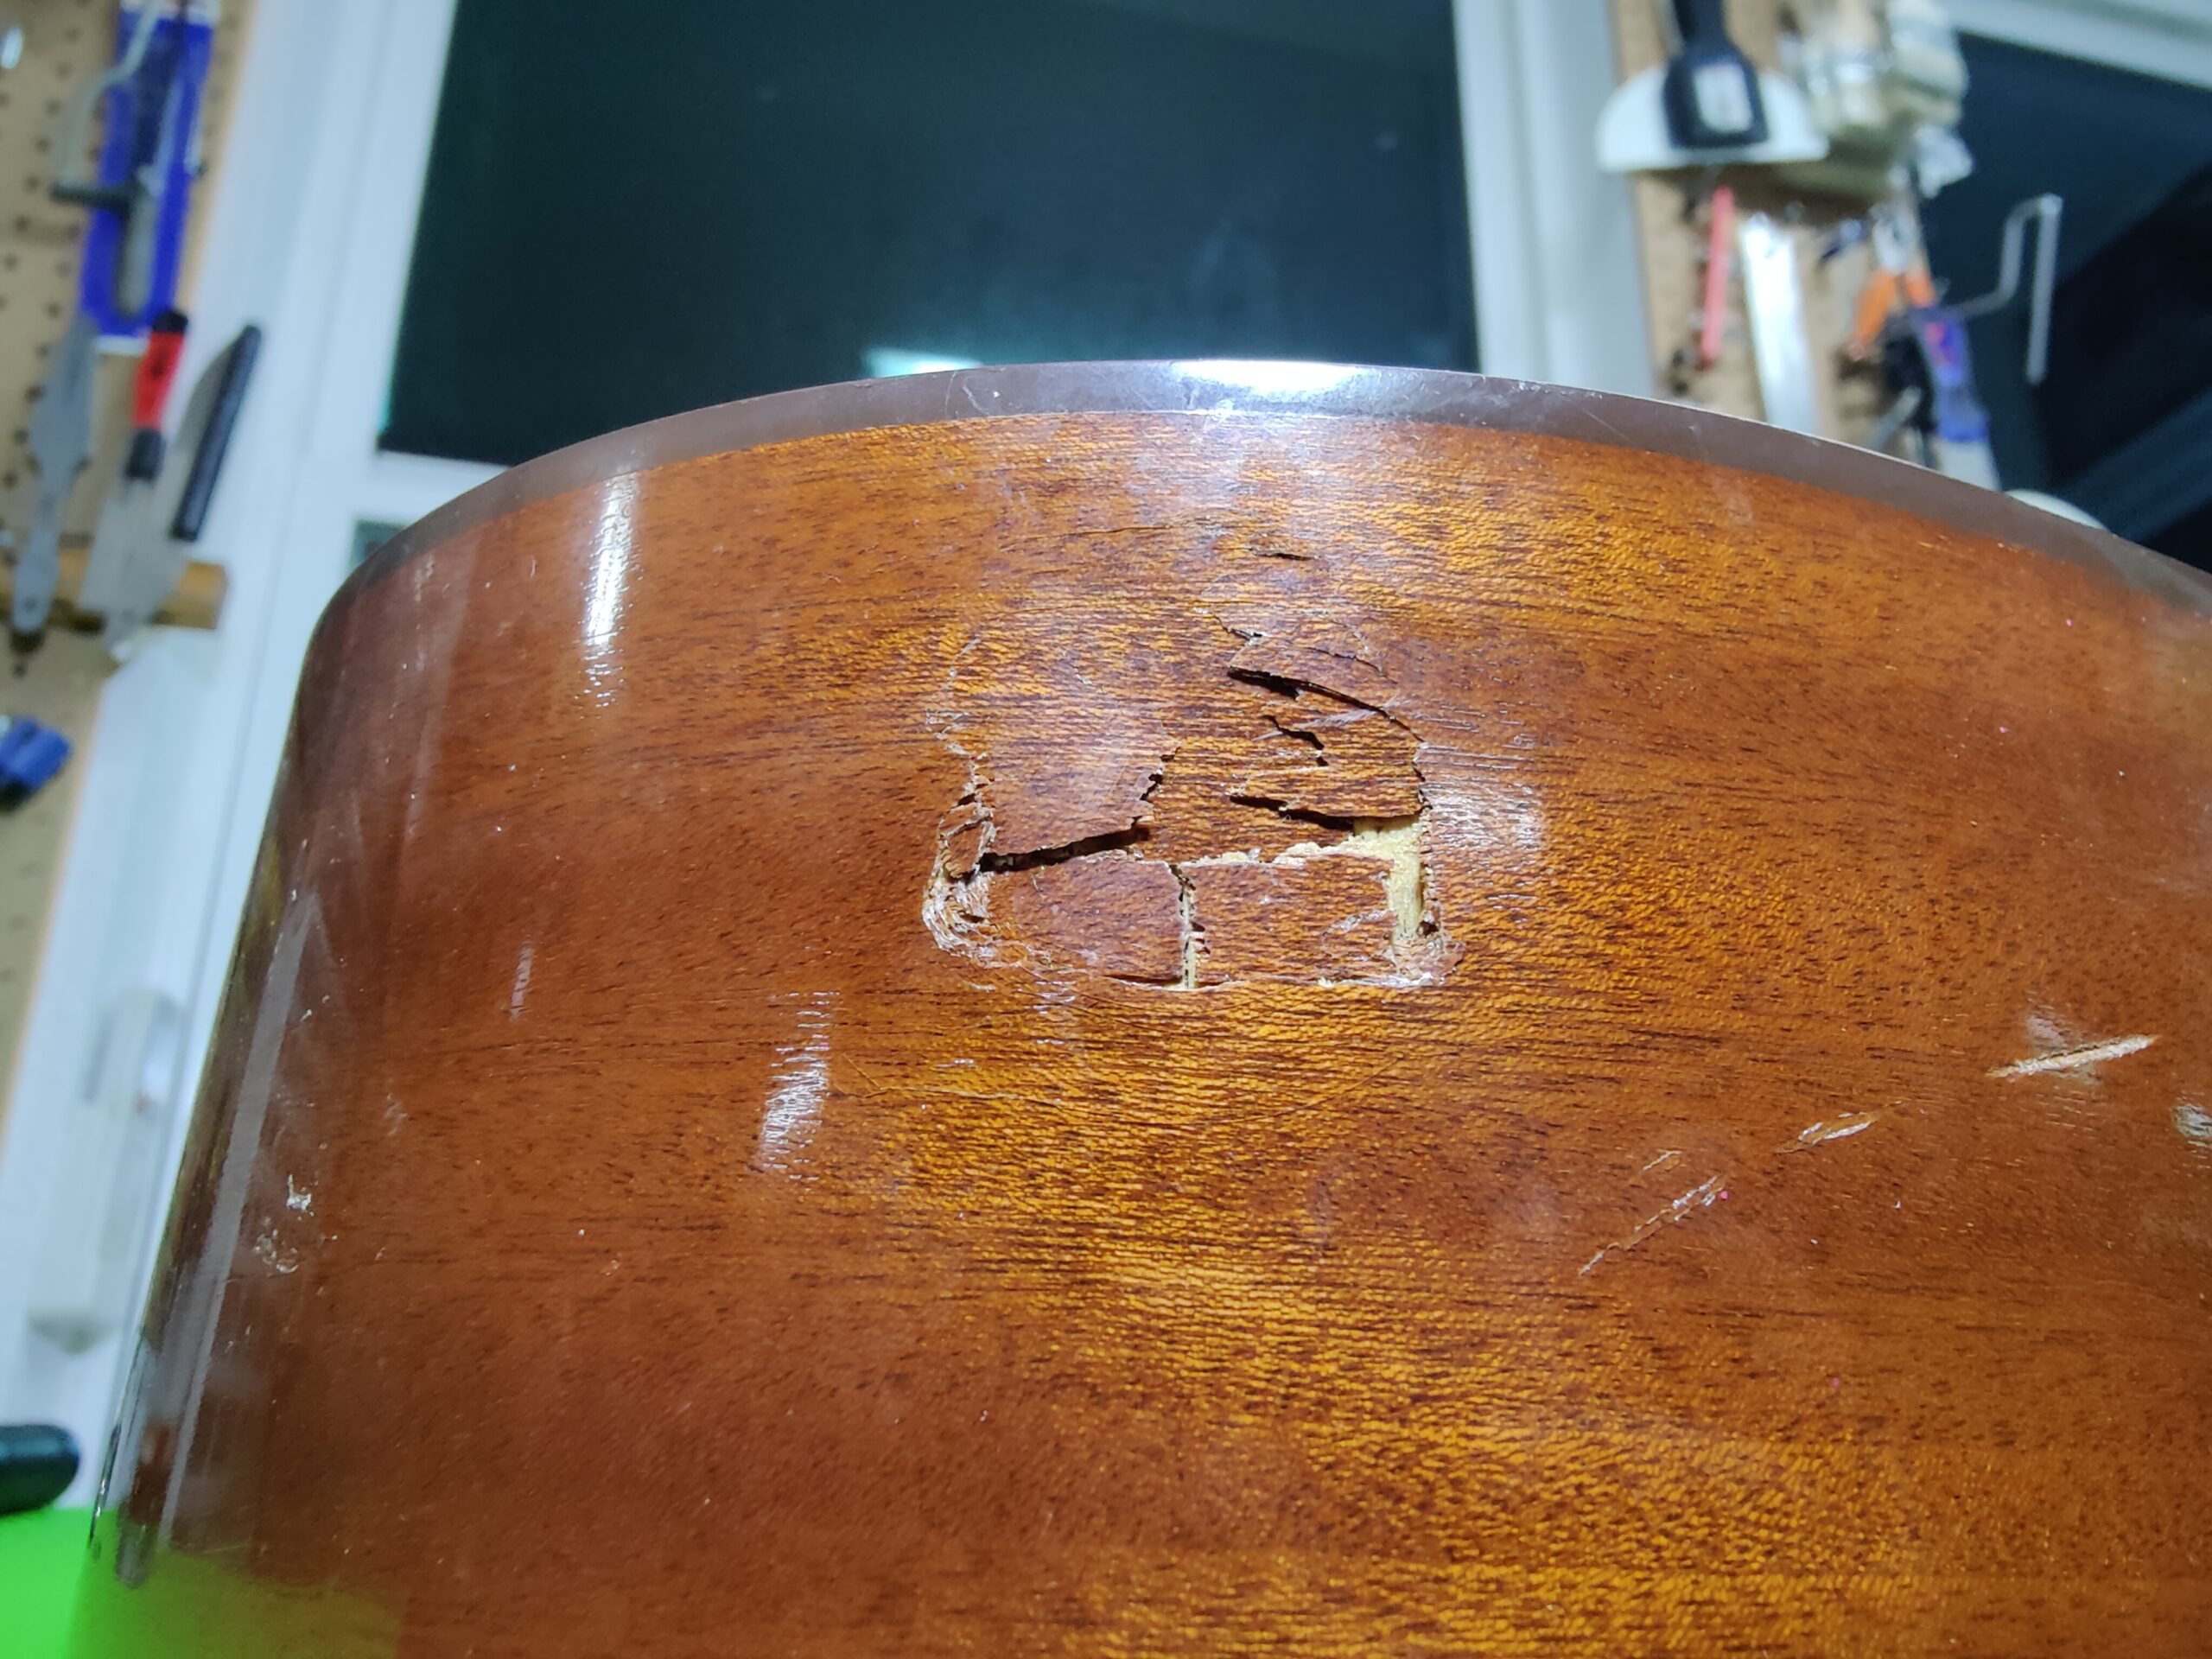
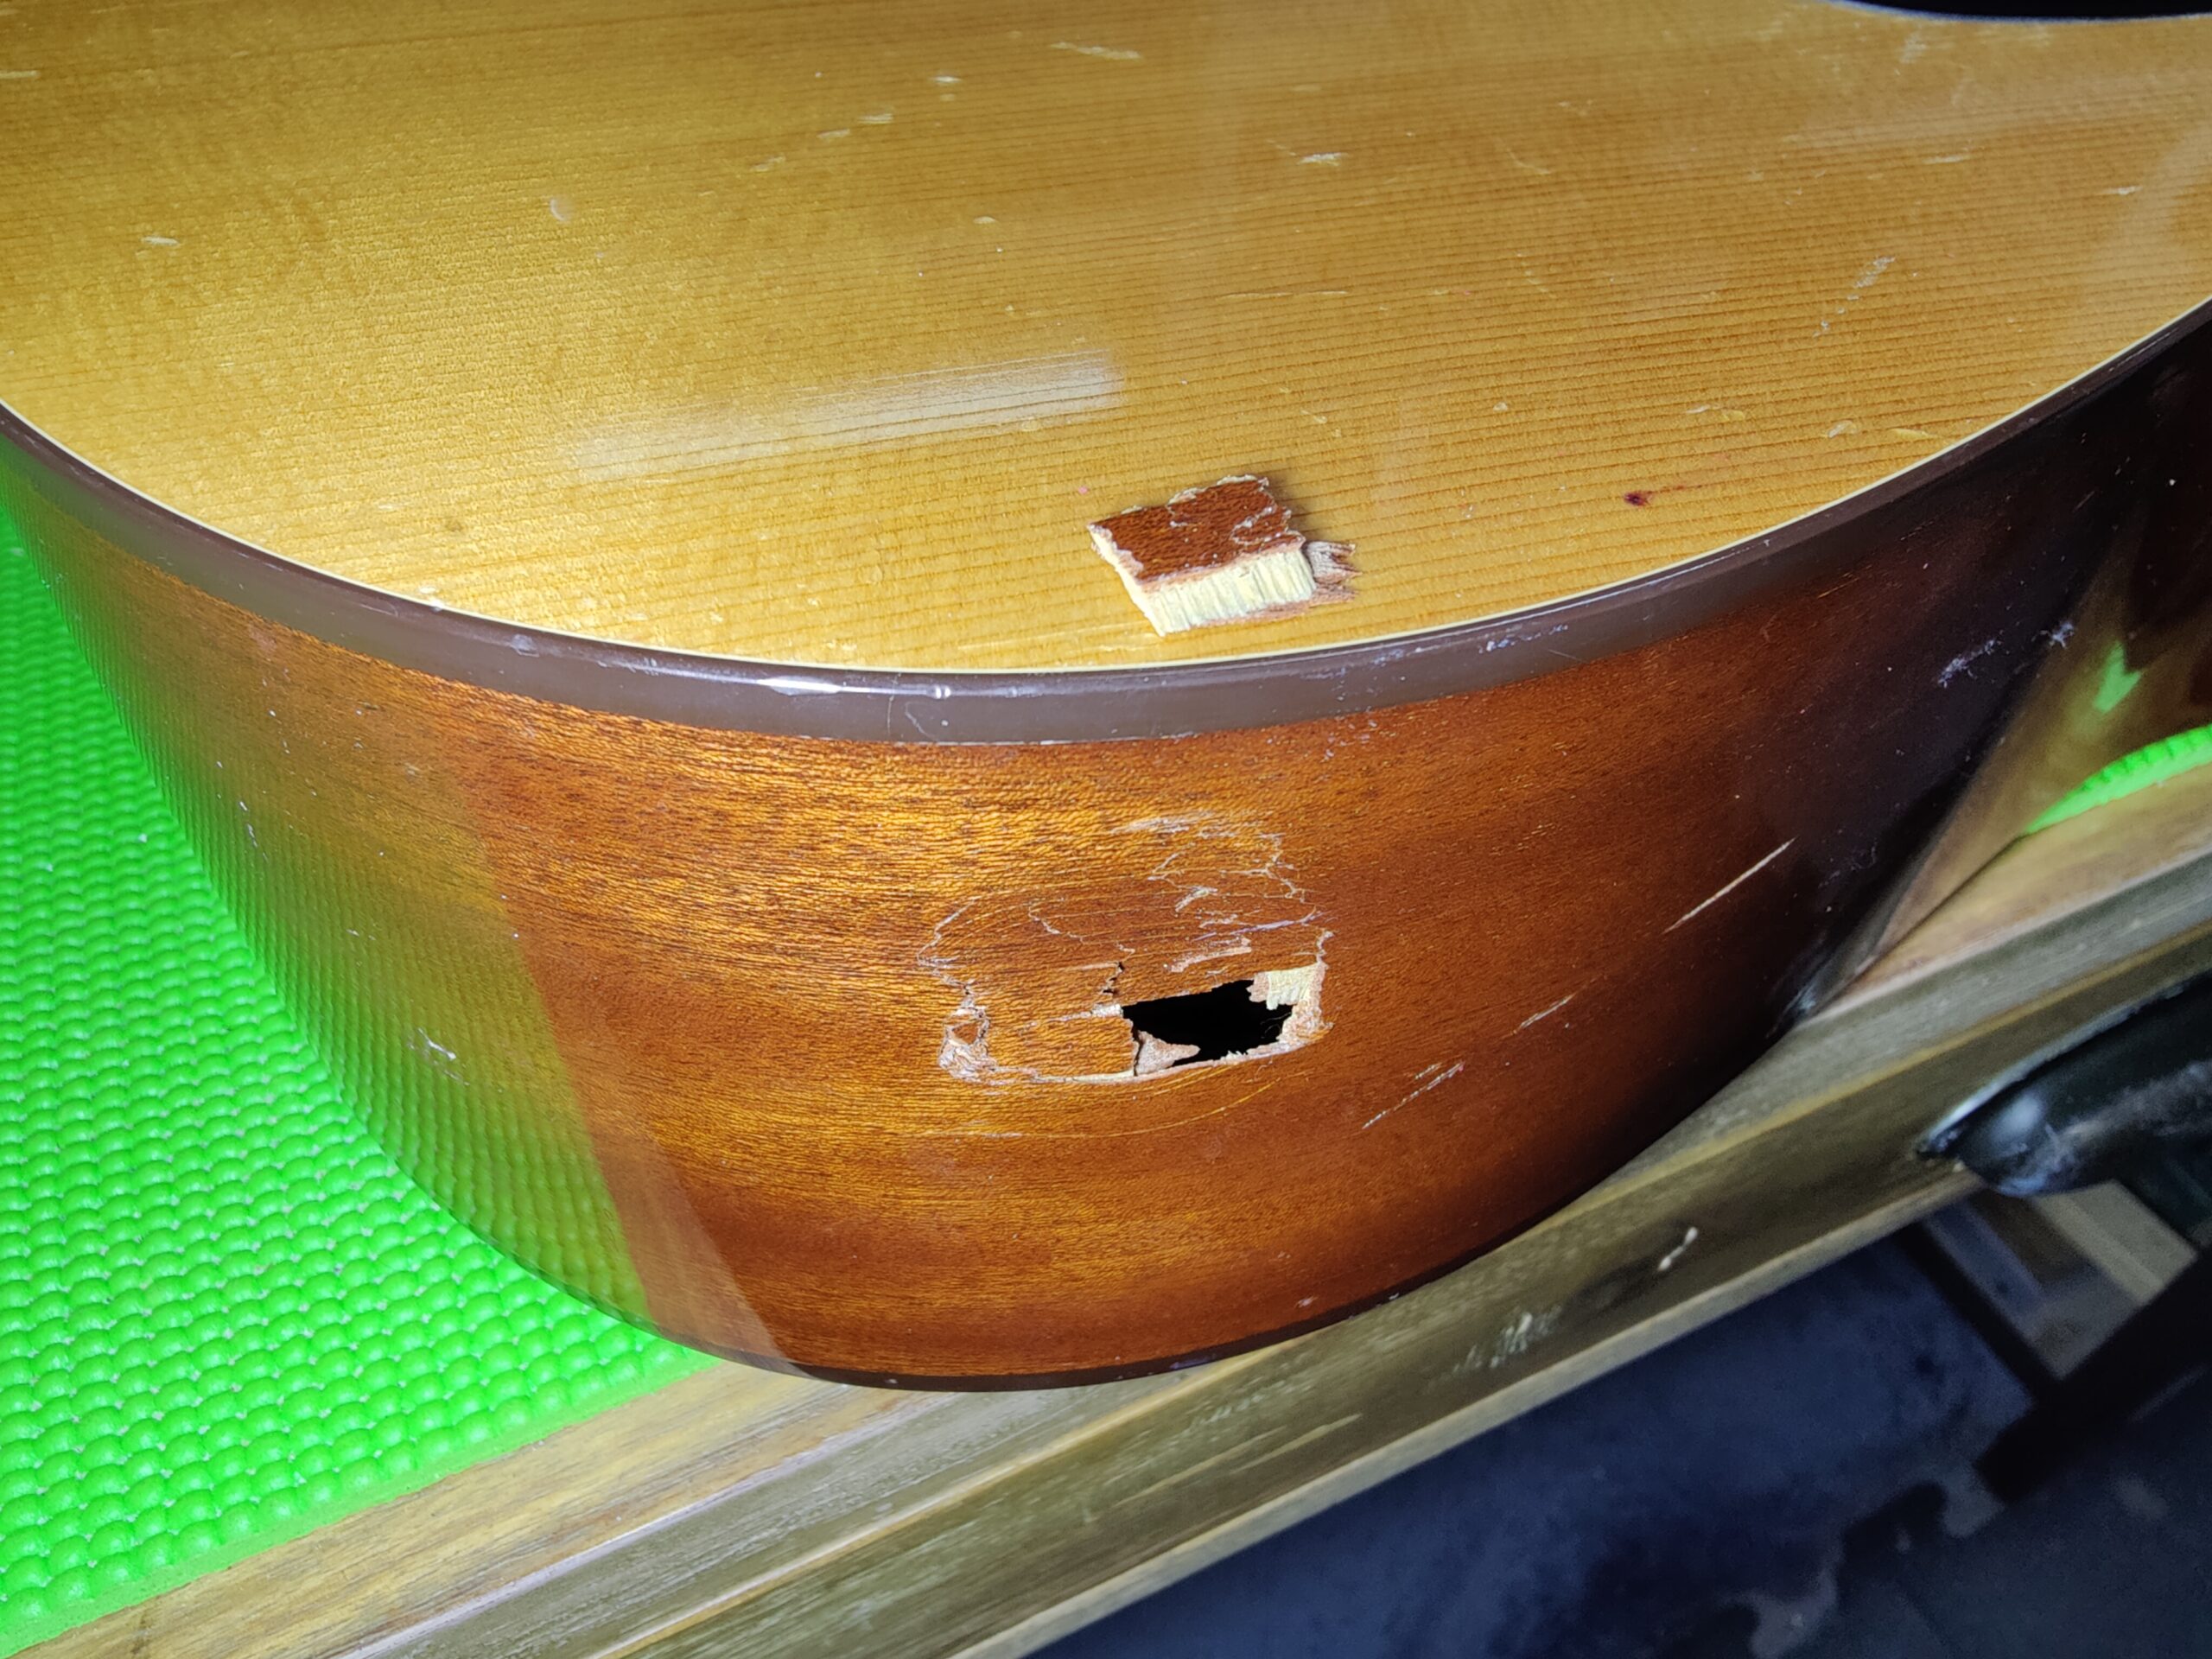
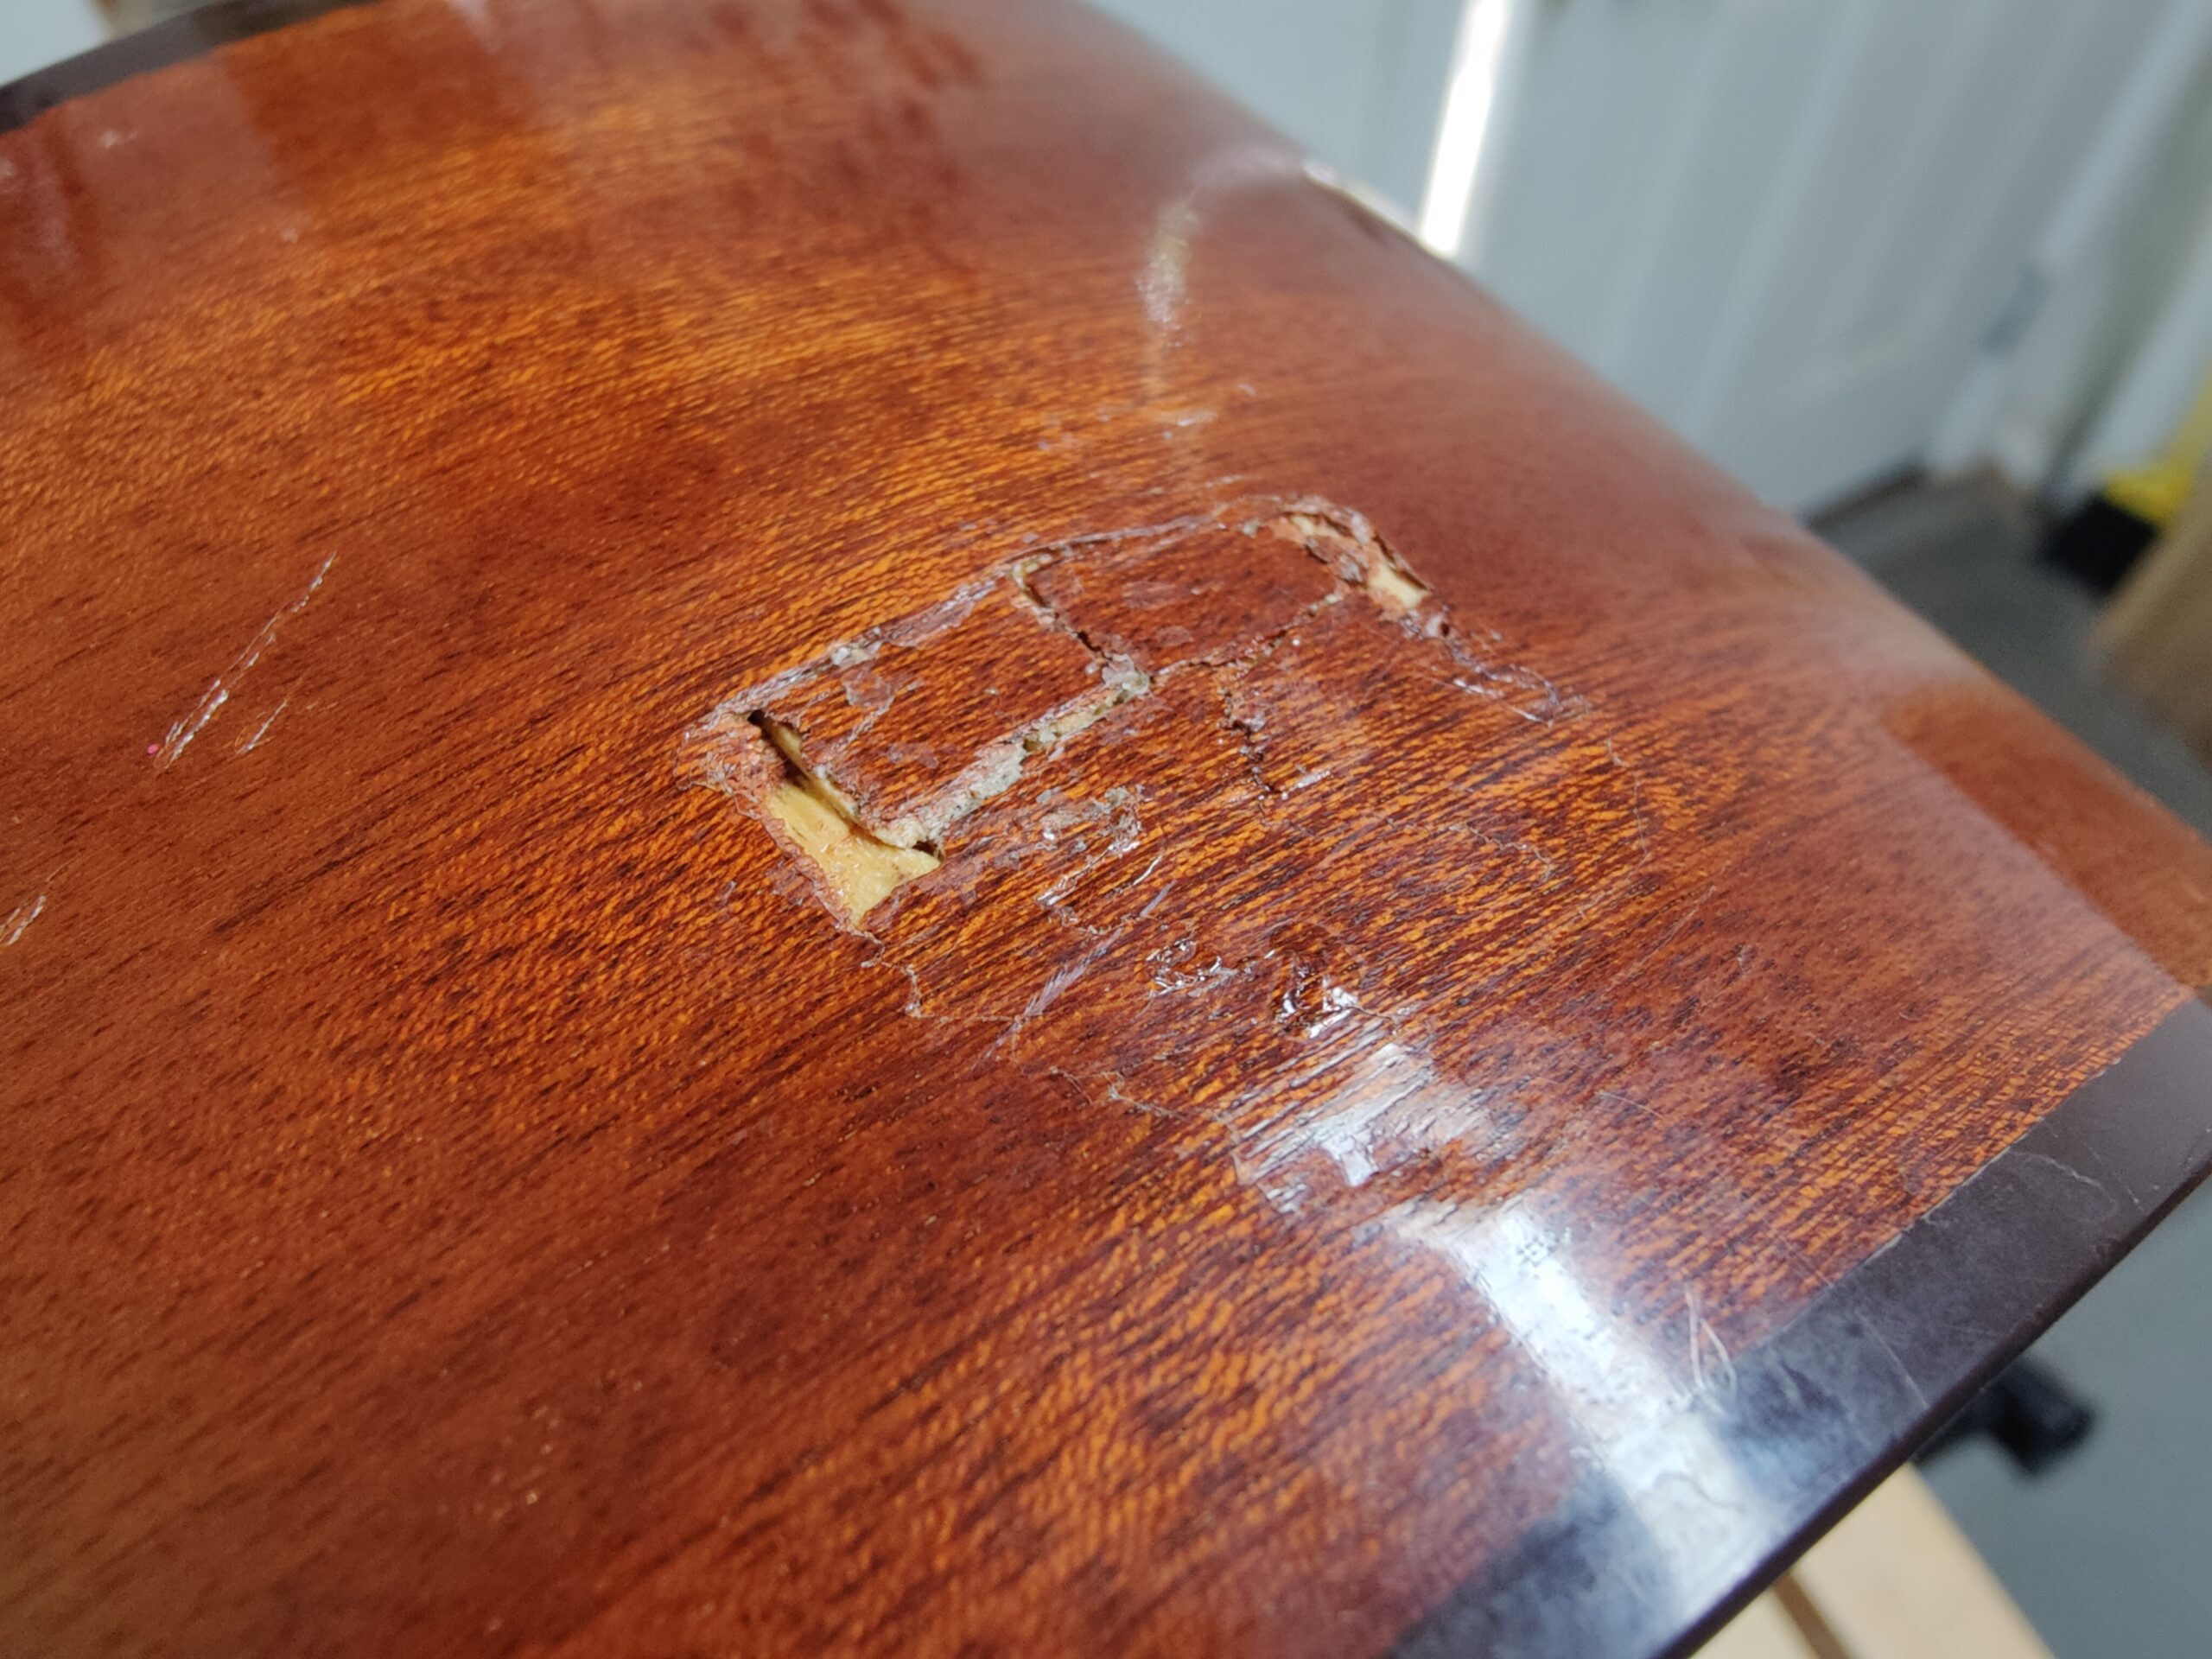
This acoustic was lent from one friend to another at a college party. After a hazy night, the friend woke up the next day to a decent size hole knocked into the side with no recollection how it happened. Suffice it to say, someone had spiked the punch and this guitar probably caught a corner of a stone countertop, or fell onto a hard object while a slurred attempt at Wonderwall was performed.
The friend, wanting to make things right, gave me a call to see what could be done. This was a complex break. Lots of different cracks moving in various directions. Wood fibers knocked out of natural alignment, laying over each other in such a way, they couldn’t simply fit back together. One large piece simply being held in by the various edges of the overall break… to sum it up, a mess of a break.
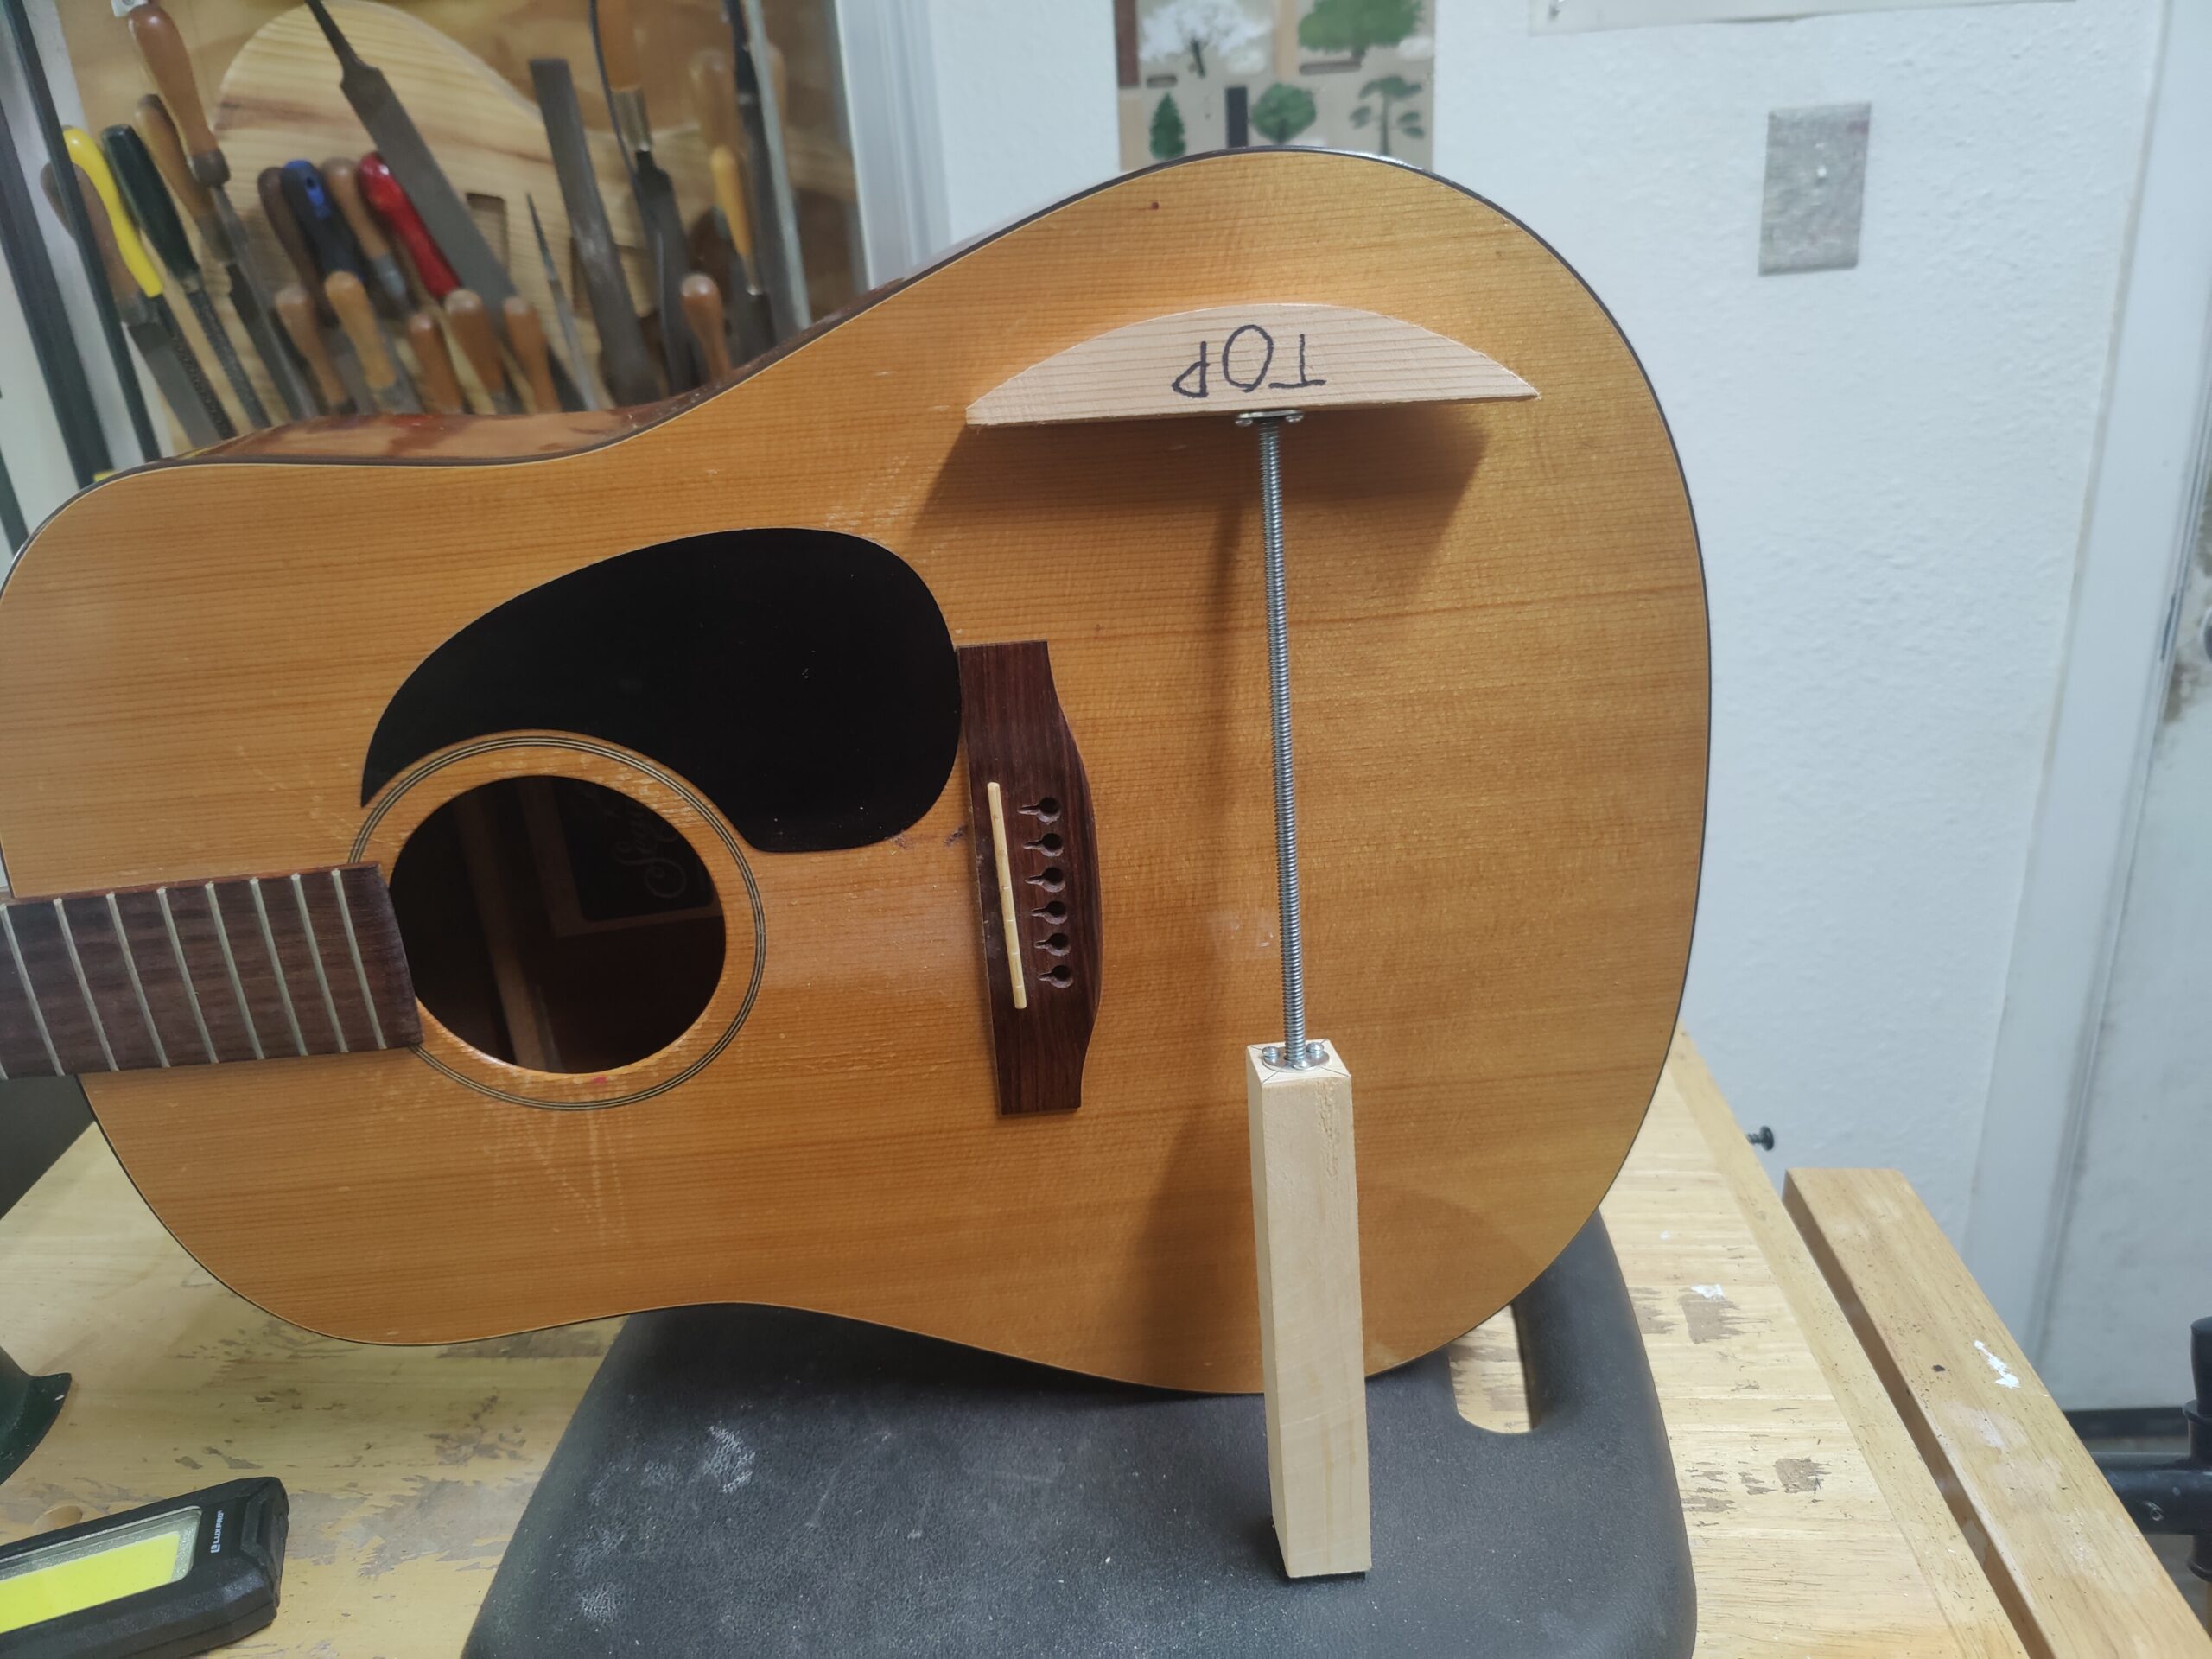
Fear not my undergraduate underdog, there’s a fix for this. I first created an “outward pressure applying caul” or, reverse clamping mechanism. I traced the wall of the acoustic and cut a block of wood to a matching contour. Drilling through another longer rectangular block of wood, I added threaded inserts onto the ends of both blocks and married the two pieces with a length of 1/4″ all thread.
 |
 |
 |
 |
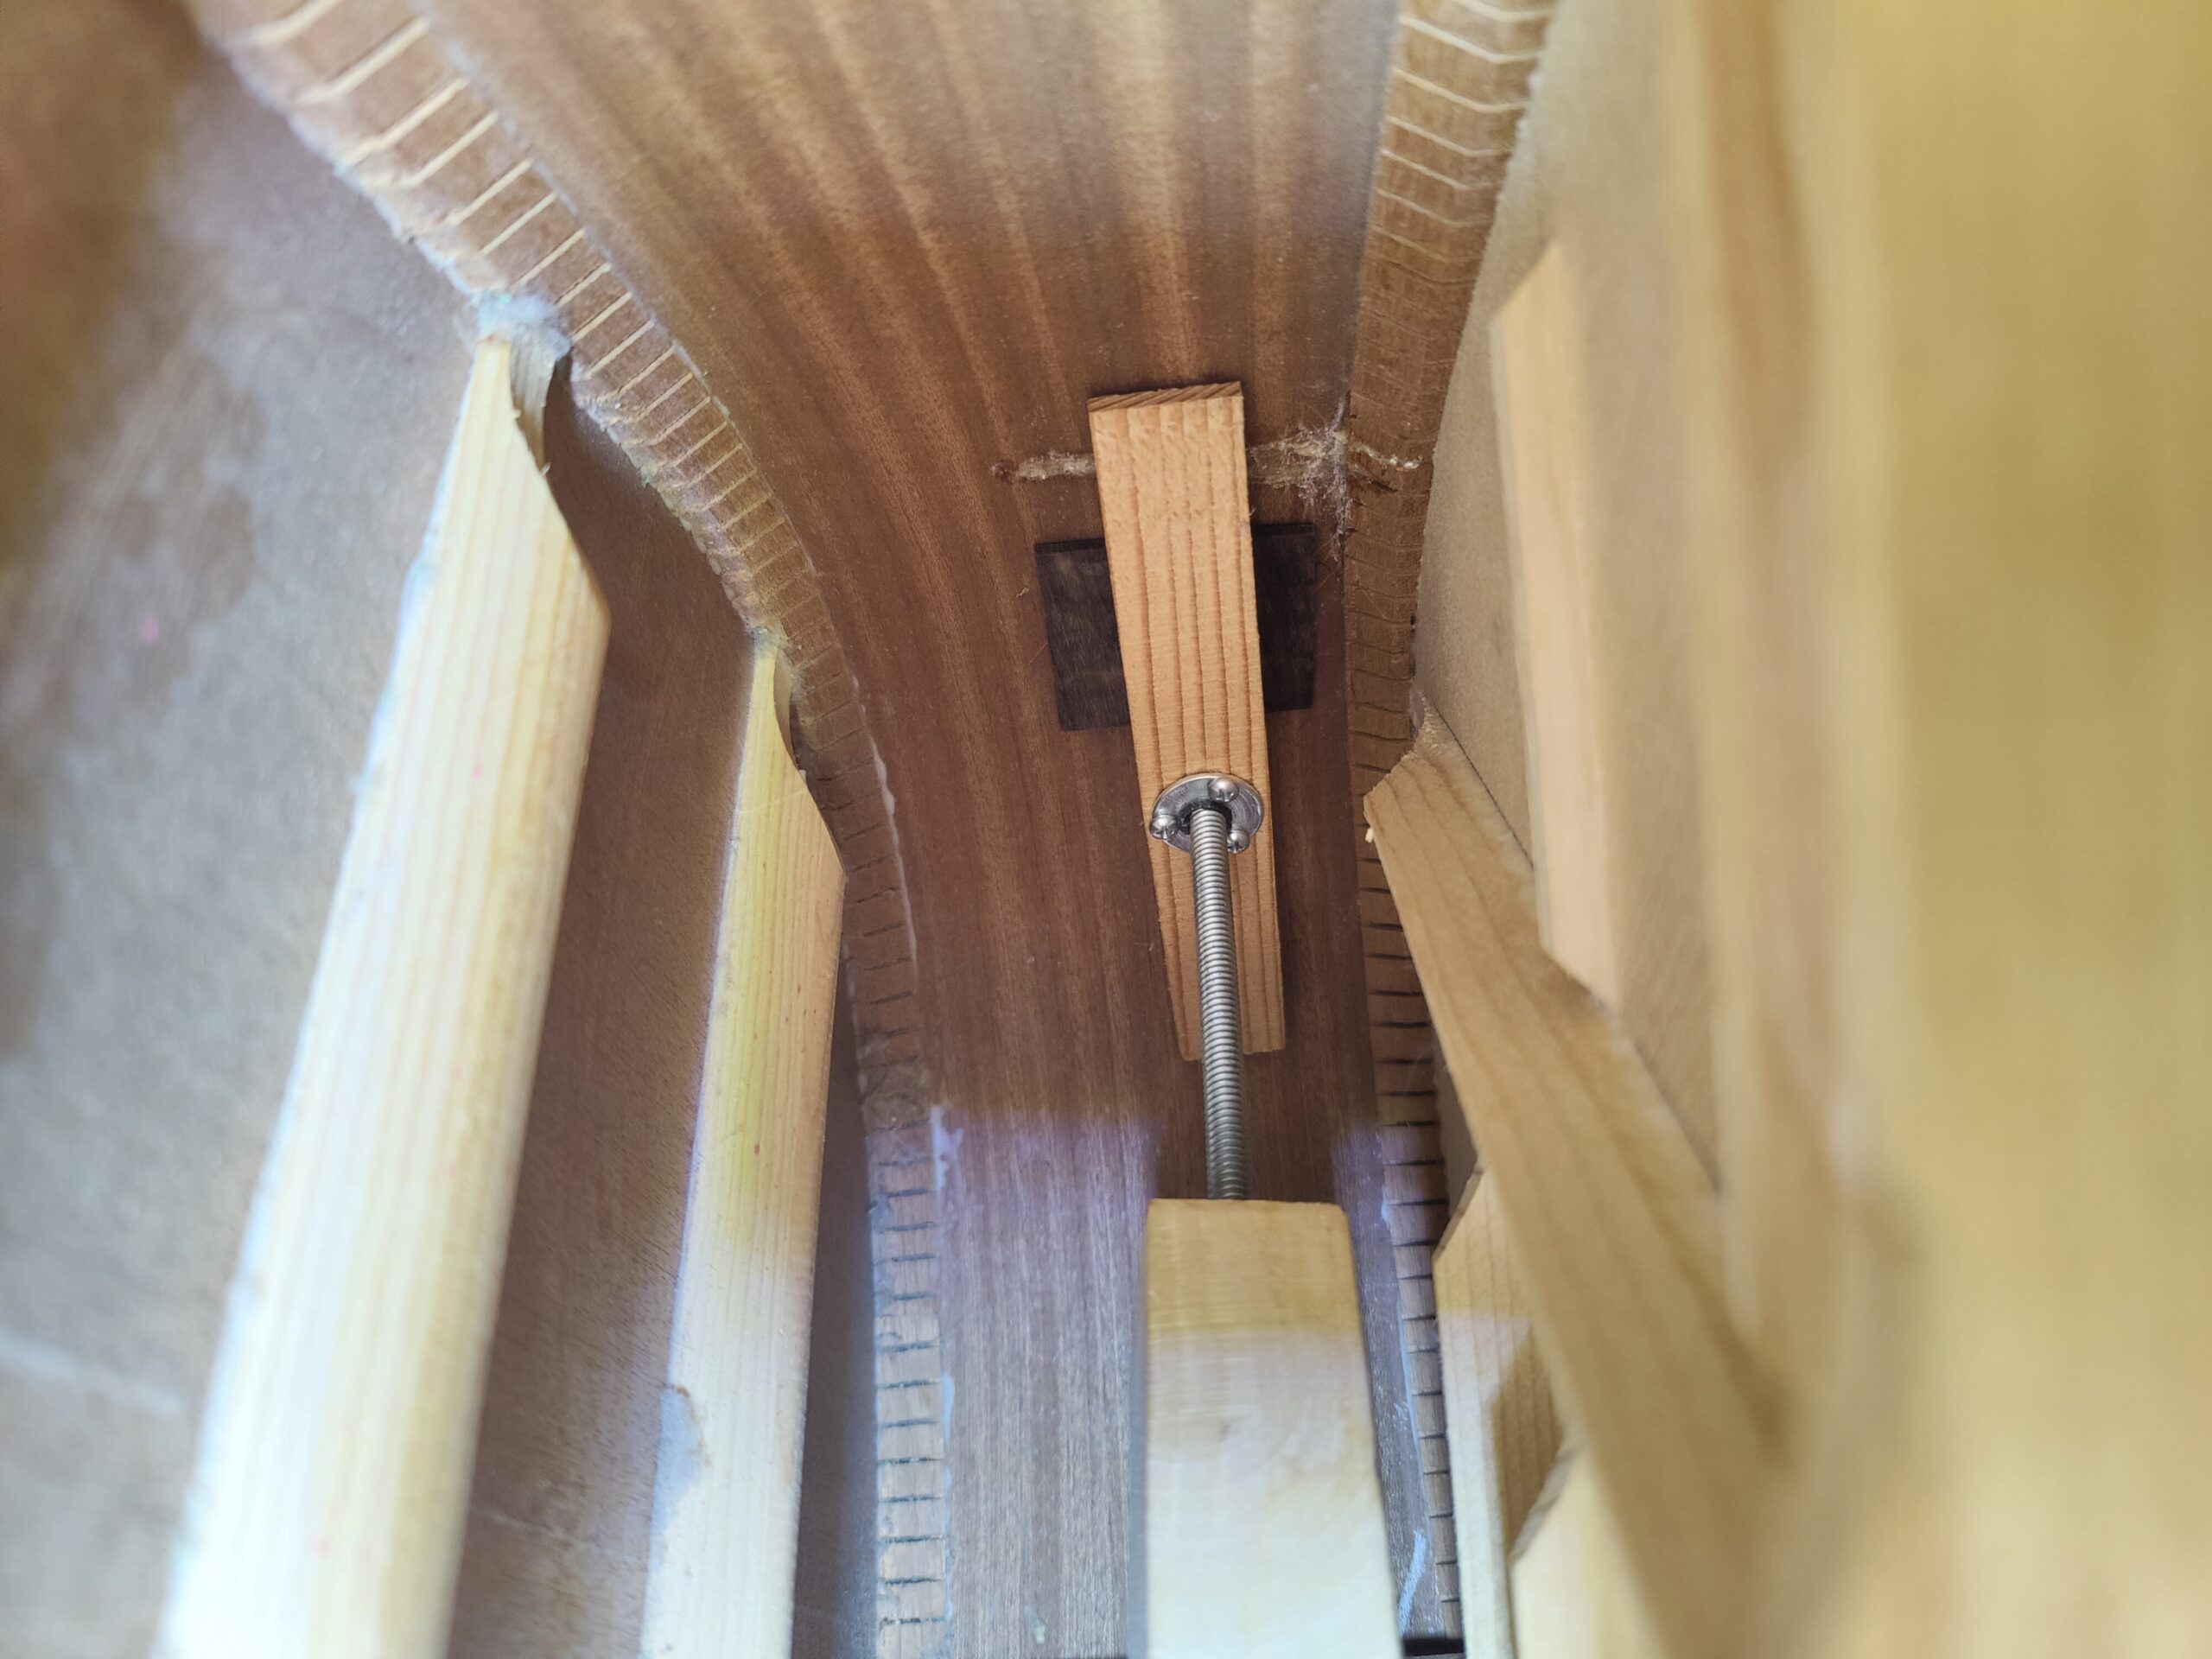
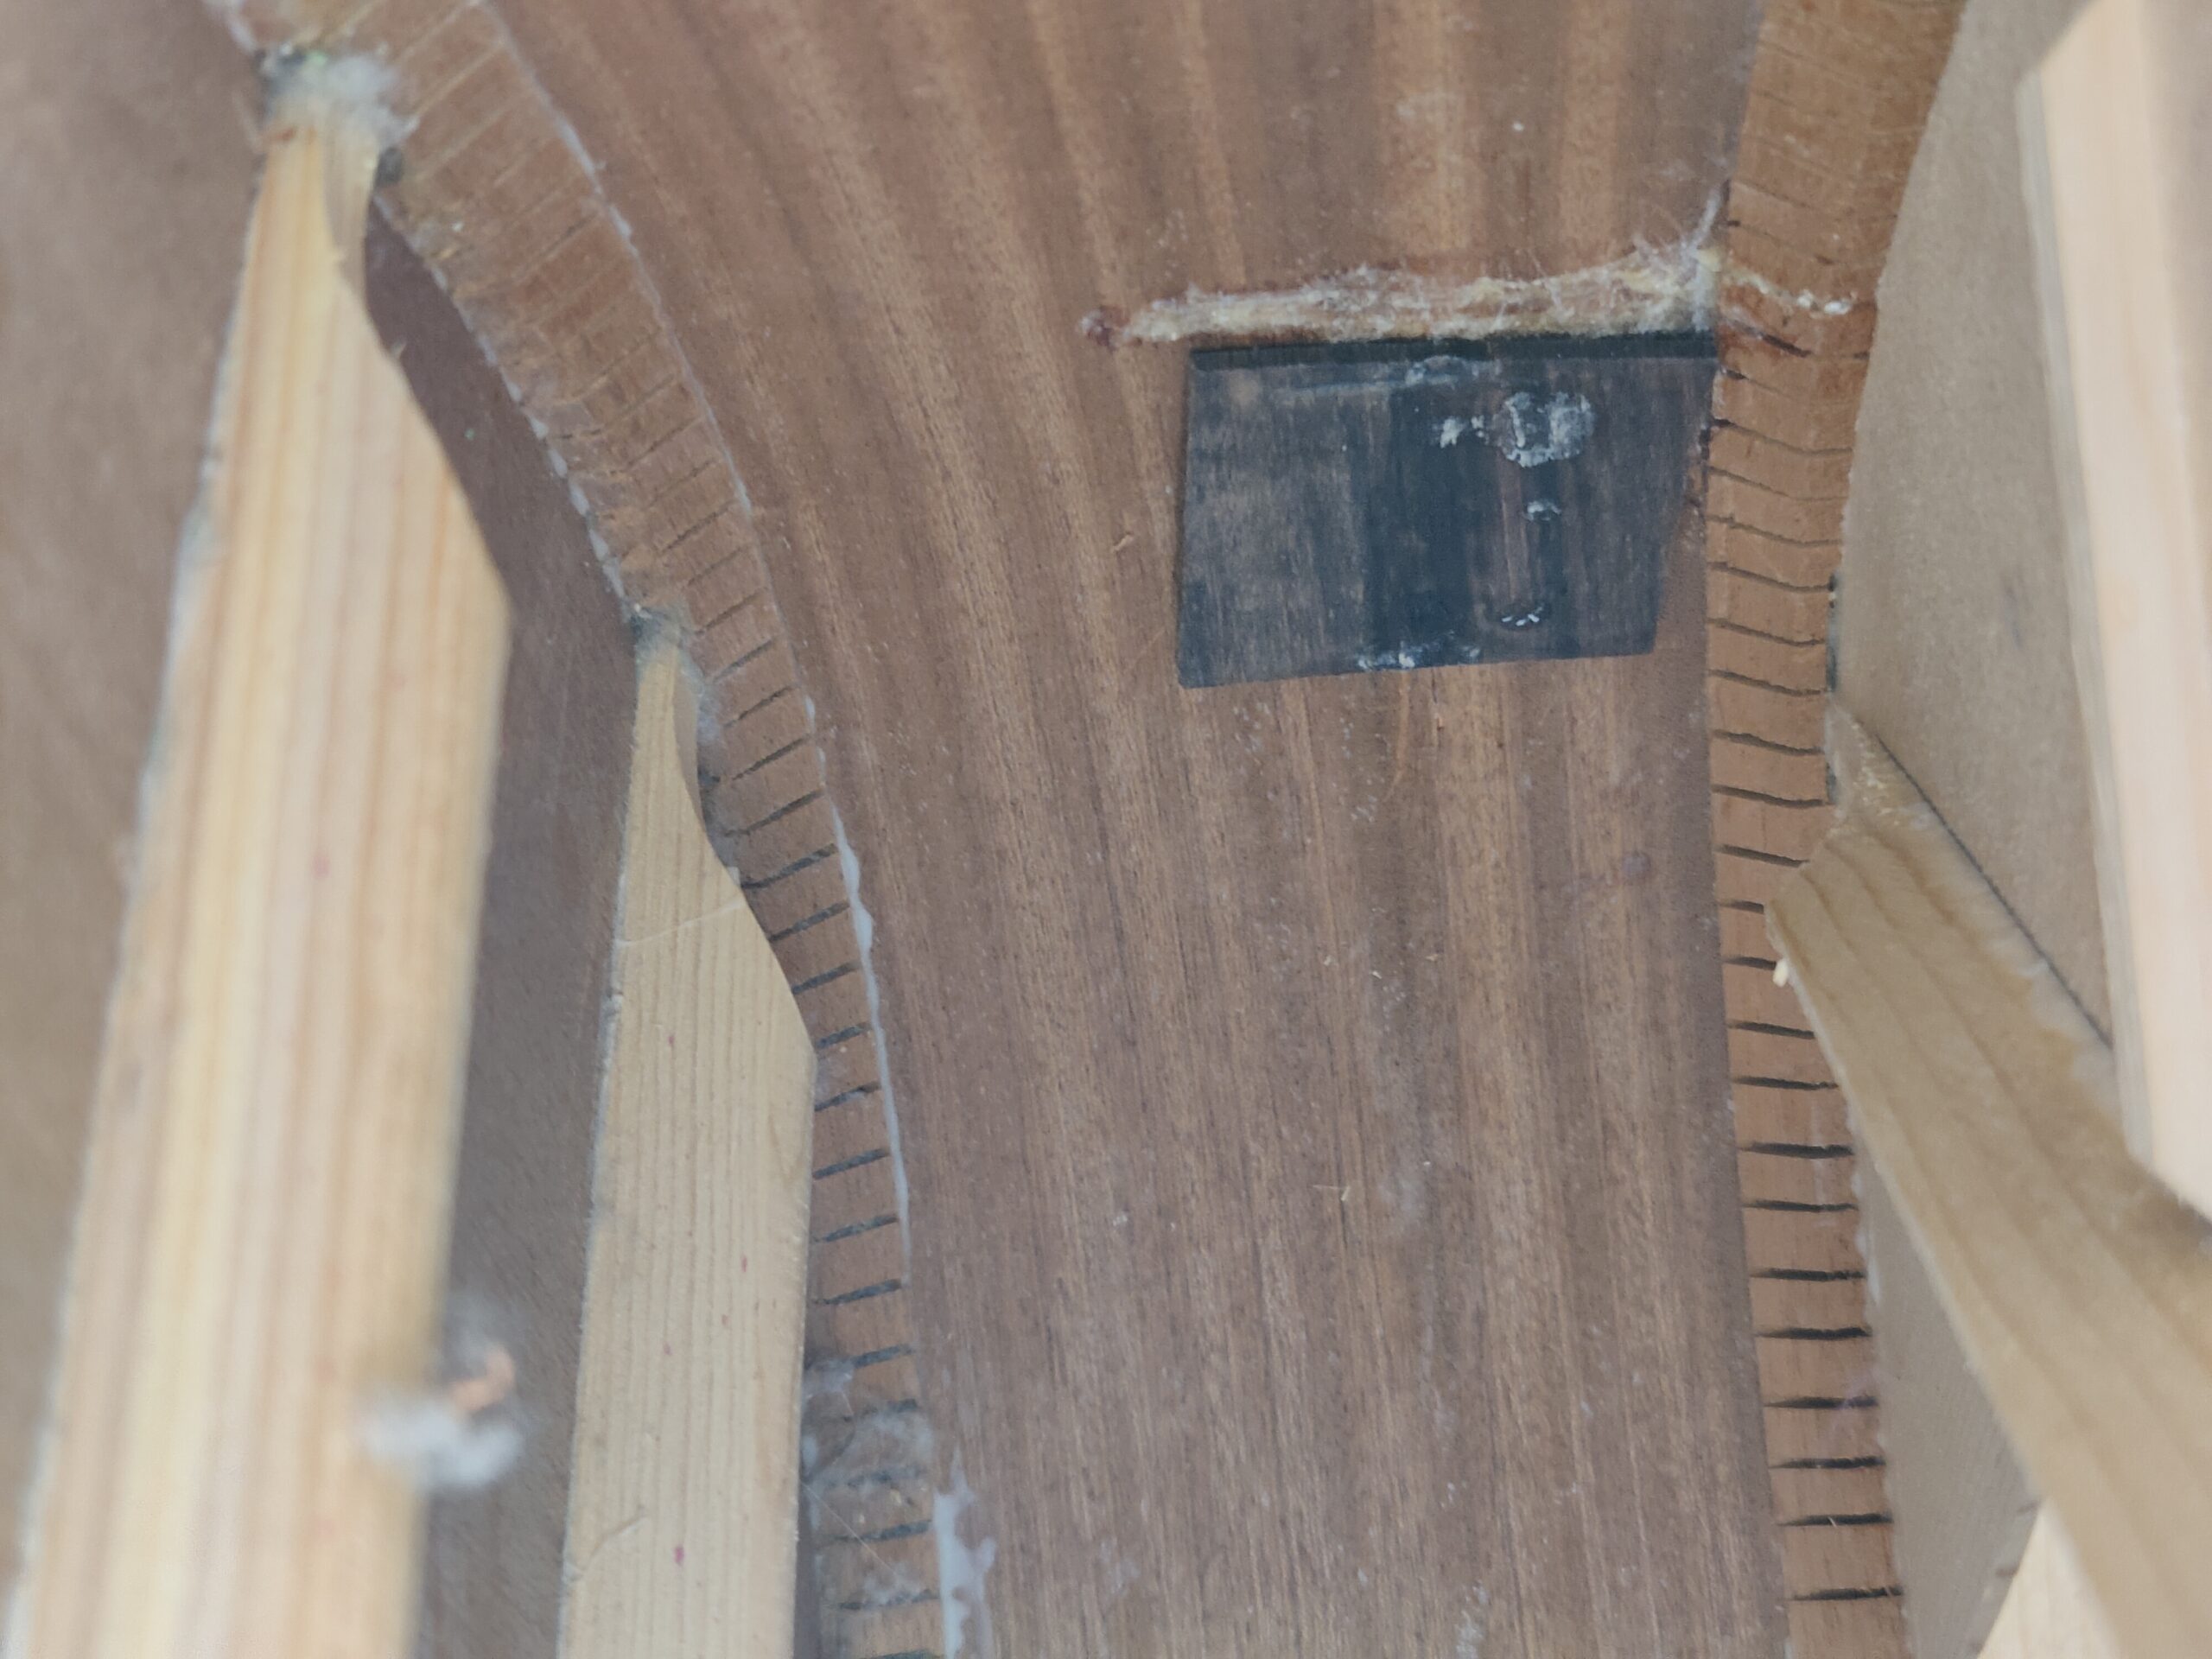
Not pictured, I used a heat iron and bent a piece of wood to match the contour, which will be glued into the inside wall to act as a stop point for the overall hole.
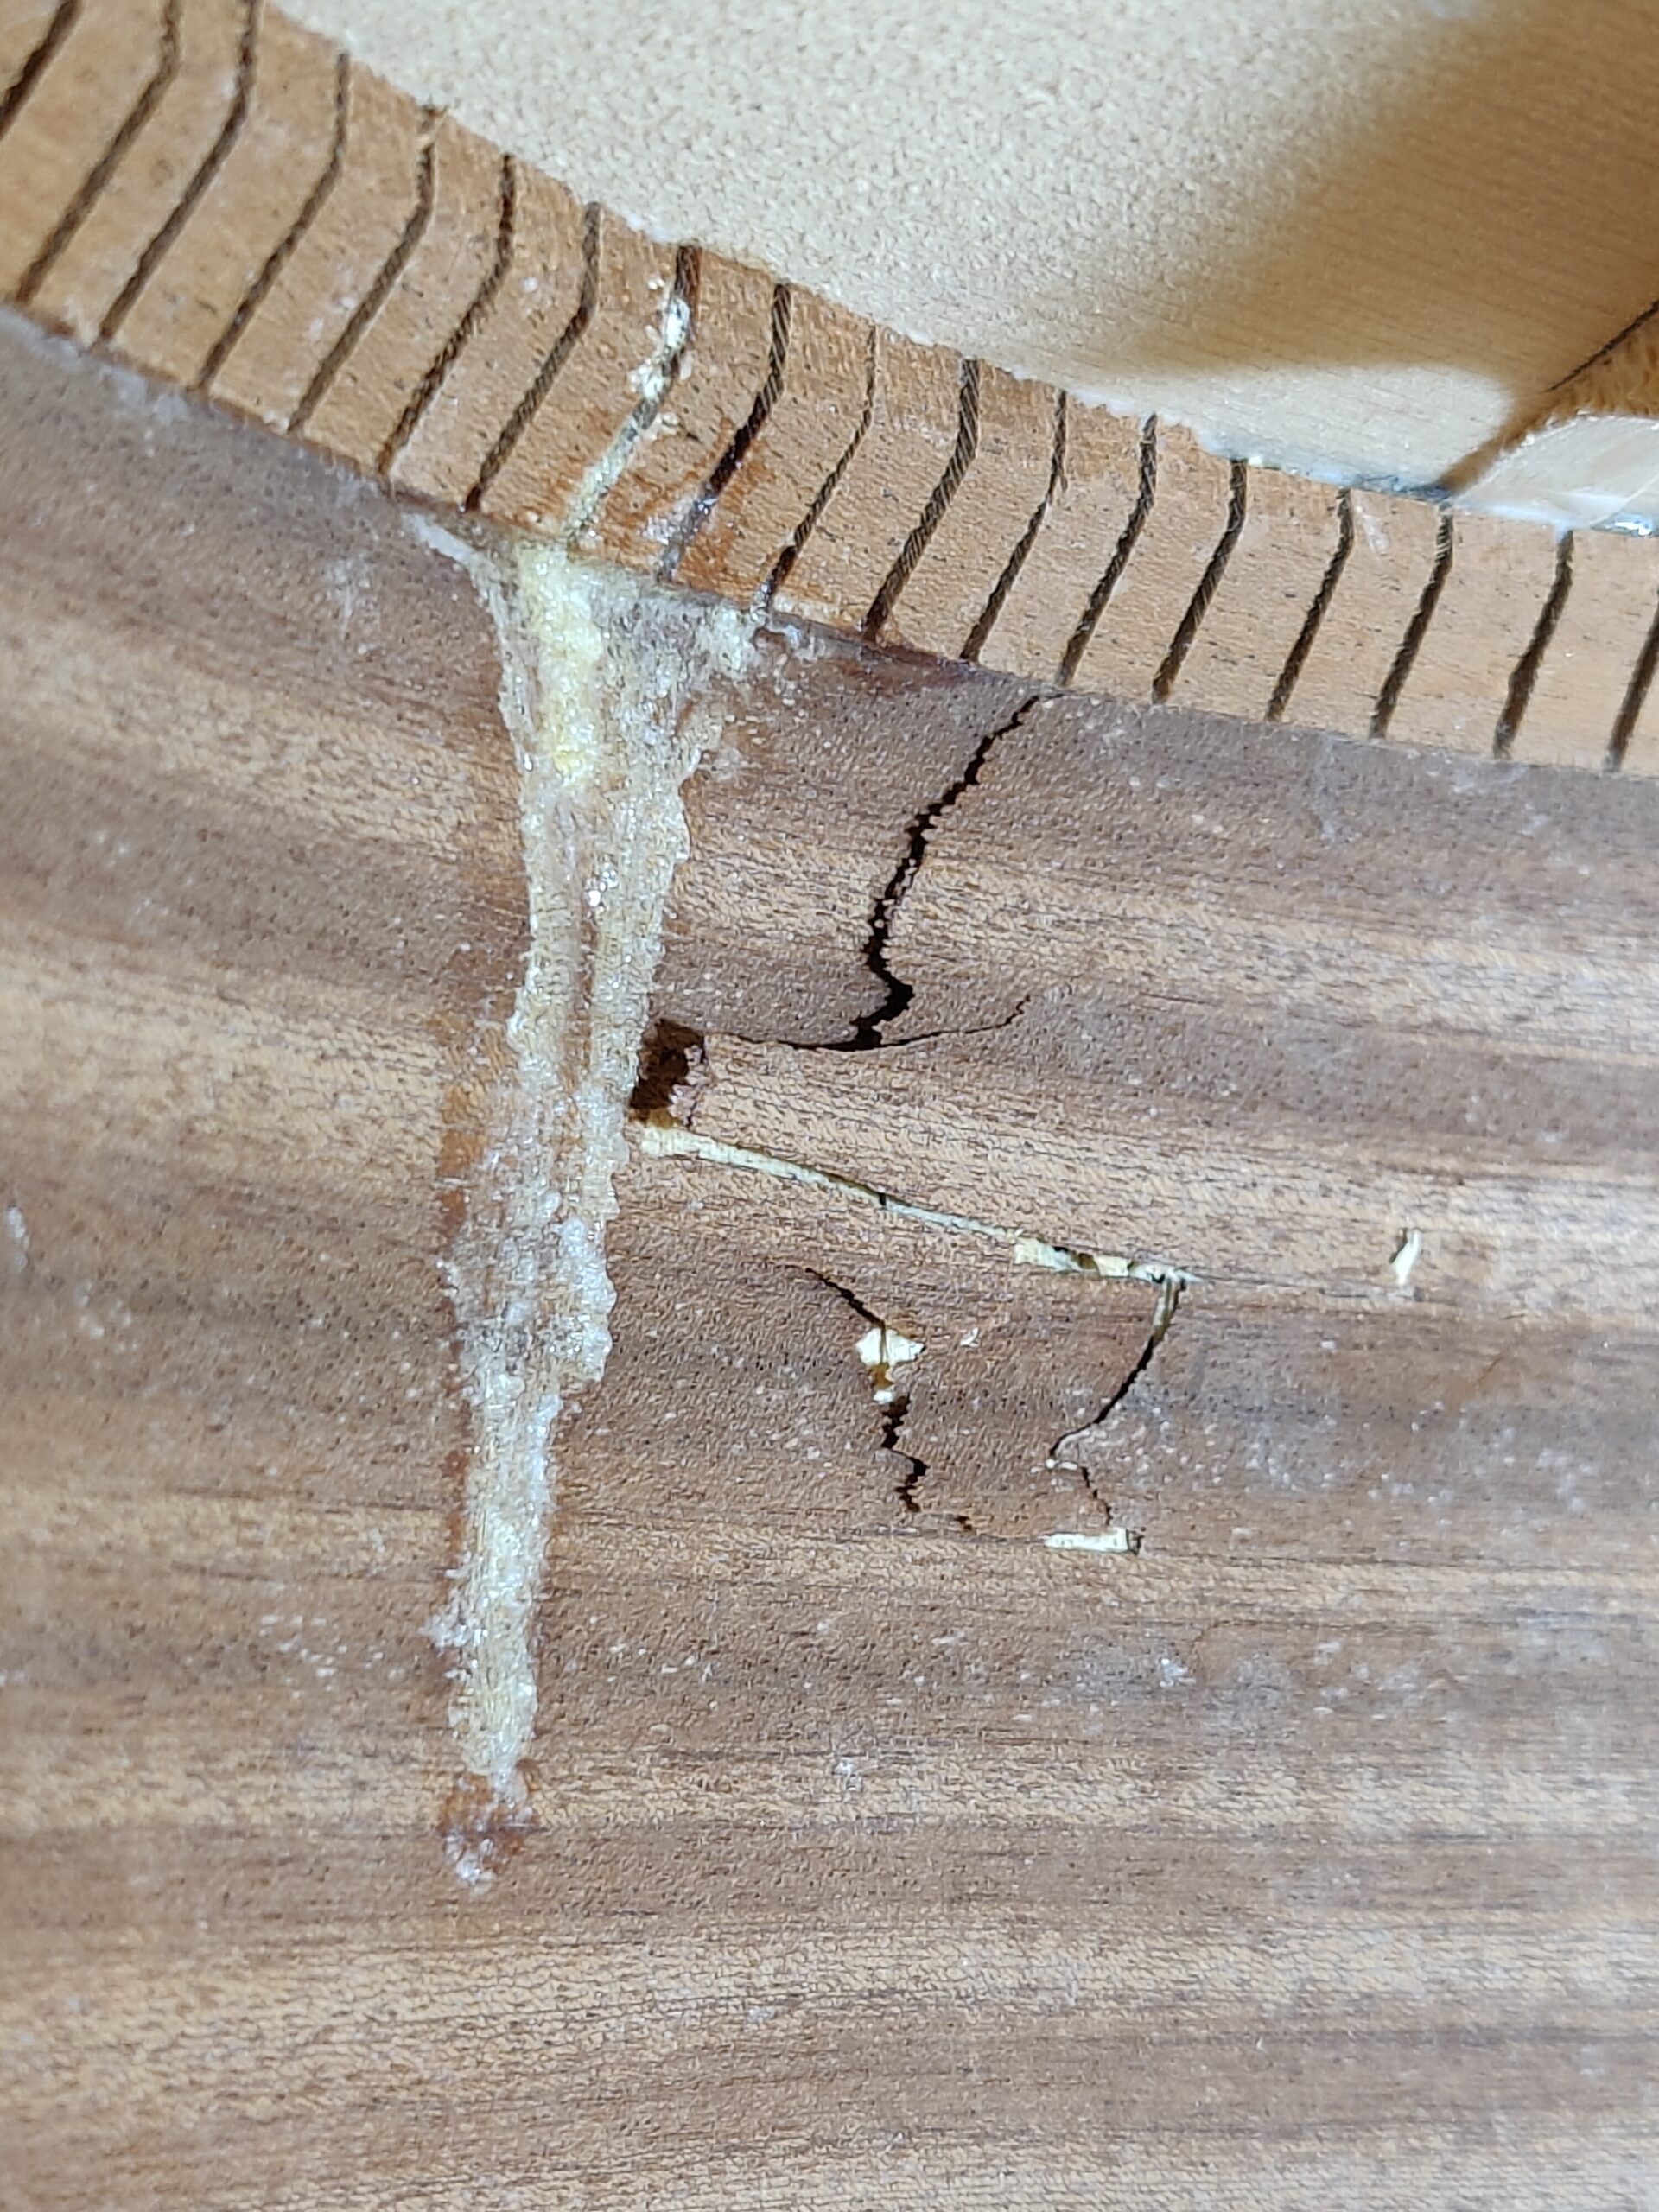
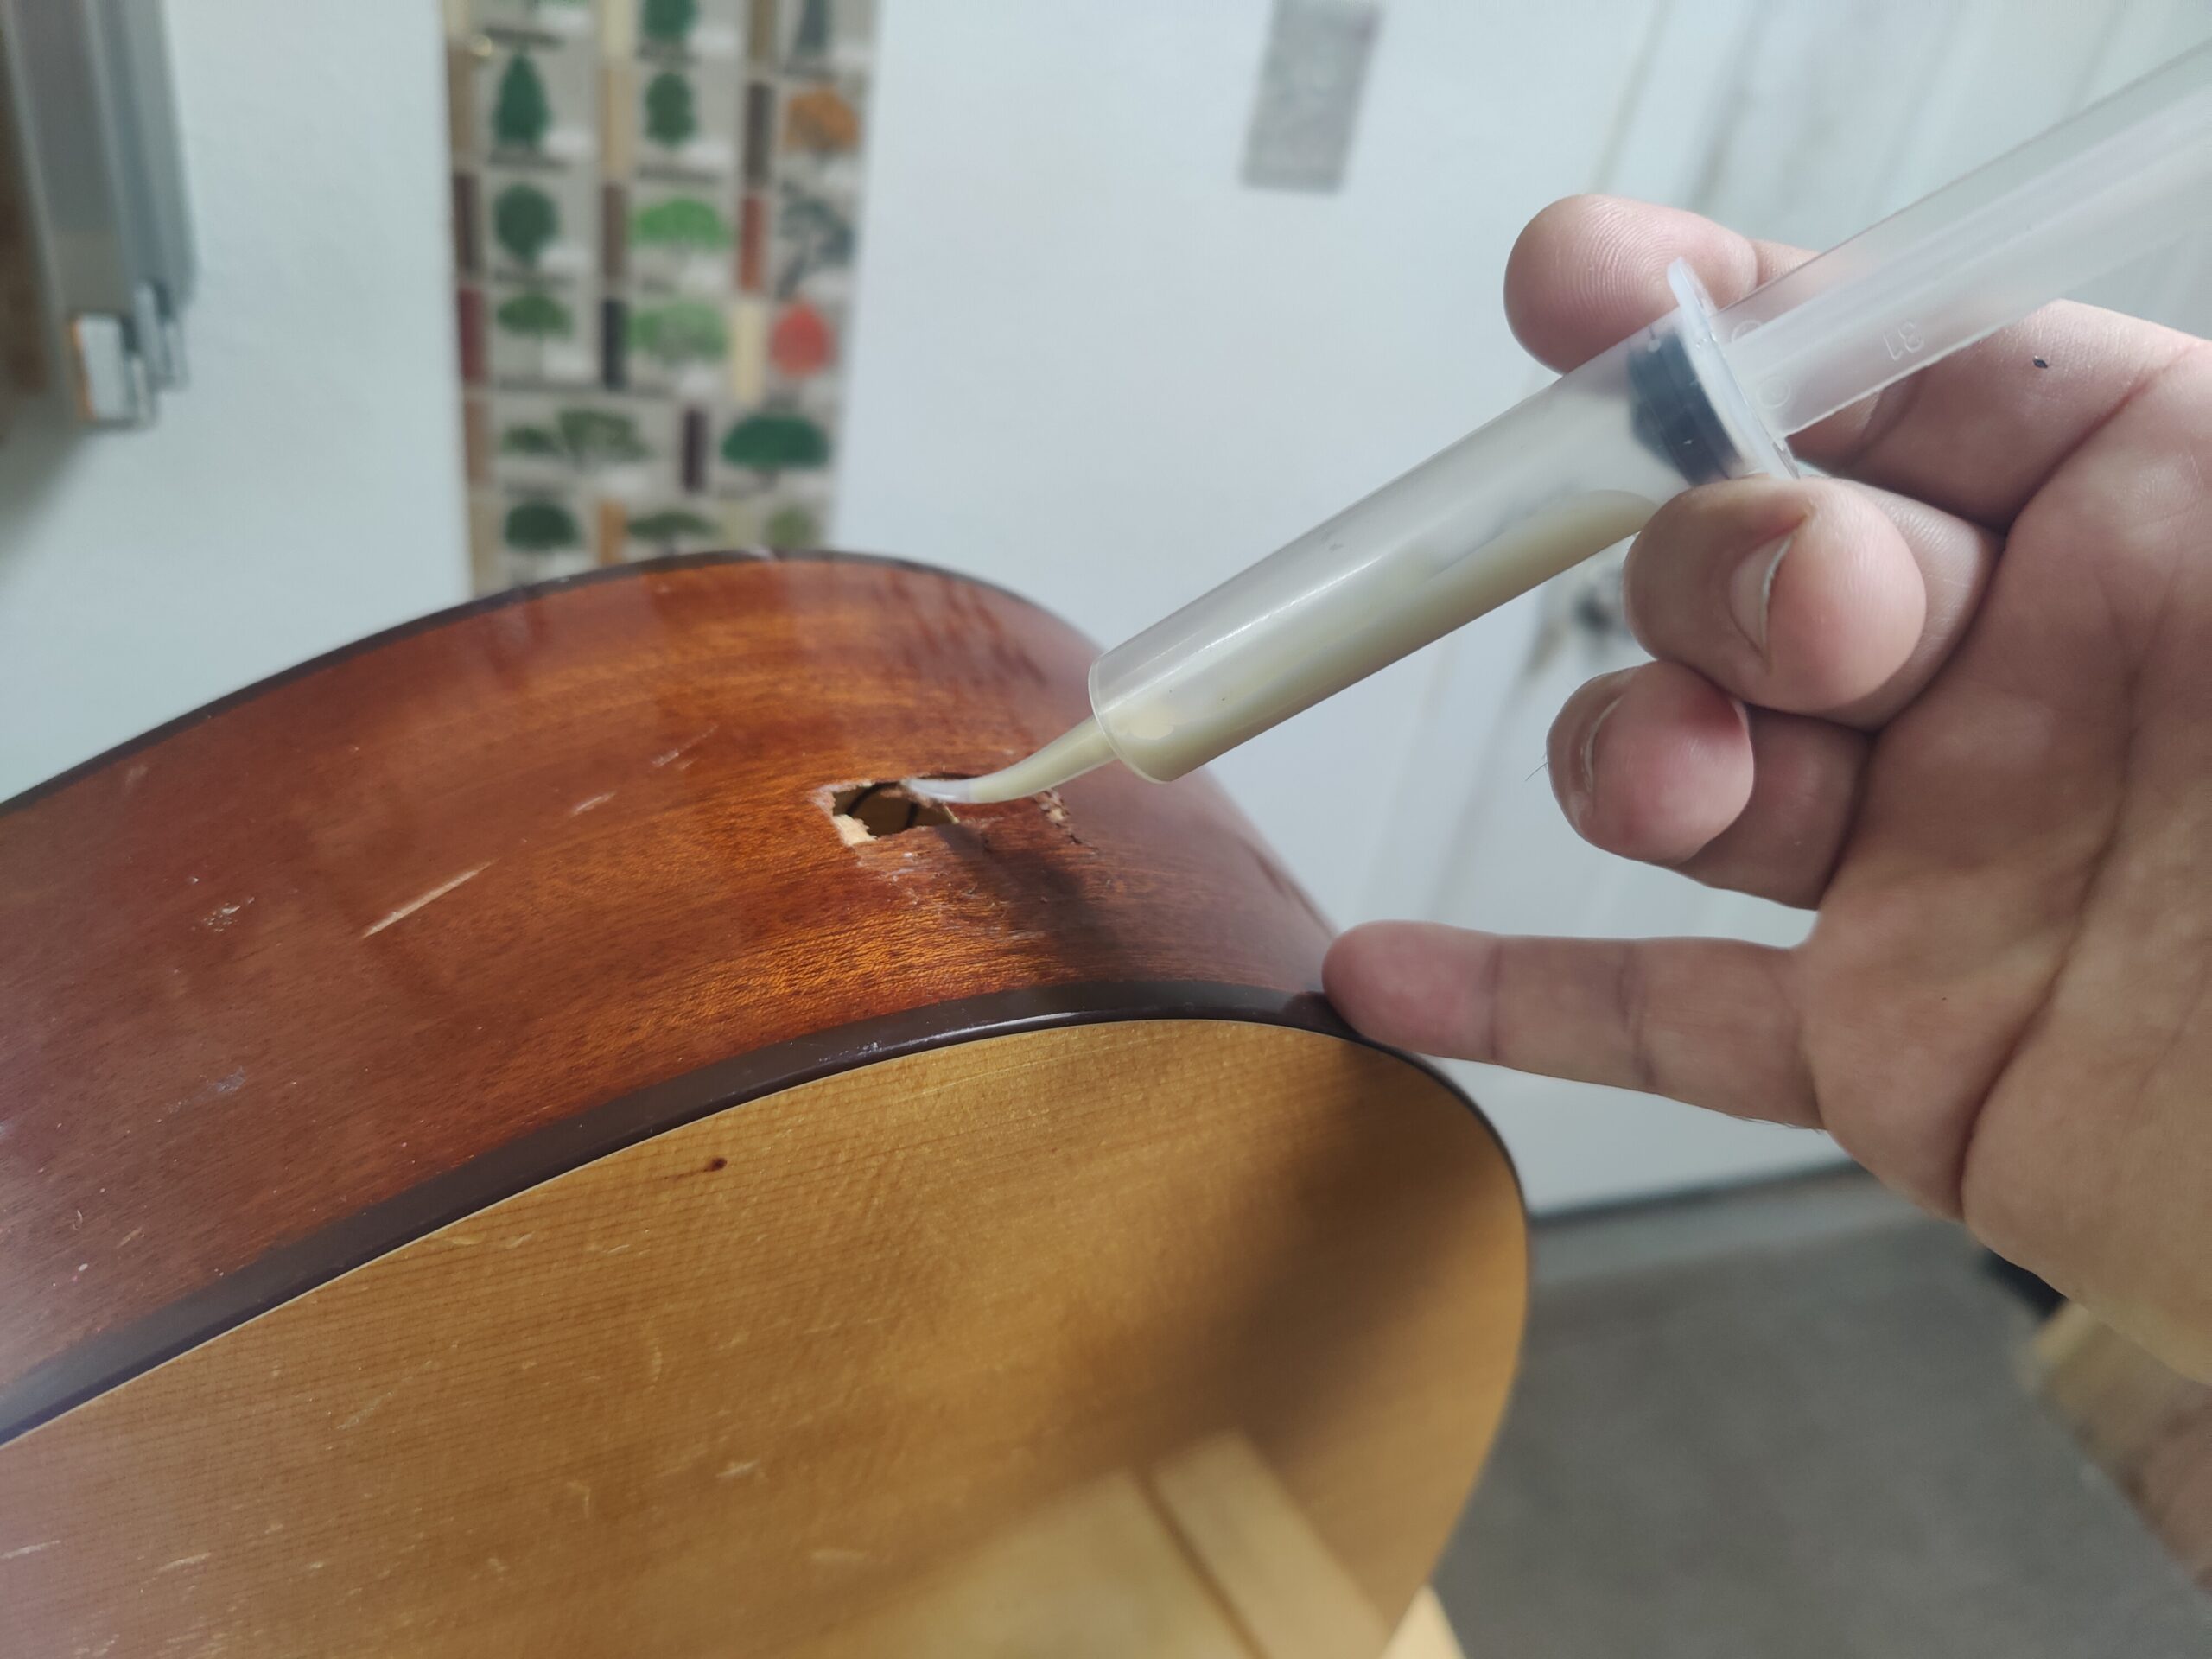
Applying some wood glue into the void and various cracks to piece this break back together. I glue the bent wood piece on the inside wall with my reverse clamping mechanism. Simultaneously, I rough cut another caul to clamp pressure downward, sandwiching the various cracks against the solid bent piece of wood on the inside.
 |
 |
 |
 |
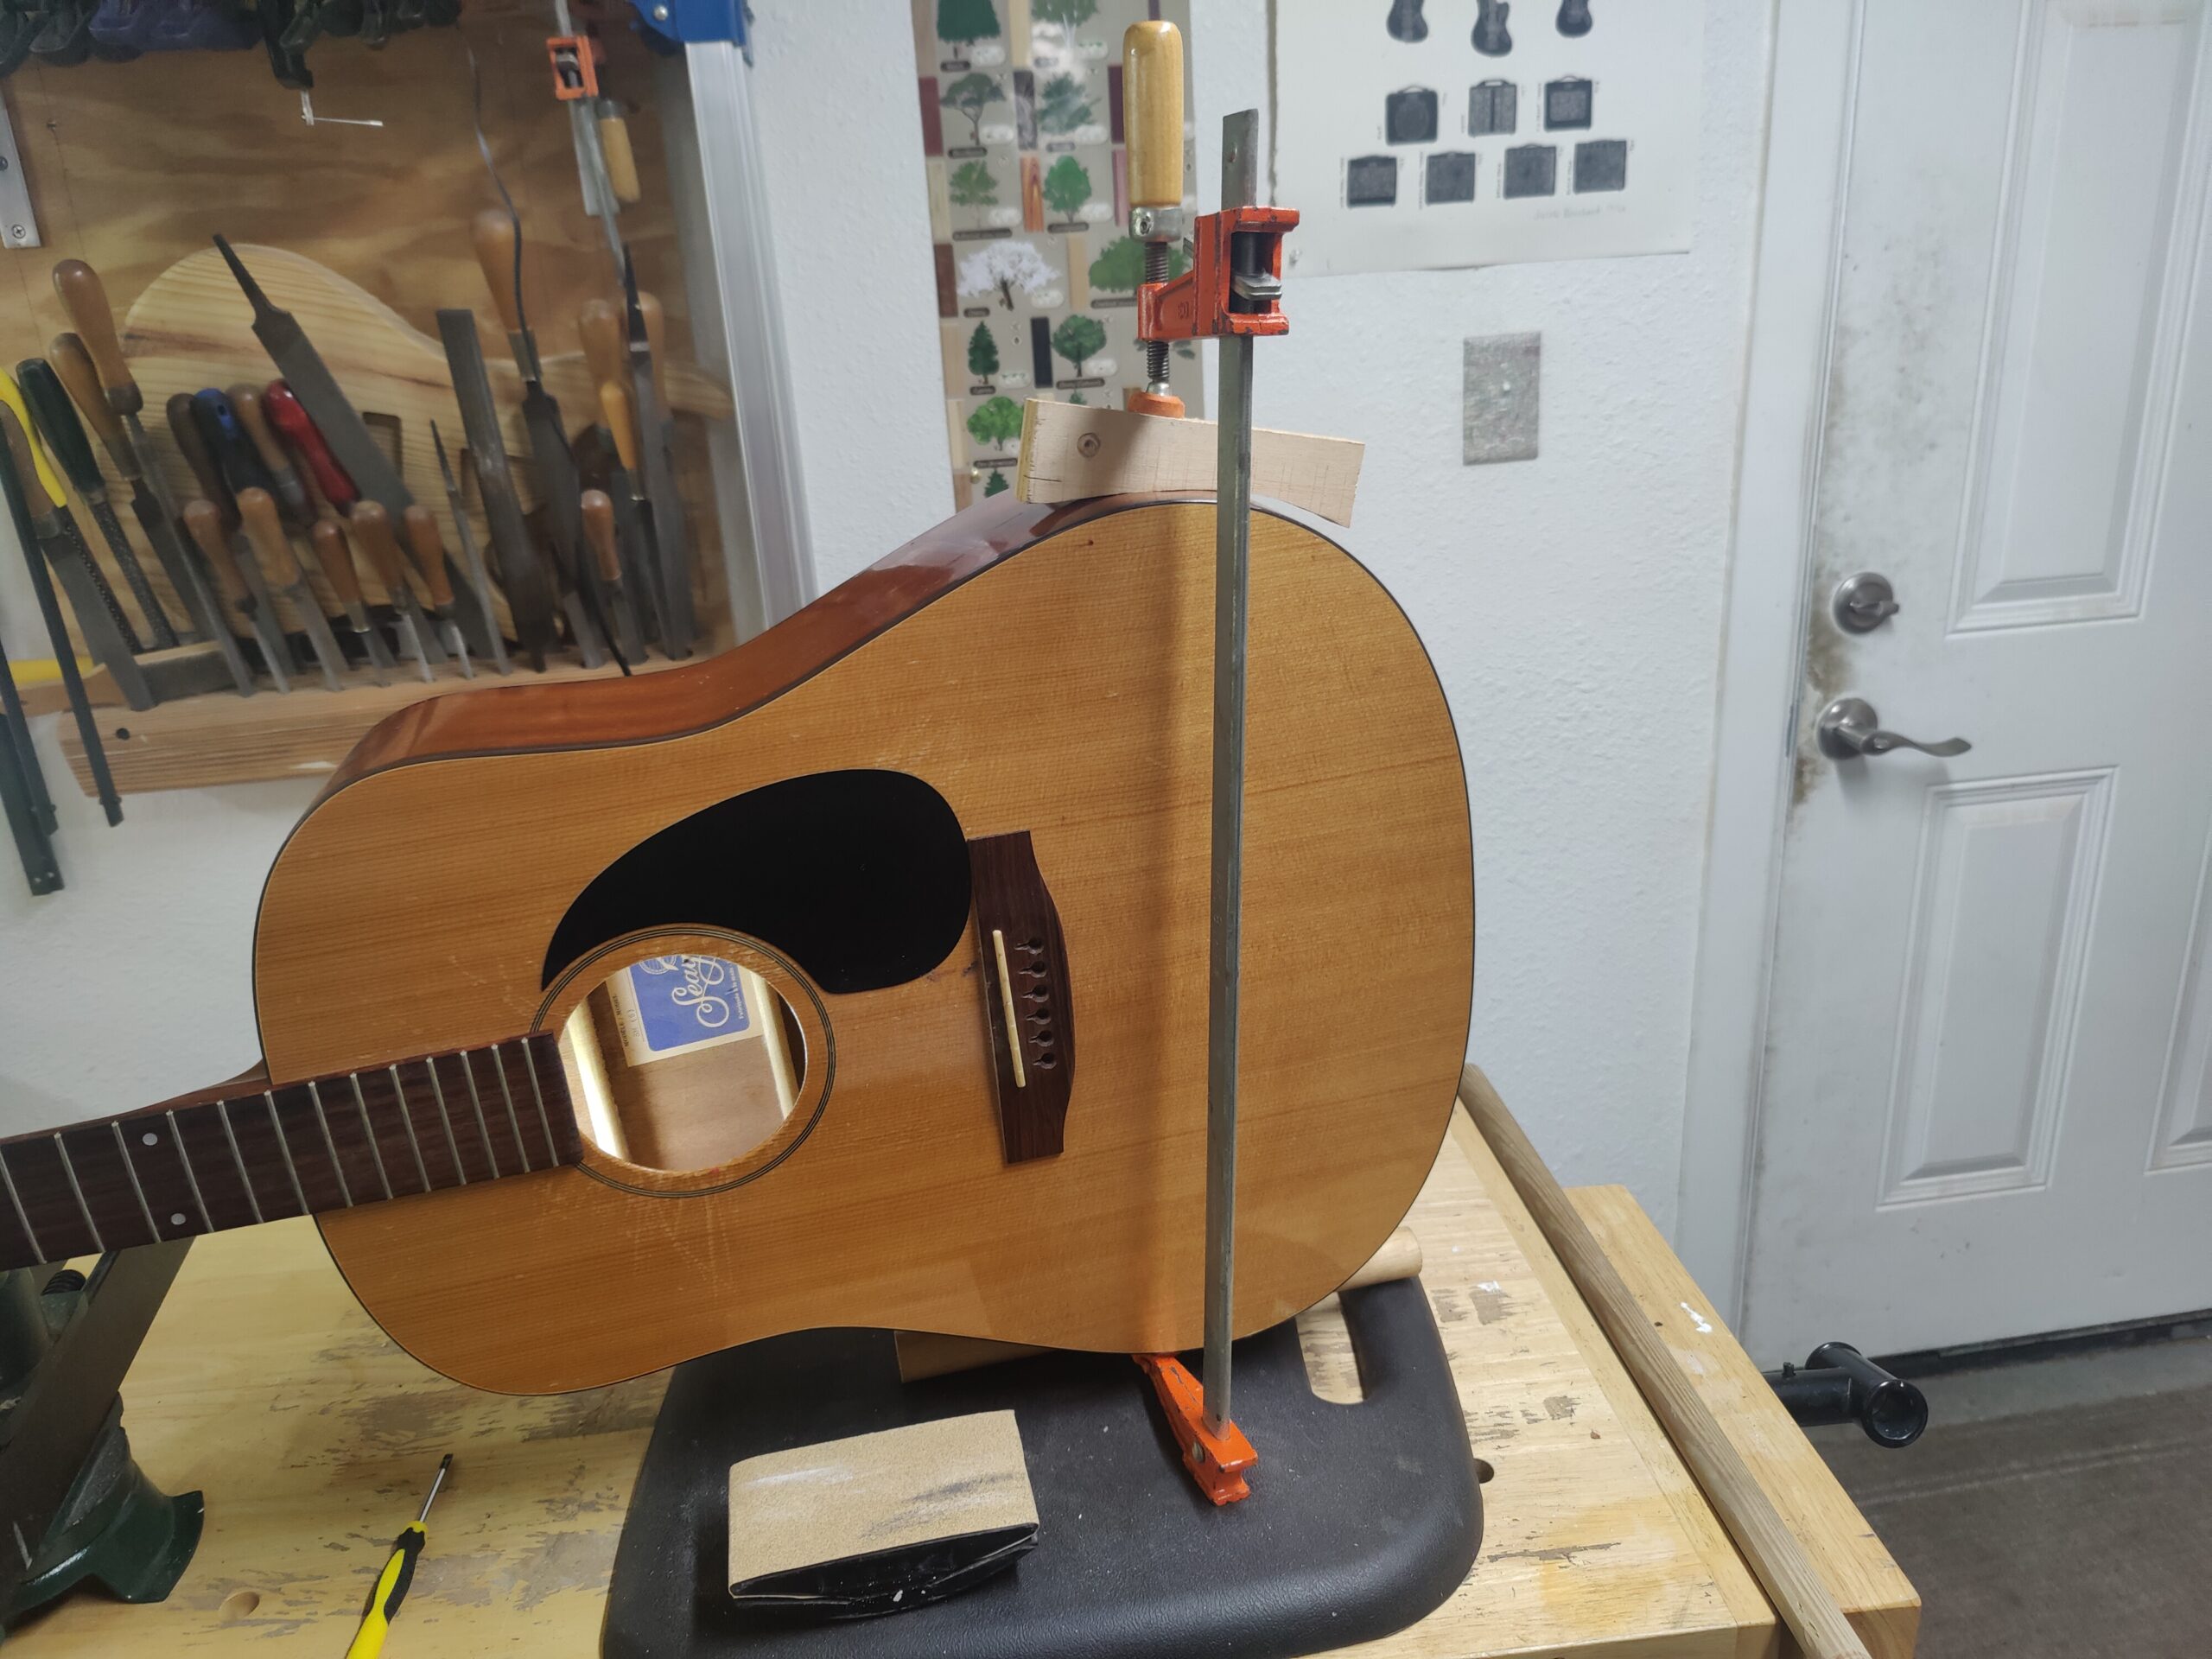
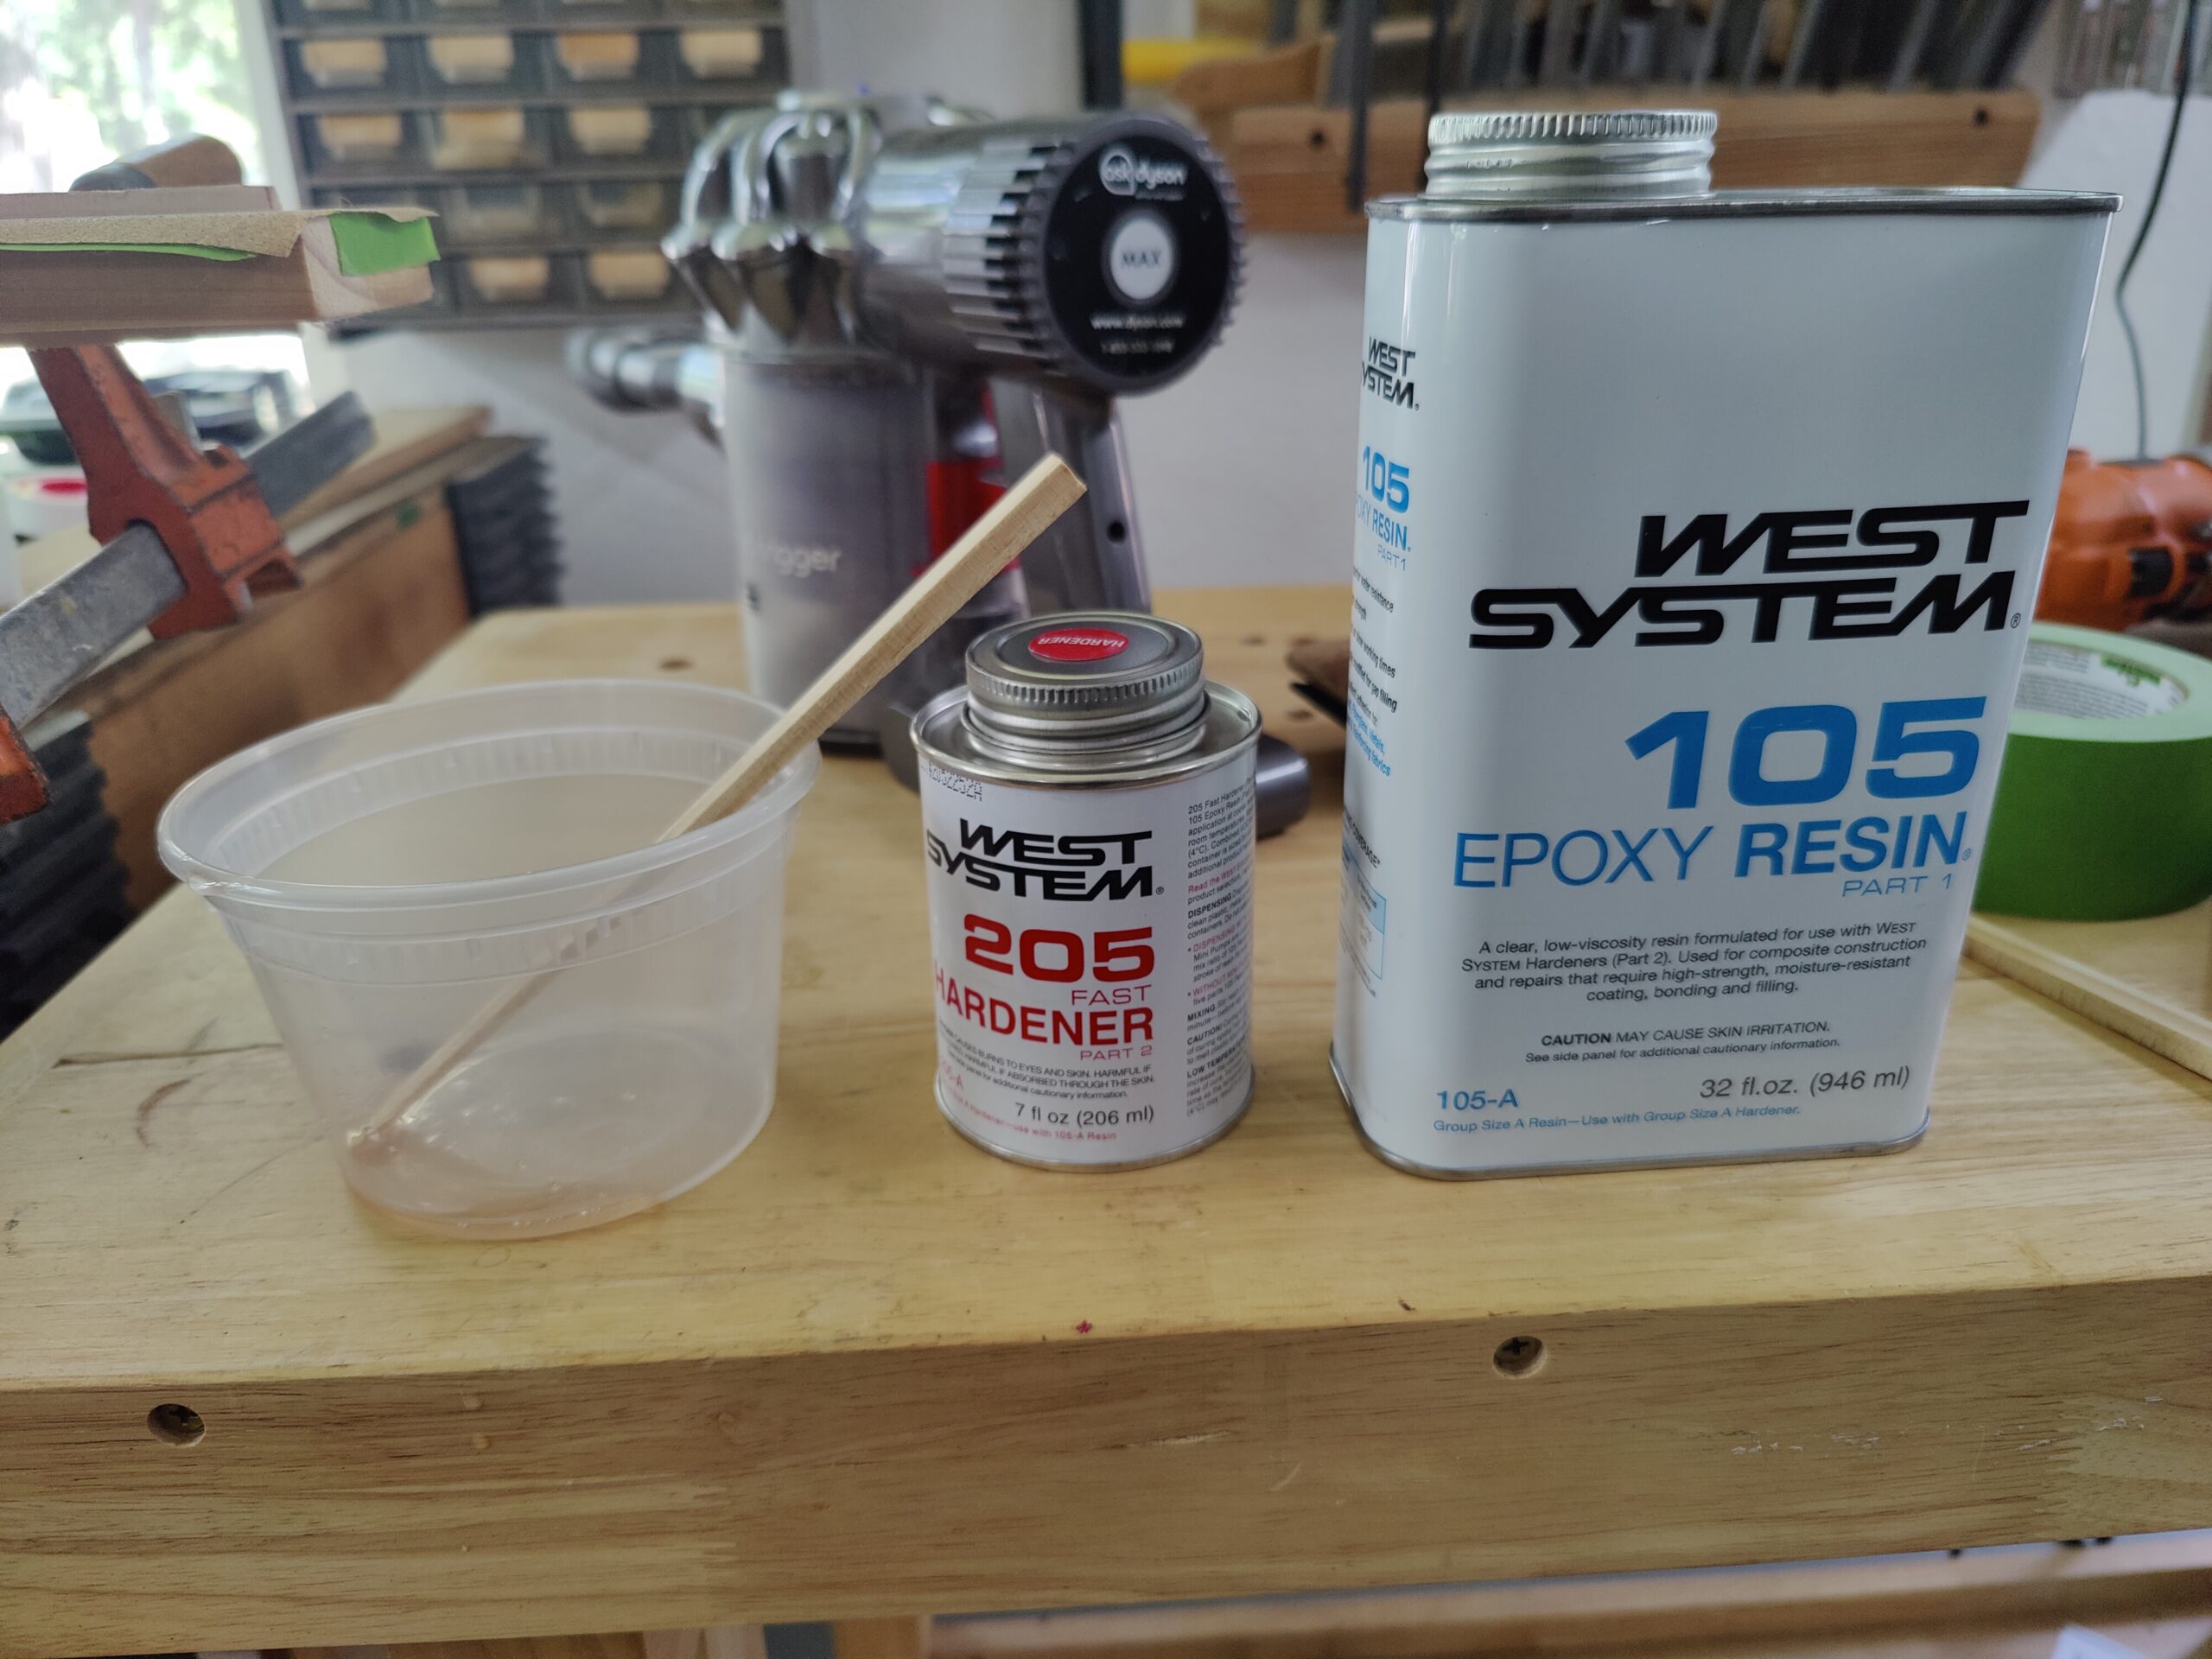
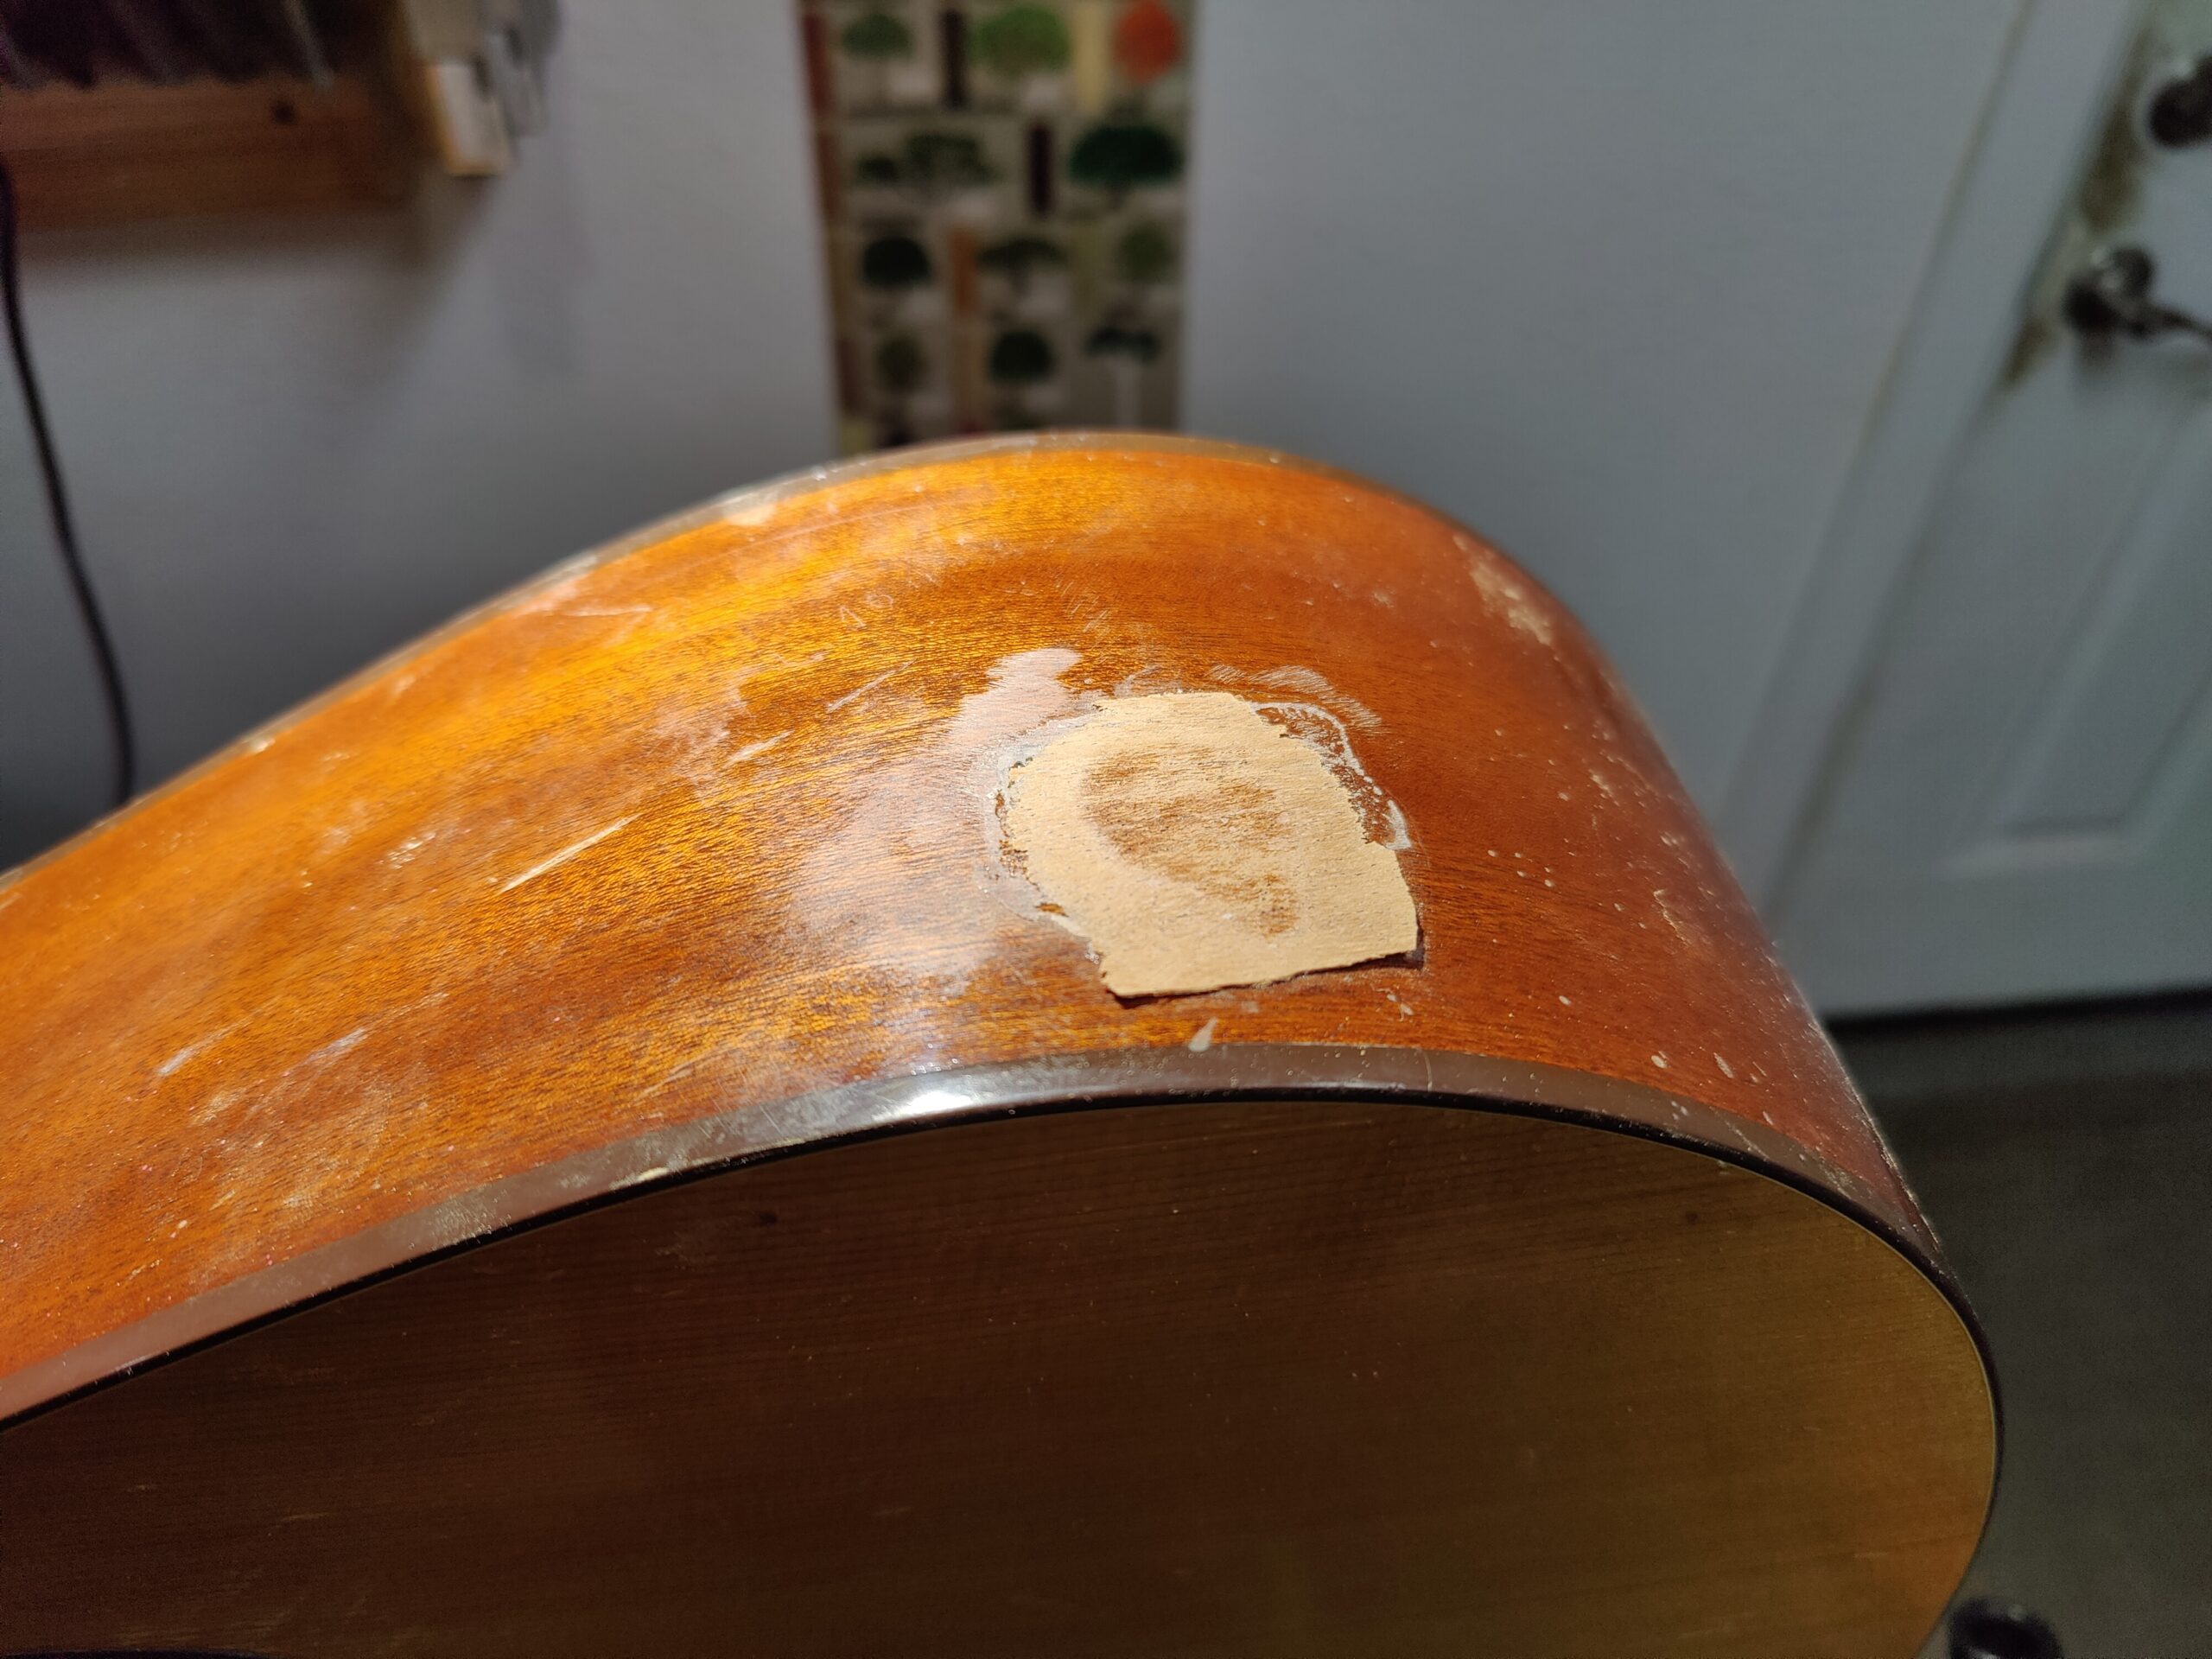
There’s still a bit of a void and unevenness as all the factored fragments of wood did not make it to my shop after the incident. To fill the voids and allow an even surface to work from, I use West Systems Epoxy.
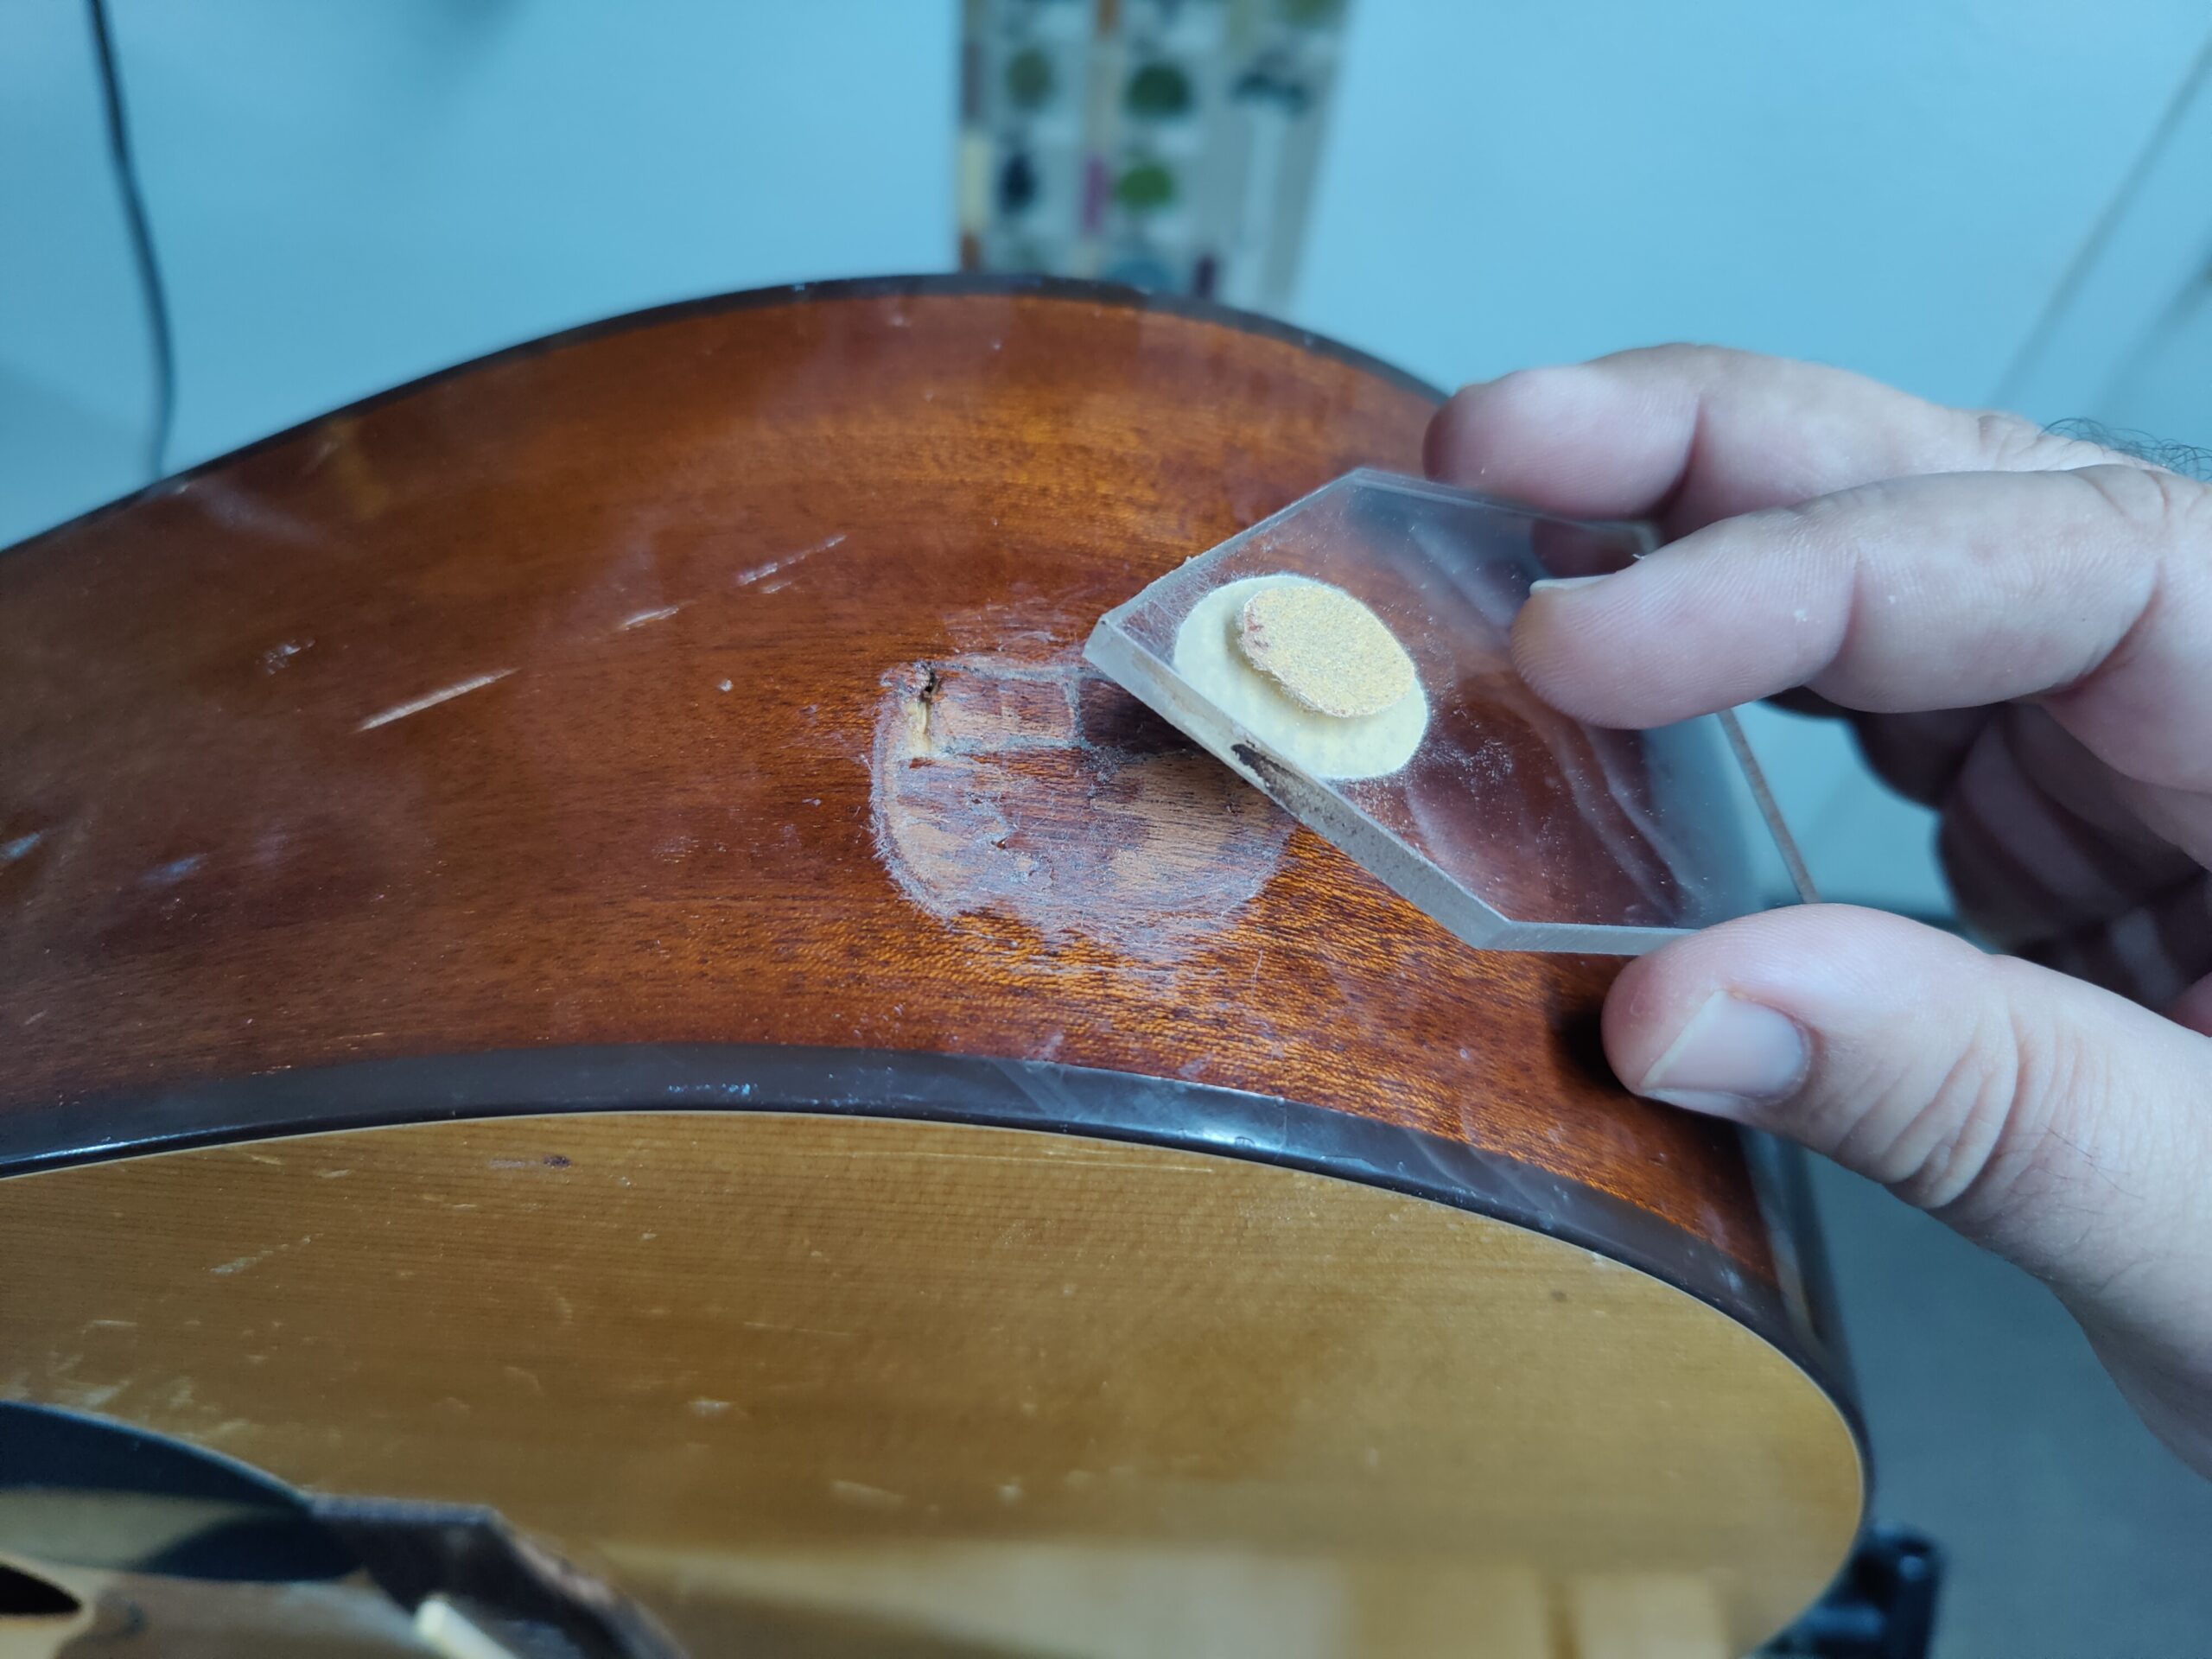
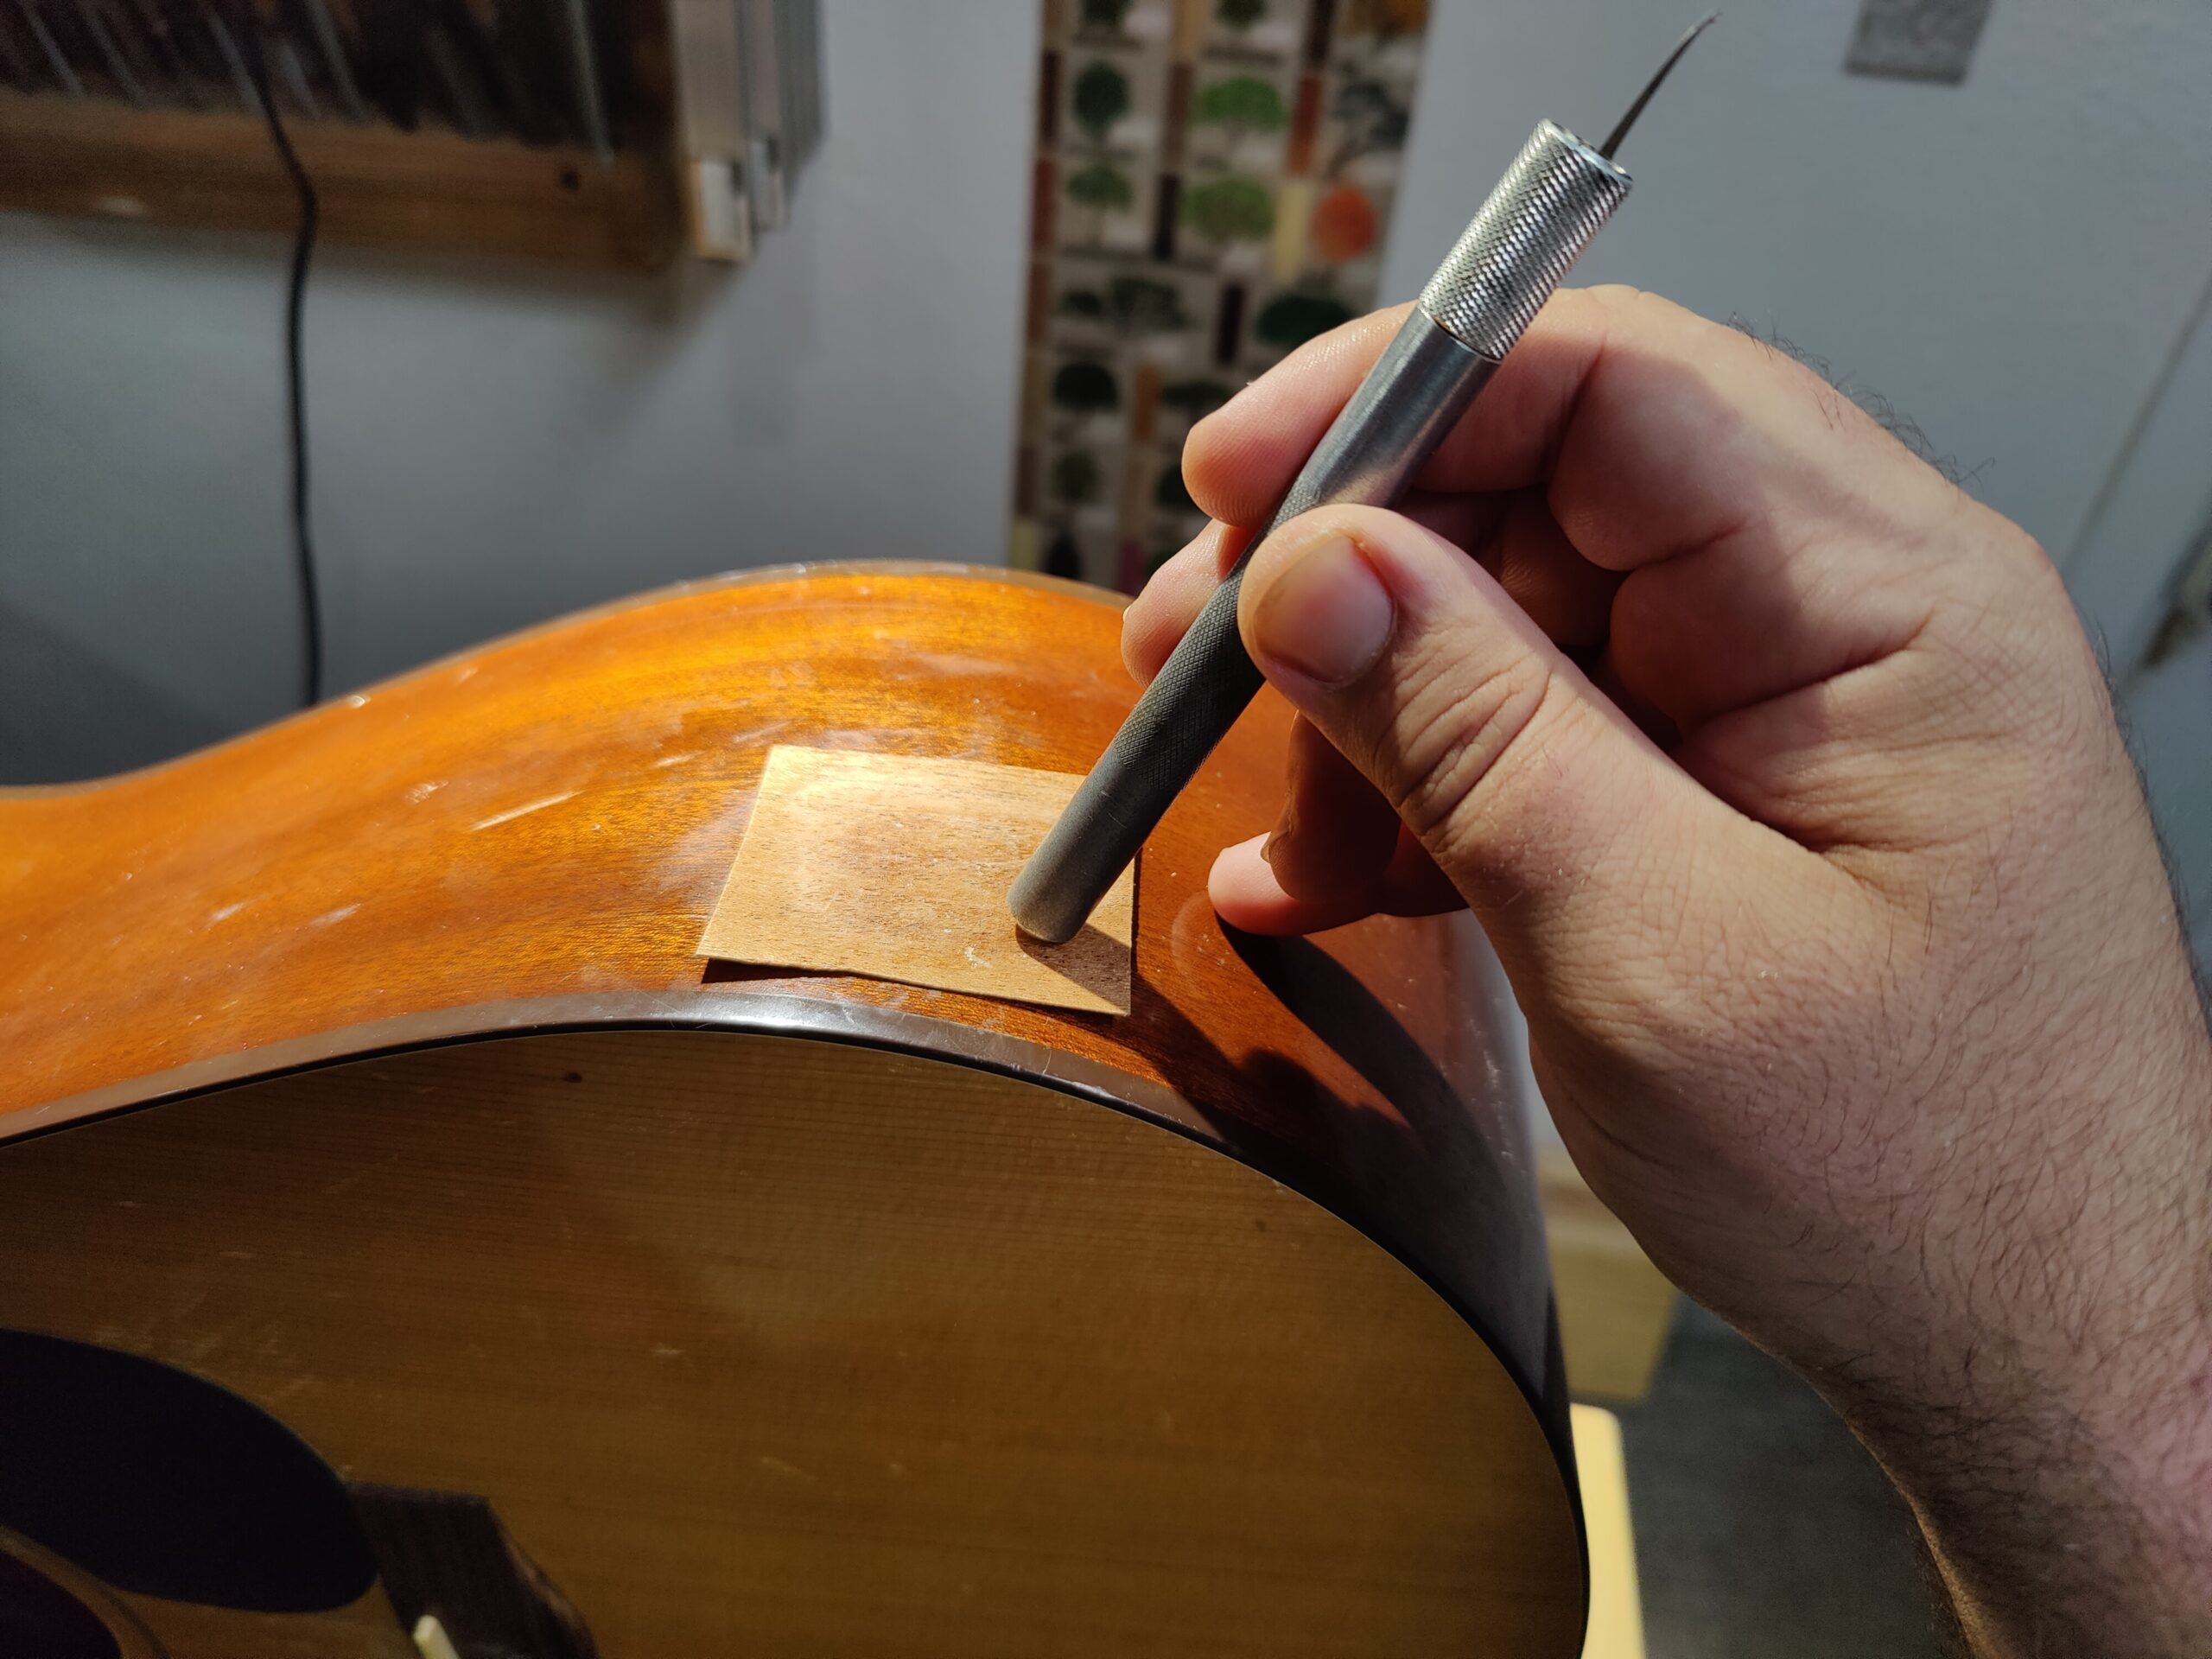
The next day, I sand the hardened epoxy to match the contours of the side using a piece of plexi-glass with adhesive backed sandpaper. This helps me see my progress and not spend more time on an area than necessary.
 |
 |
 |
 |
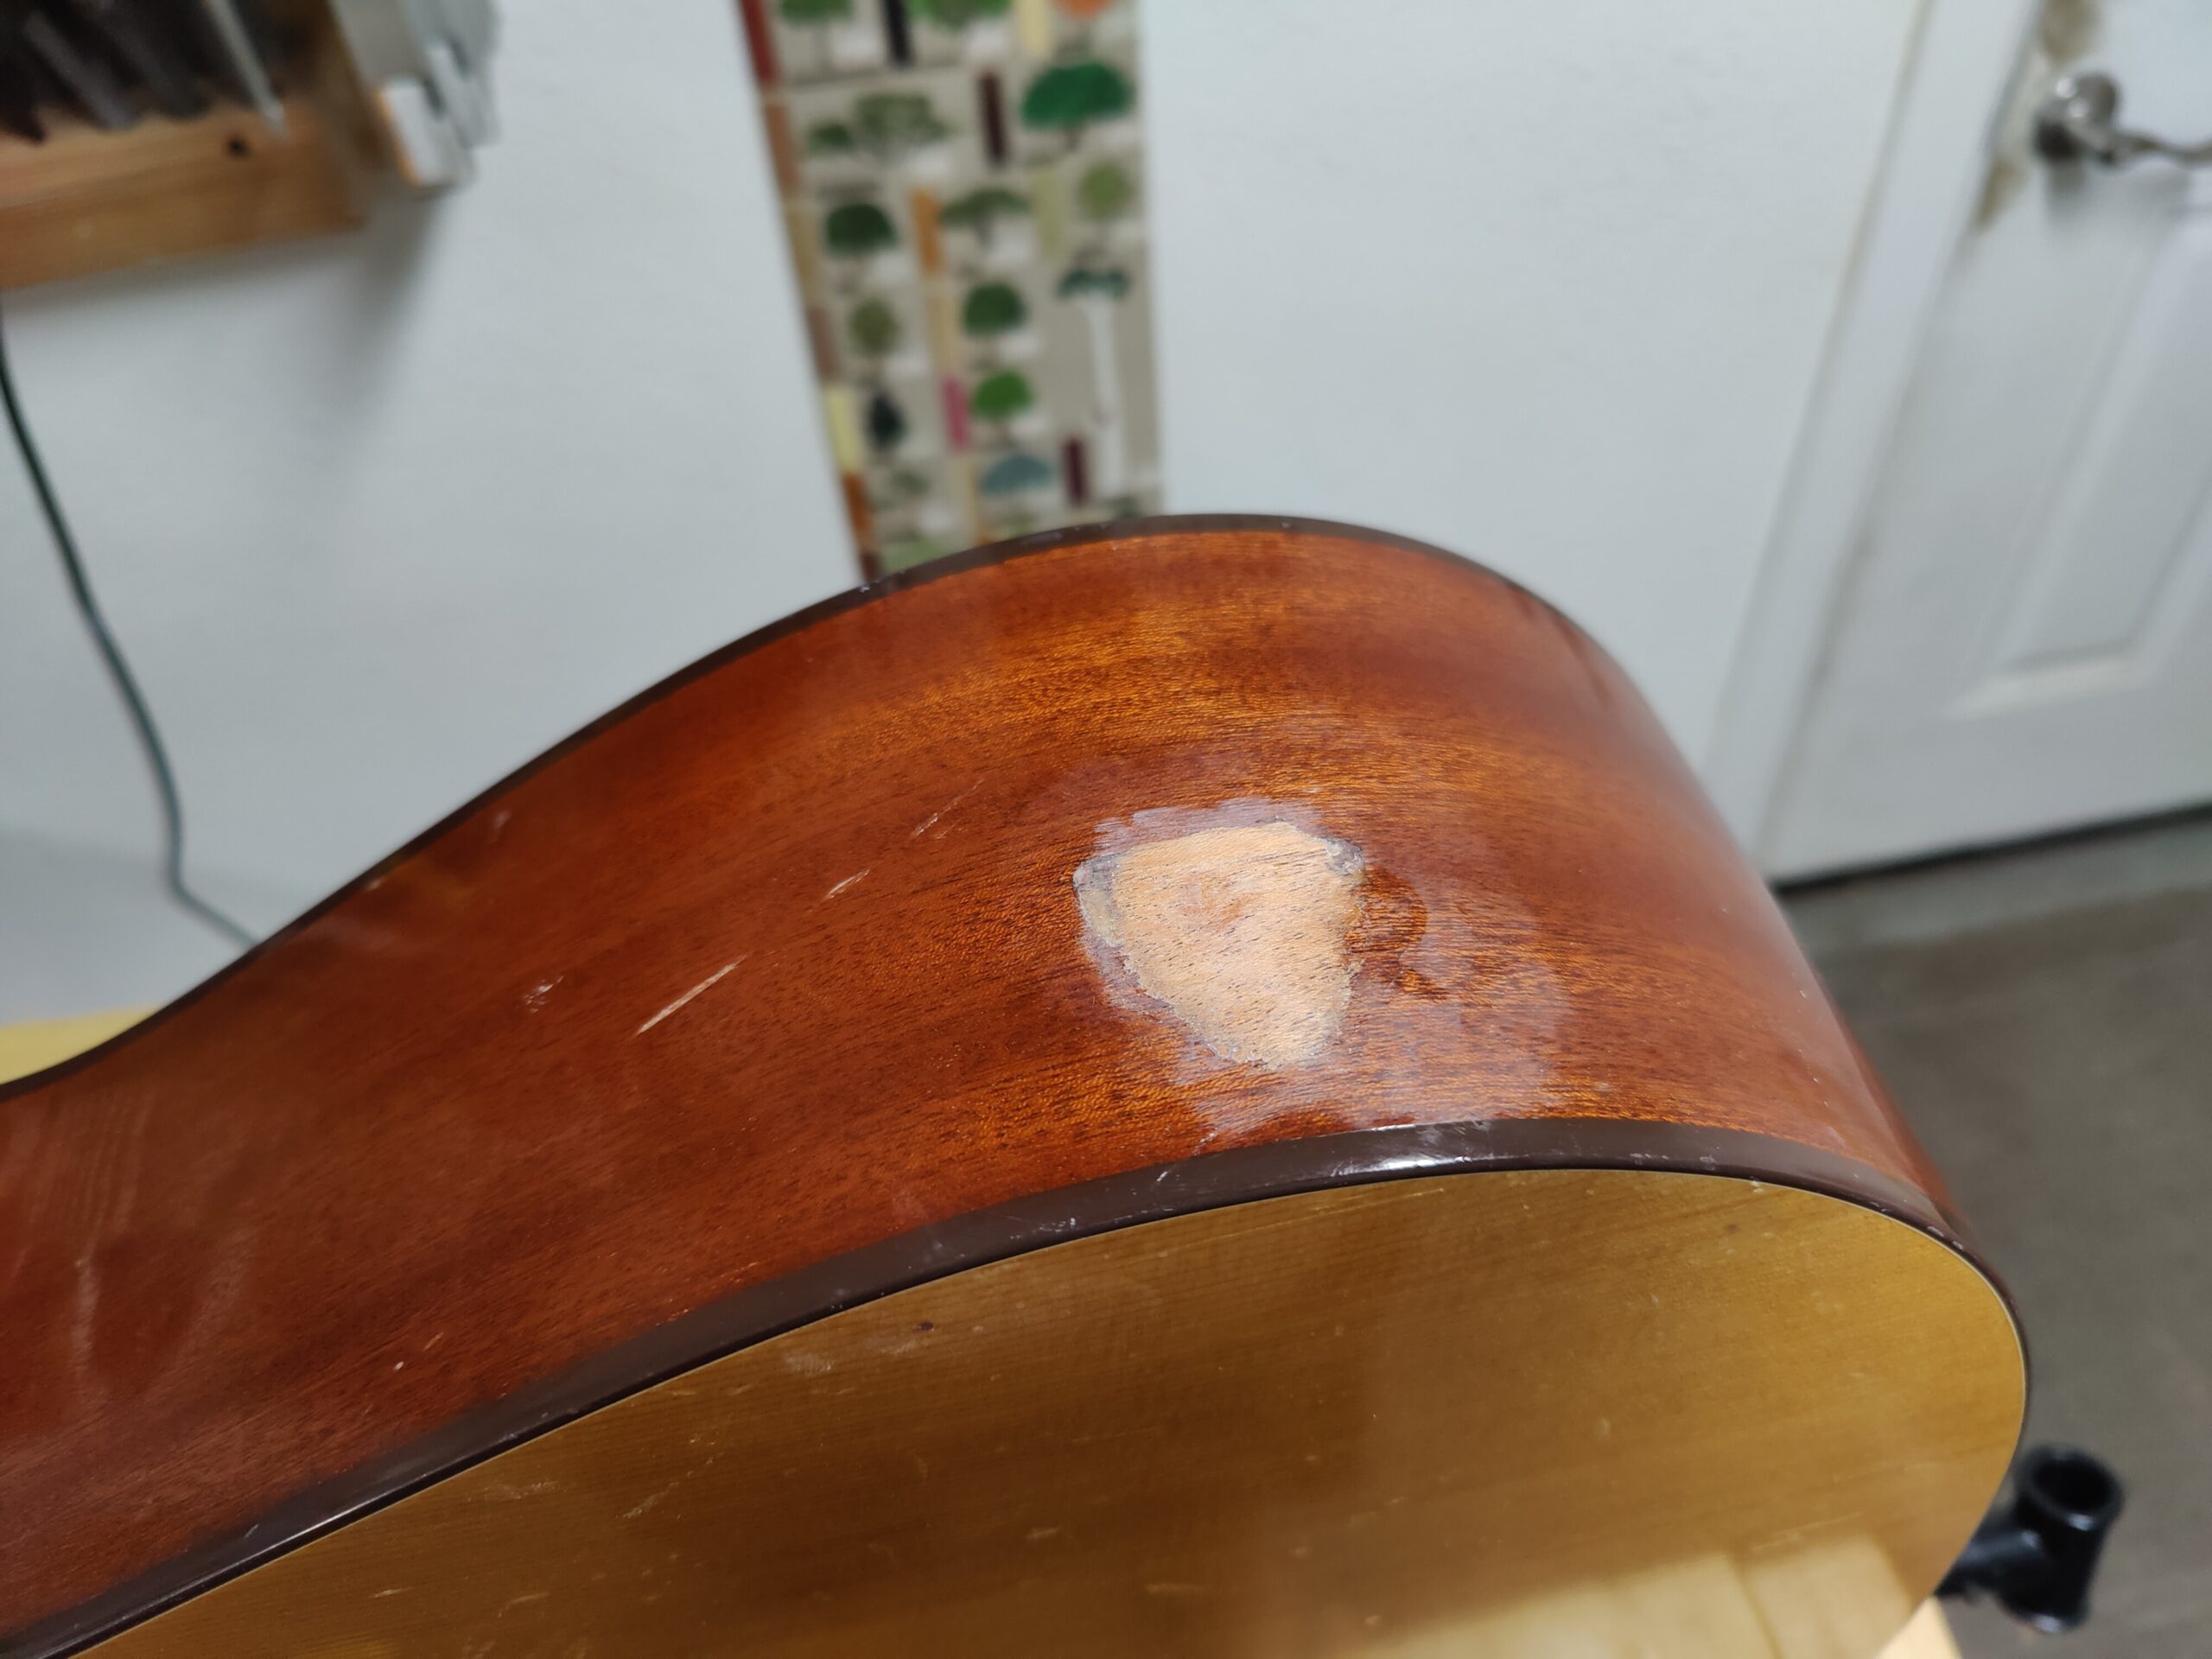
Once the surface is prepped and sanded slightly below the body curve, I apply a hefty amount of super glue and use the butt end of a tool to affix a veneer of mahogany over the overall break. I sand around the perimeter to widdle away the ends of the veneer not glued down and to level the veneer with the rest of the side contour.
 |
 |
 |
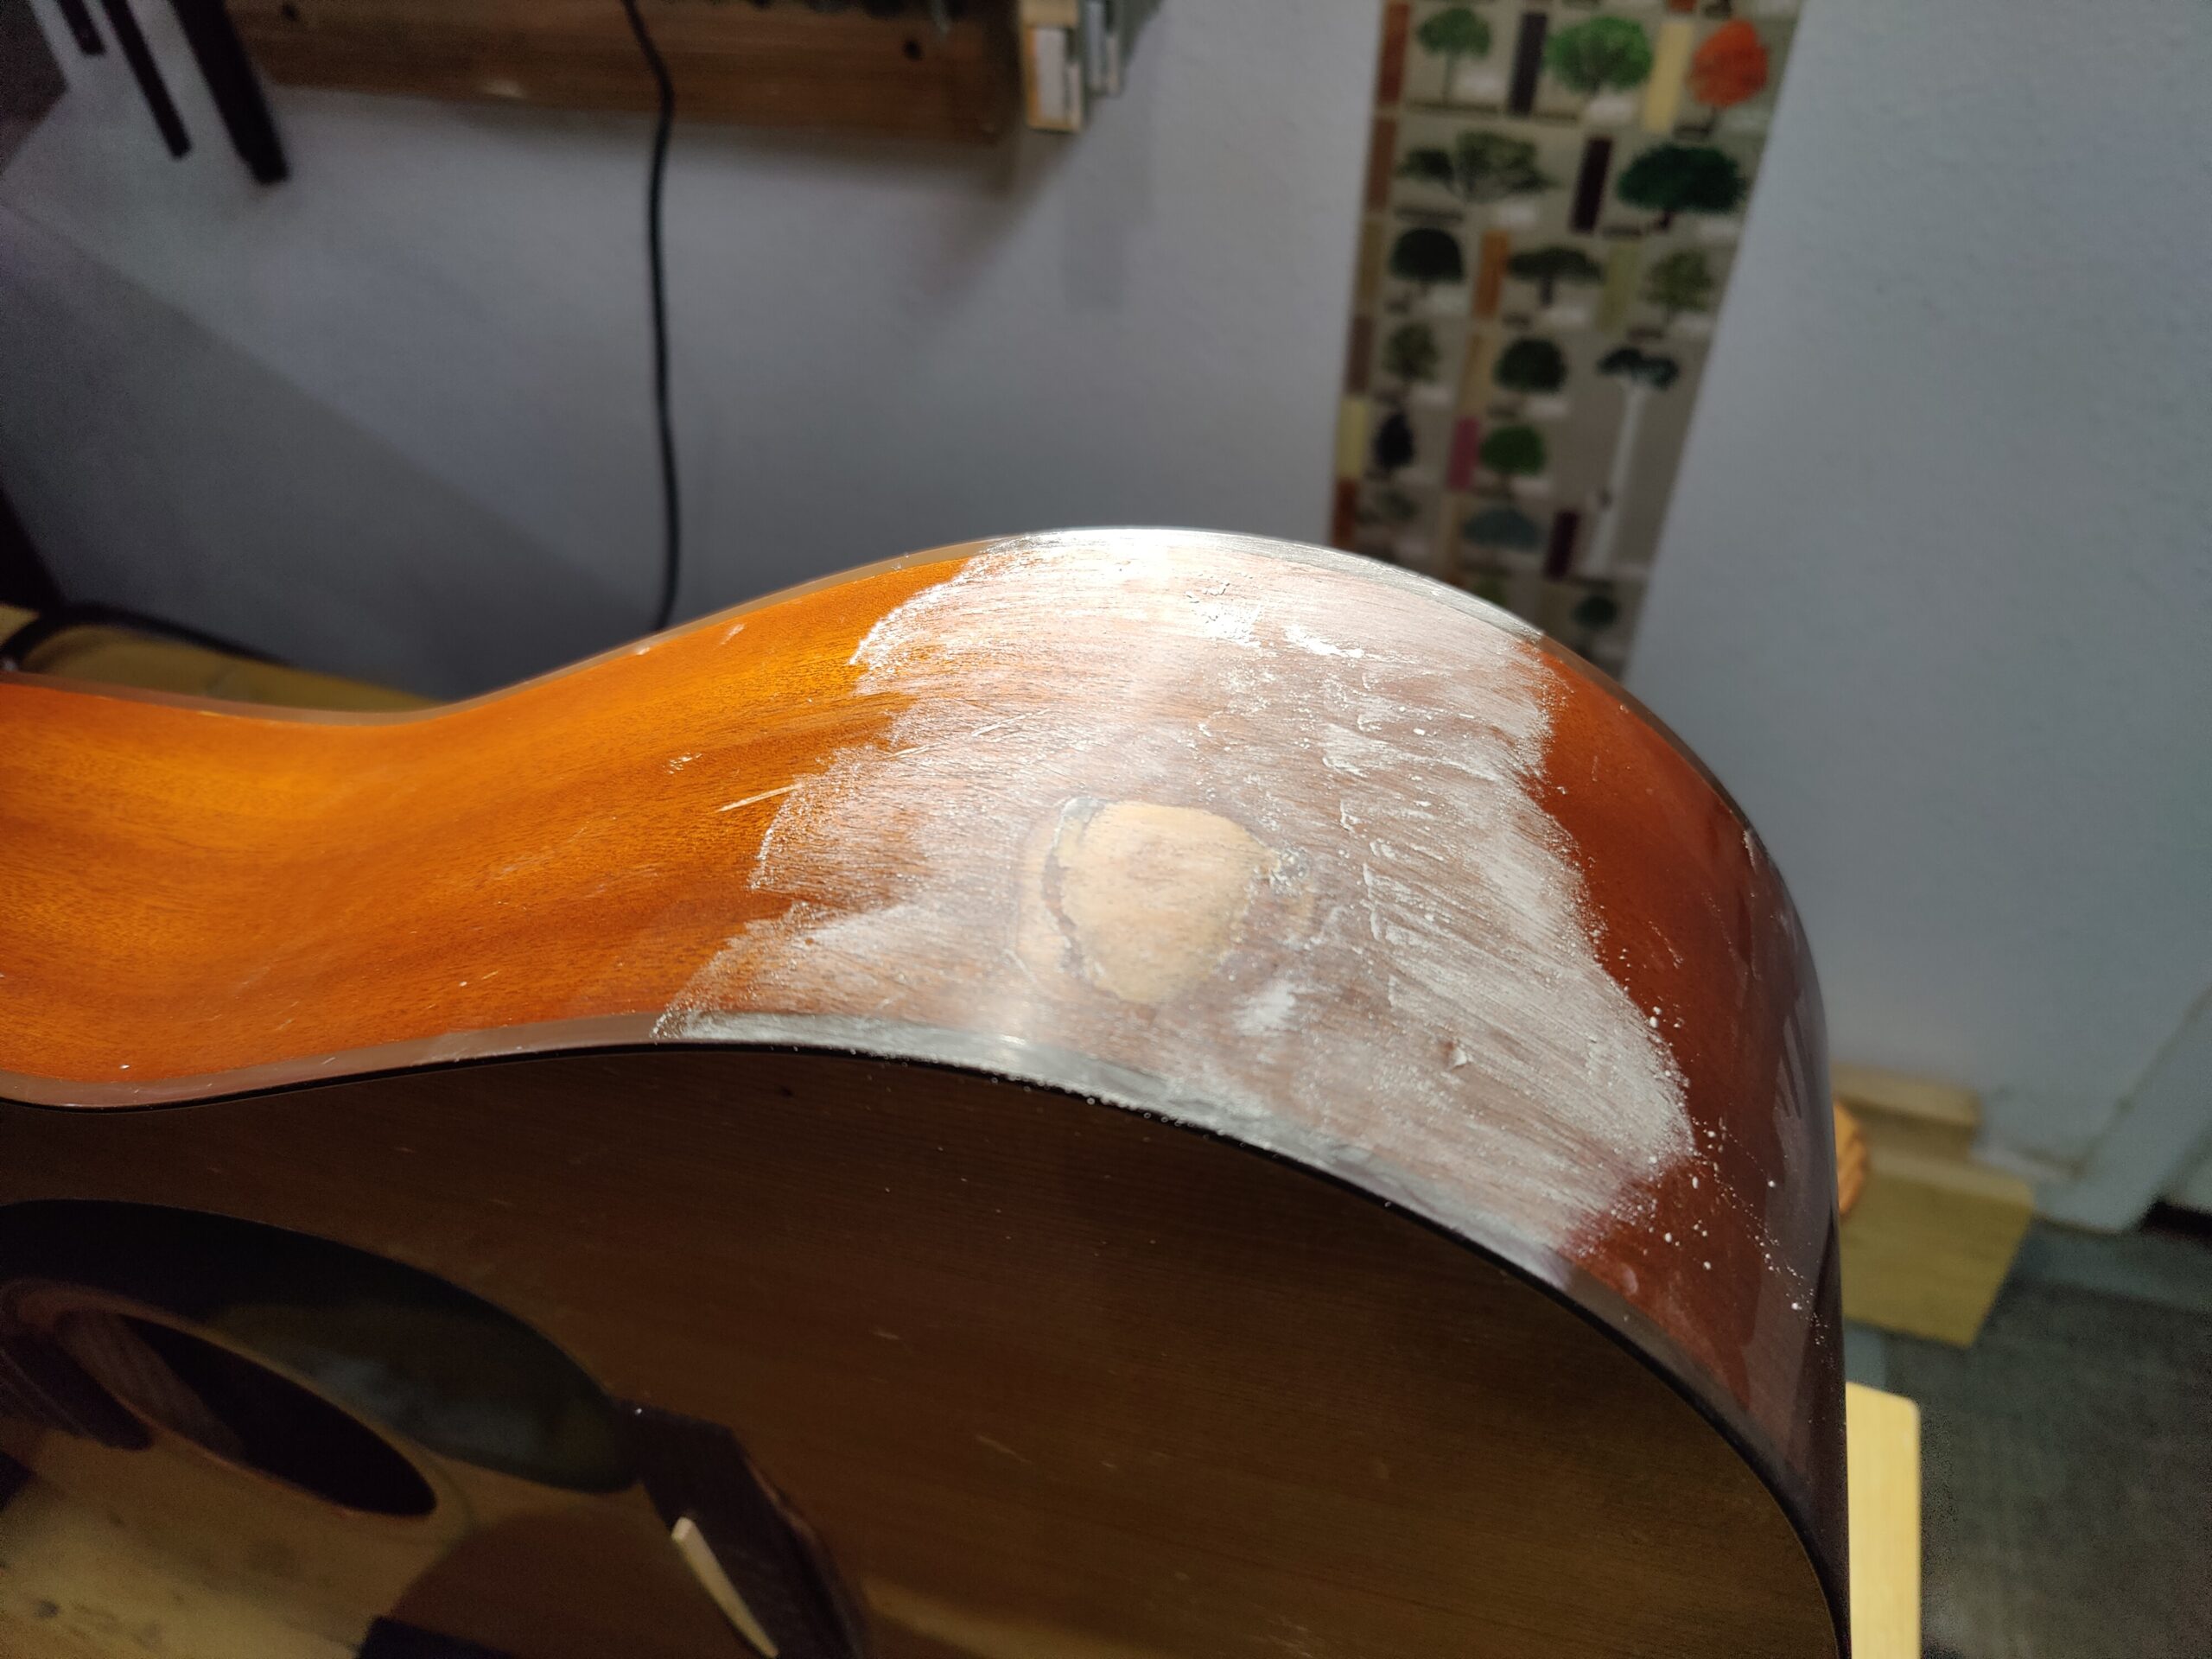 |
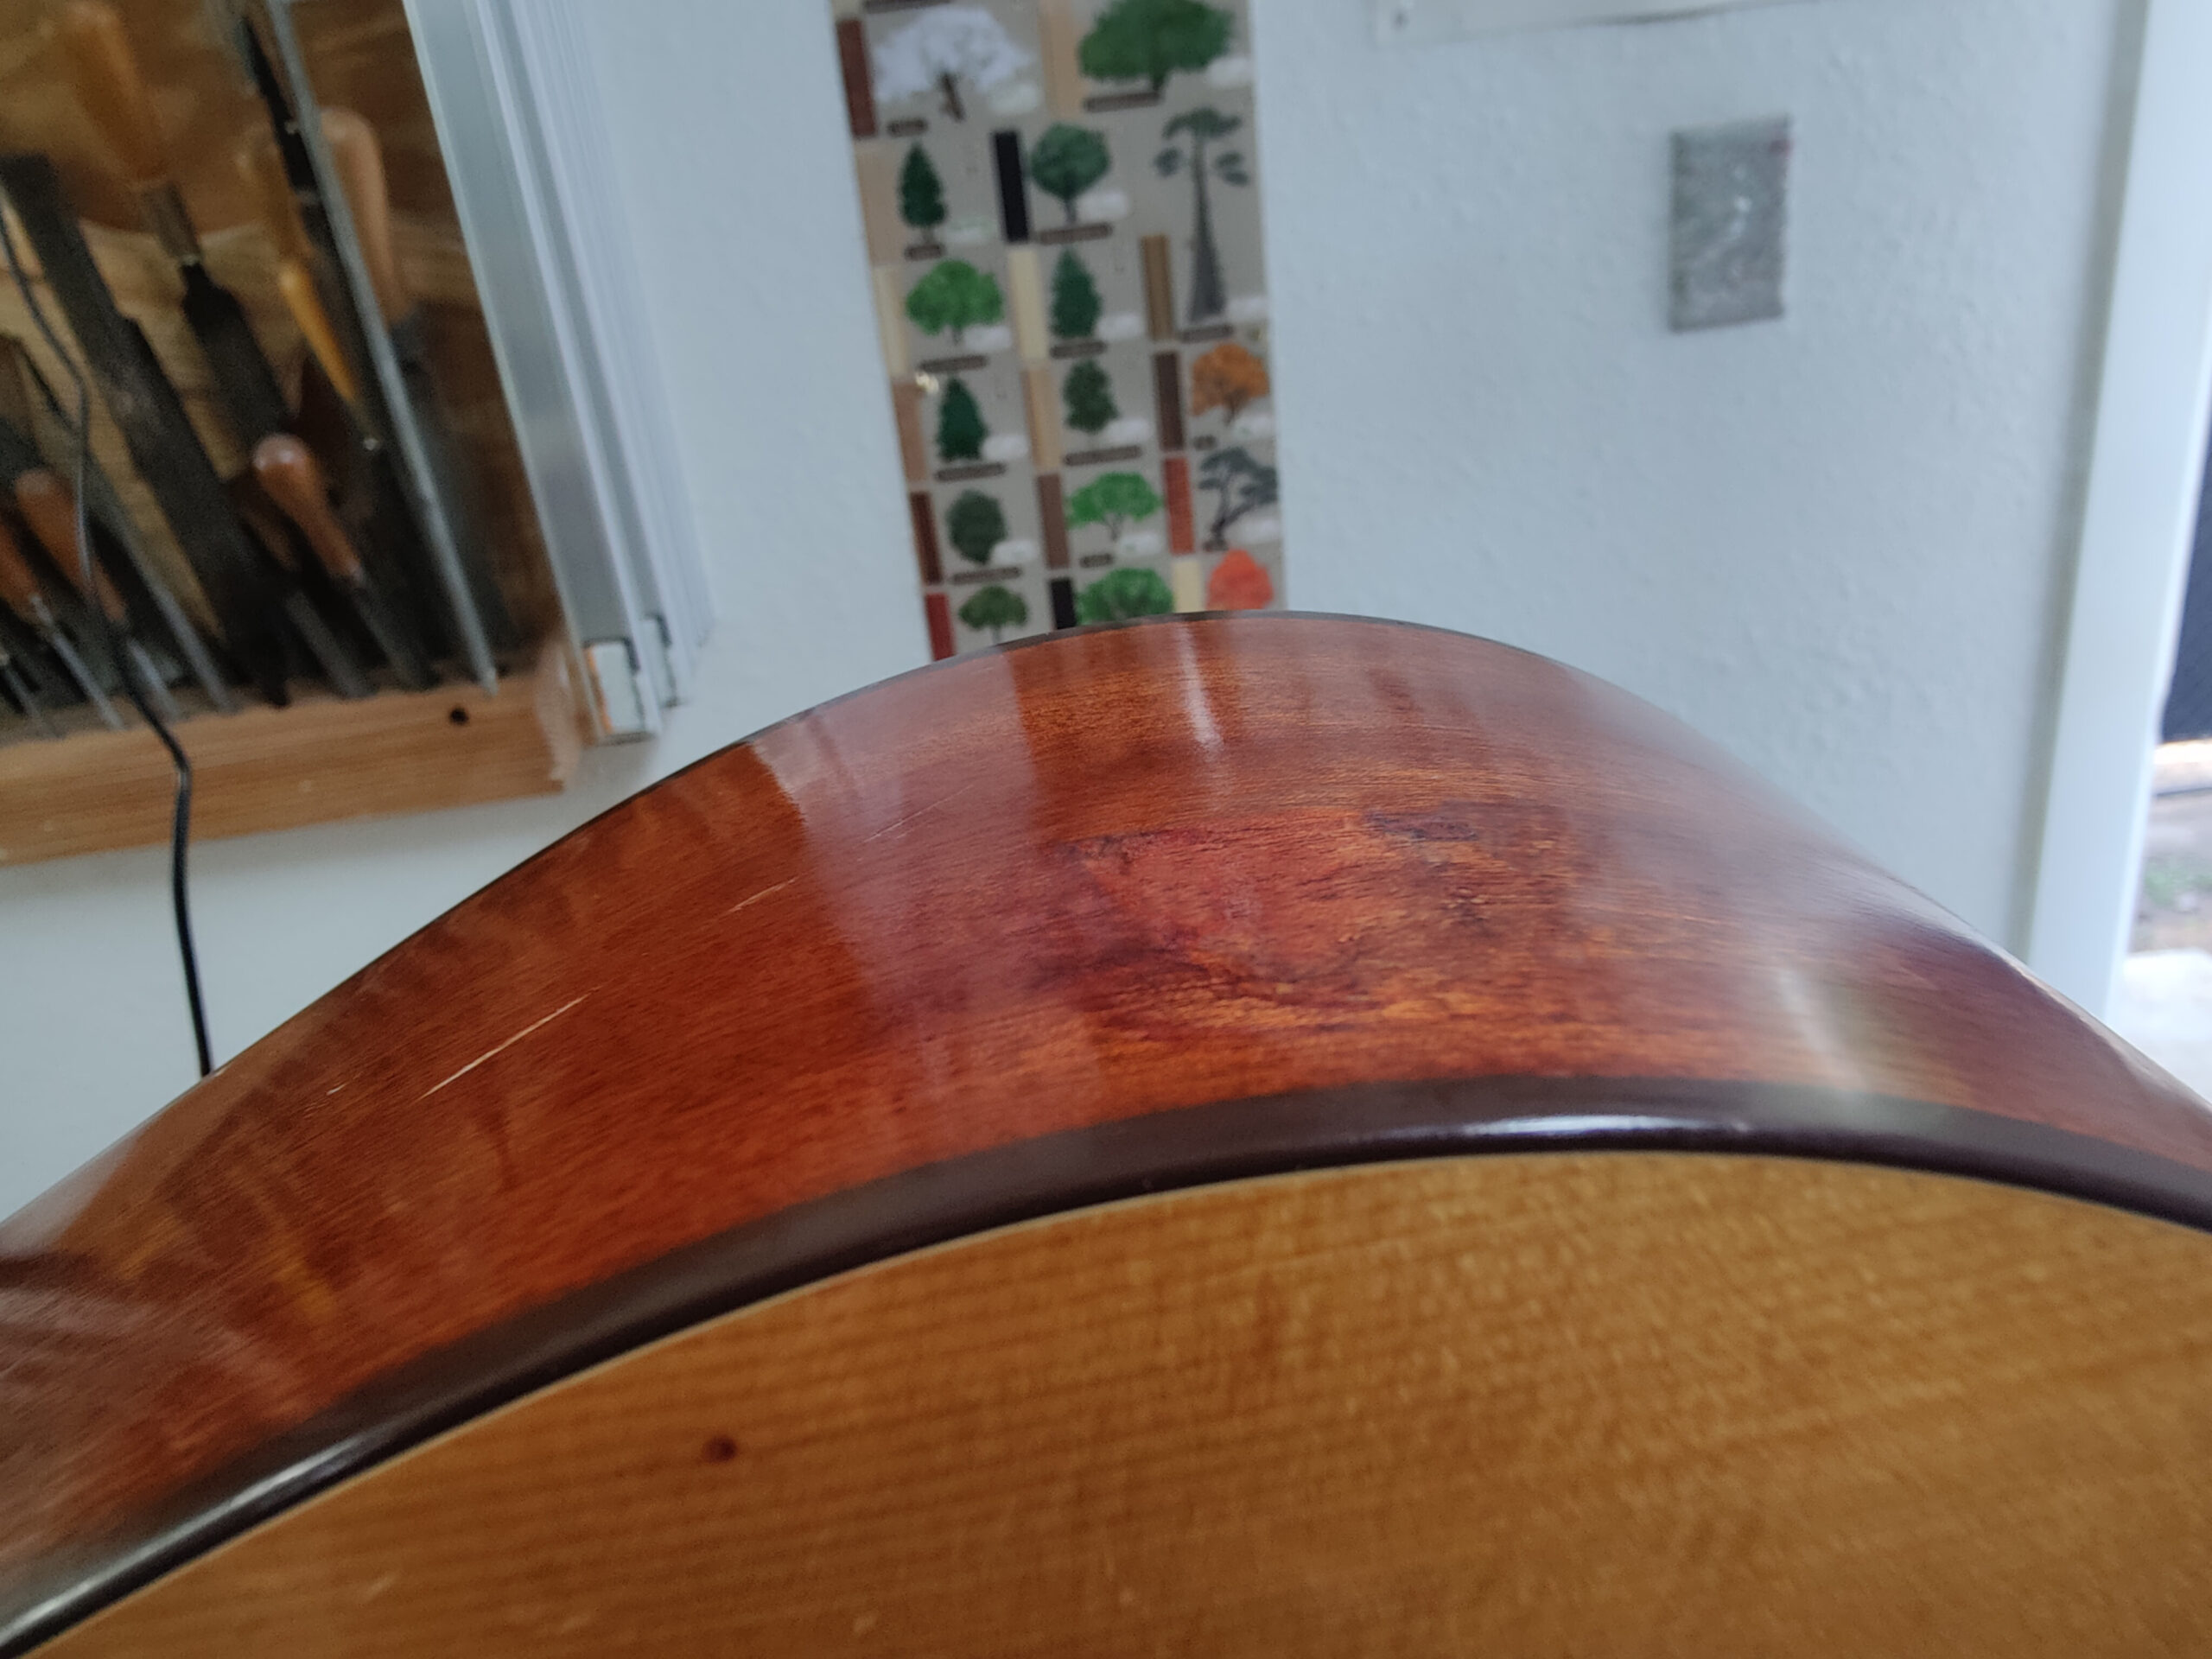
Once things are level, I add drops of a few liquid stains to denatured alcohol and apply that mixture onto the freshly applied veneer to match the tint used by the manufacturer. This takes several tries. There is no formula or chart to aid this process. It’s a matter of choosing an initial formula, applying it, wiping it off, tweaking your formula and trying again and again until you have a match you’re happy with.
 |
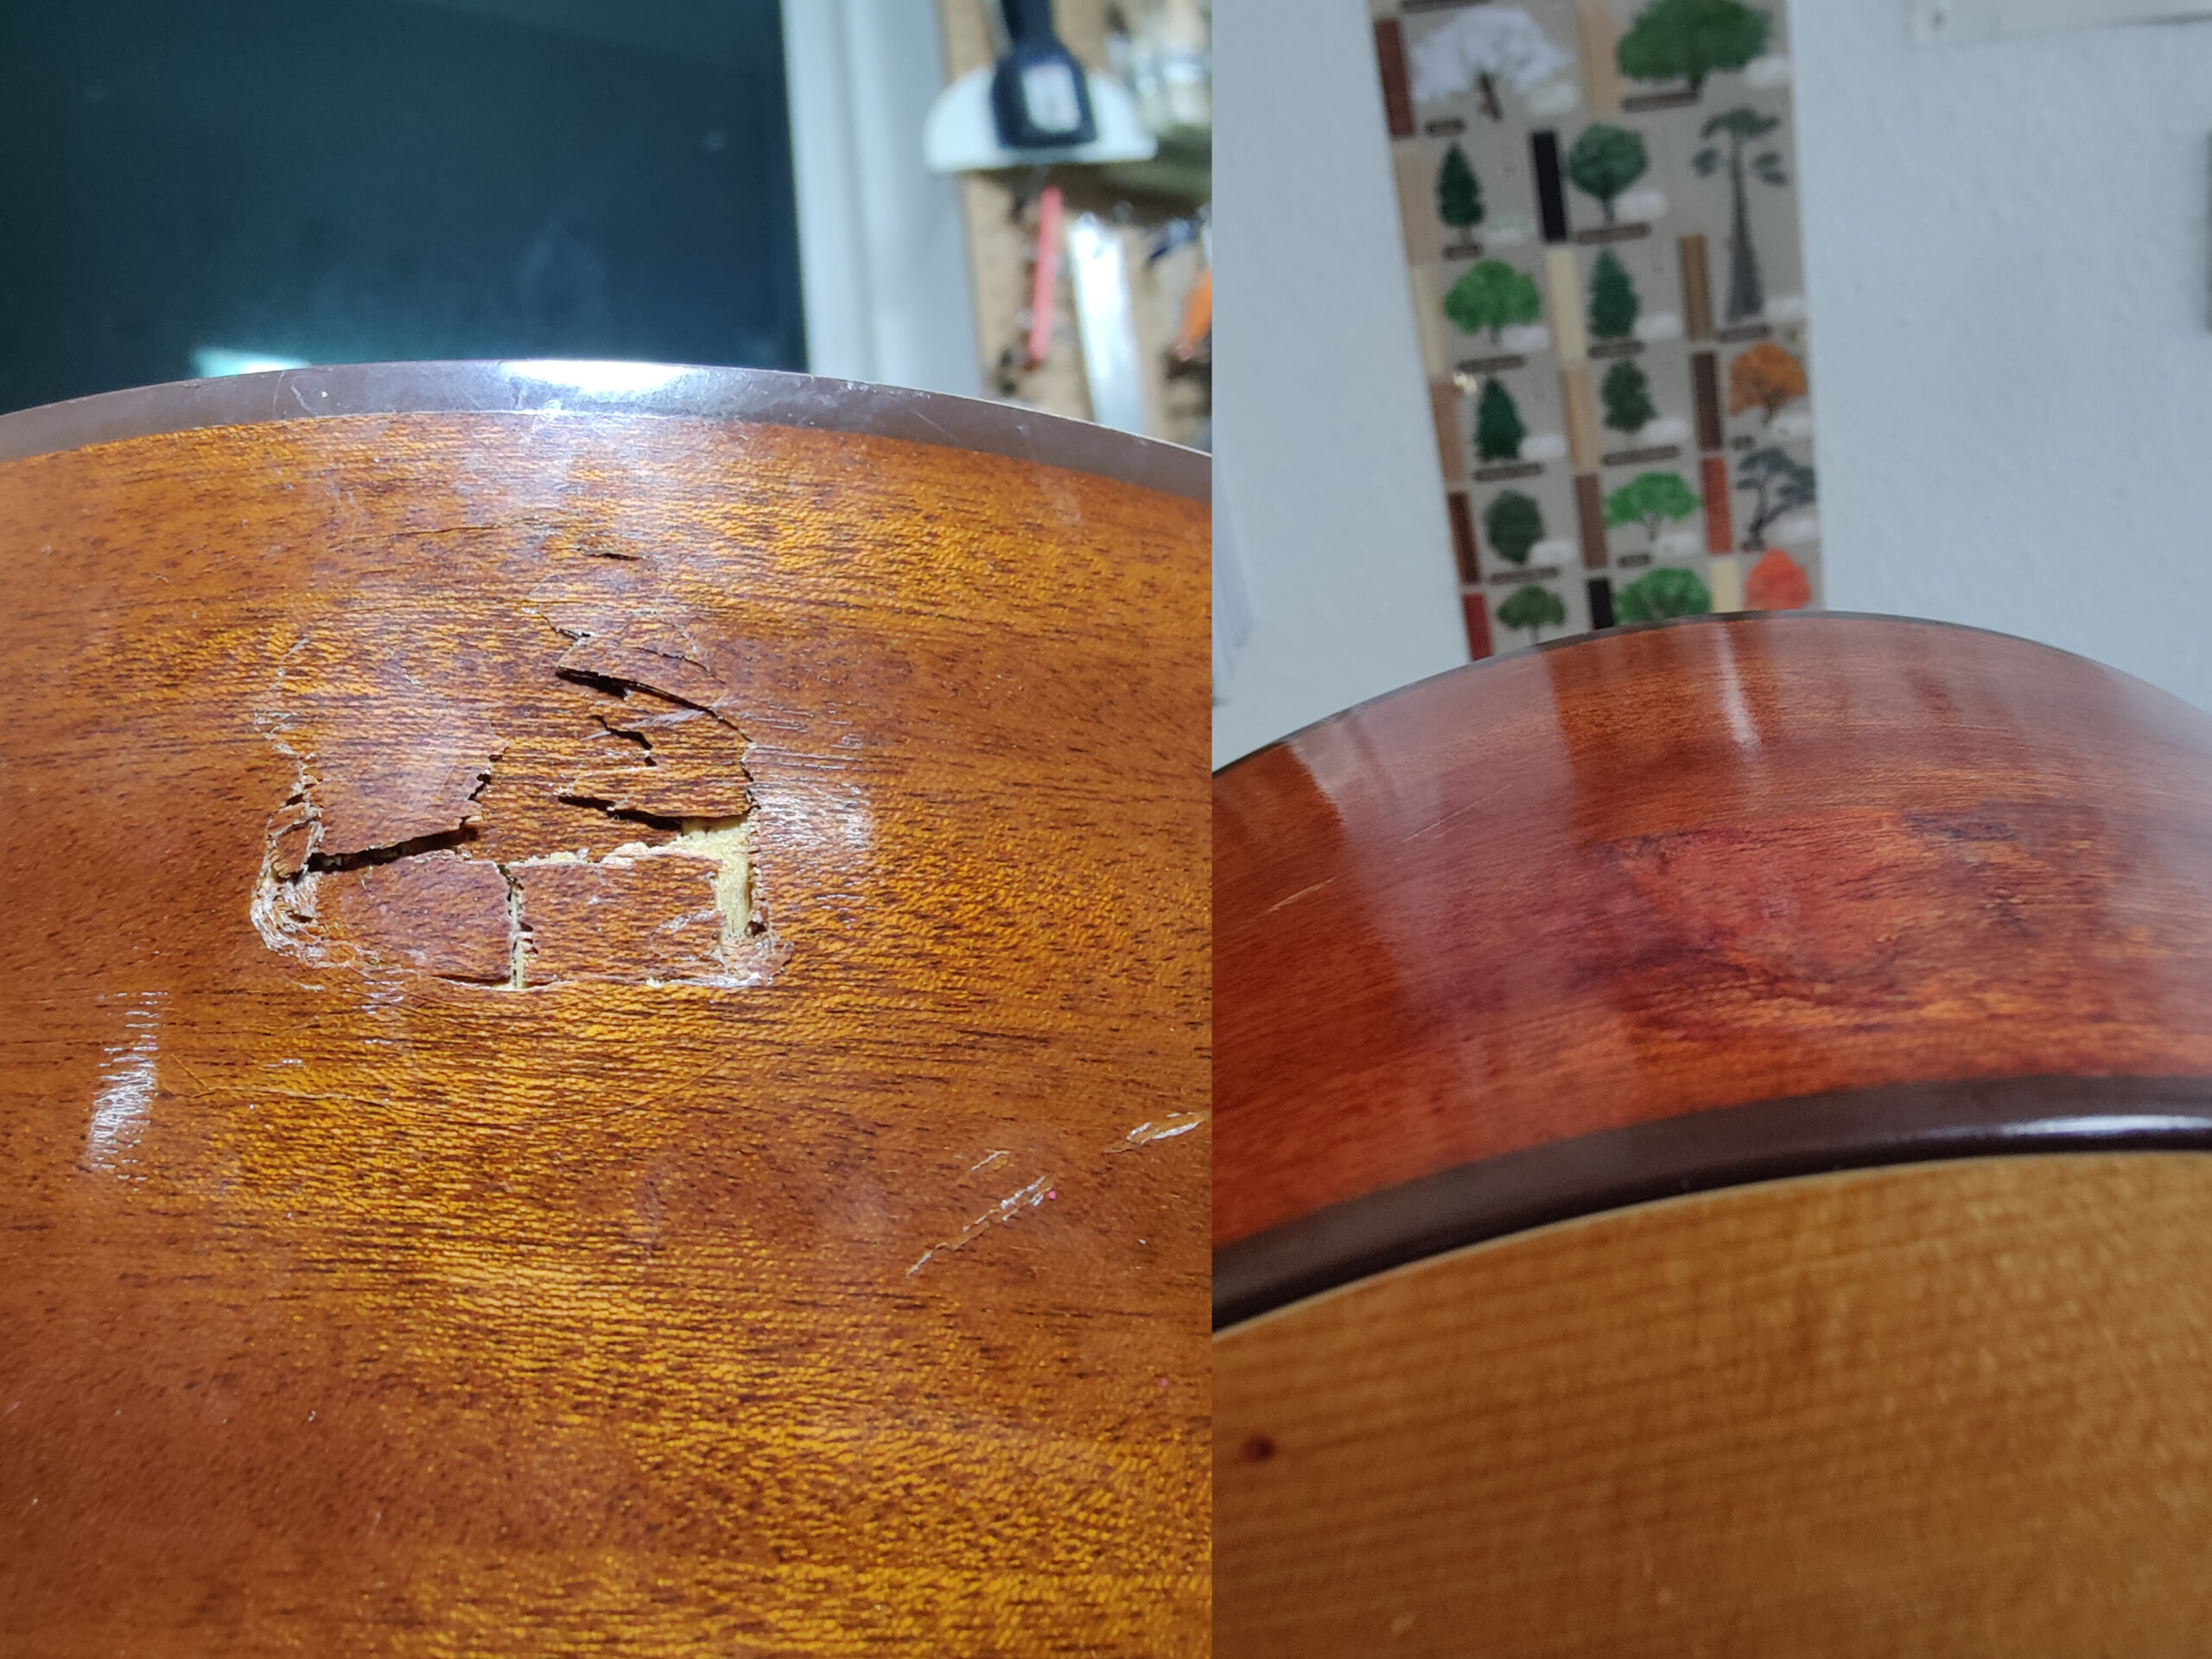 |
The end results blended in nicely and a friendship was salvaged. Do you and your friend have unsettled drama about a borrowed guitar sustaining damage?
Call Andrew with South Austin Guitar Repair. 512-590-1225.